Intro
Let’s imagine that your client owns one or more apartments which she rents and has already listed on Airbnb.com, Booking.com, Expedia.com and so on and so forth. At this point, what you want to do is roll out a landing page to showcase what’s being offered so she can stand out from the rest of the crowd without breaking the bank. You’re in need of top performance at a discount price. I also happen to assume that you’re a developer yourself, because in order to pull this off, you will need to know how to code. Nevertheless, even if you are not that tech-savvy, you’ll still gain valuable knowledge as to what is possible.
The goals we’ll have in mind are:
- set up a great looking landing page for our client’s apartments
- make it lighting-fast with a great PageSpeed score
- don’t make it look cheap
- have our client retain the ability to change it up a bit when needed (text/images)
- sprinkle in some localization in the mix
- take care of SEO optimization and how it’s being listed on Google and other search engines
- make sure the hosting’s dirt cheap
In case you are not technical and/or don’t have the necessary budget for third-party developers, I suggest you also check out wix.com or wordpress.org. Those are what are called “site builders”. They’re services that allow people with little to no coding skills to build their own websites and host them. It’s a great fit for many use cases. You get a good enough web presence while investing far less effort than would be required using various alternatives. They offer a choice of hundreds, if not thousands, of templates, along with WYSIWYG editors that make it easy to drag-and-drop content as well as dynamic elements without the usual hassle. It makes it very easy to have something to show your clients. Take a look at how https://www.domain.com/blog/2019/04/11/what-is-a-website-builder defines what a website builder is
A website builder is as it sounds; an apparatus that allows you to craft your very own site. This platform or software is typically engineered to have a user-friendly interface, with plenty of drag and drop functionality and preset styles and website templates to choose from. They allow you to build a website from scratch by using prebuilt structures.
Being wix.com partners ourselves we provide customizations to our clients (https://kodius.com/services/quick-company-pages). ==What I don’t like about site builders in general is that they look and behave a bit dated and the speed leaves a lot to be desired.== They still work fine and get the job done, however it looks and feels cheap-o and a tad too generic.
https://kresimir3.wixsite.com/website
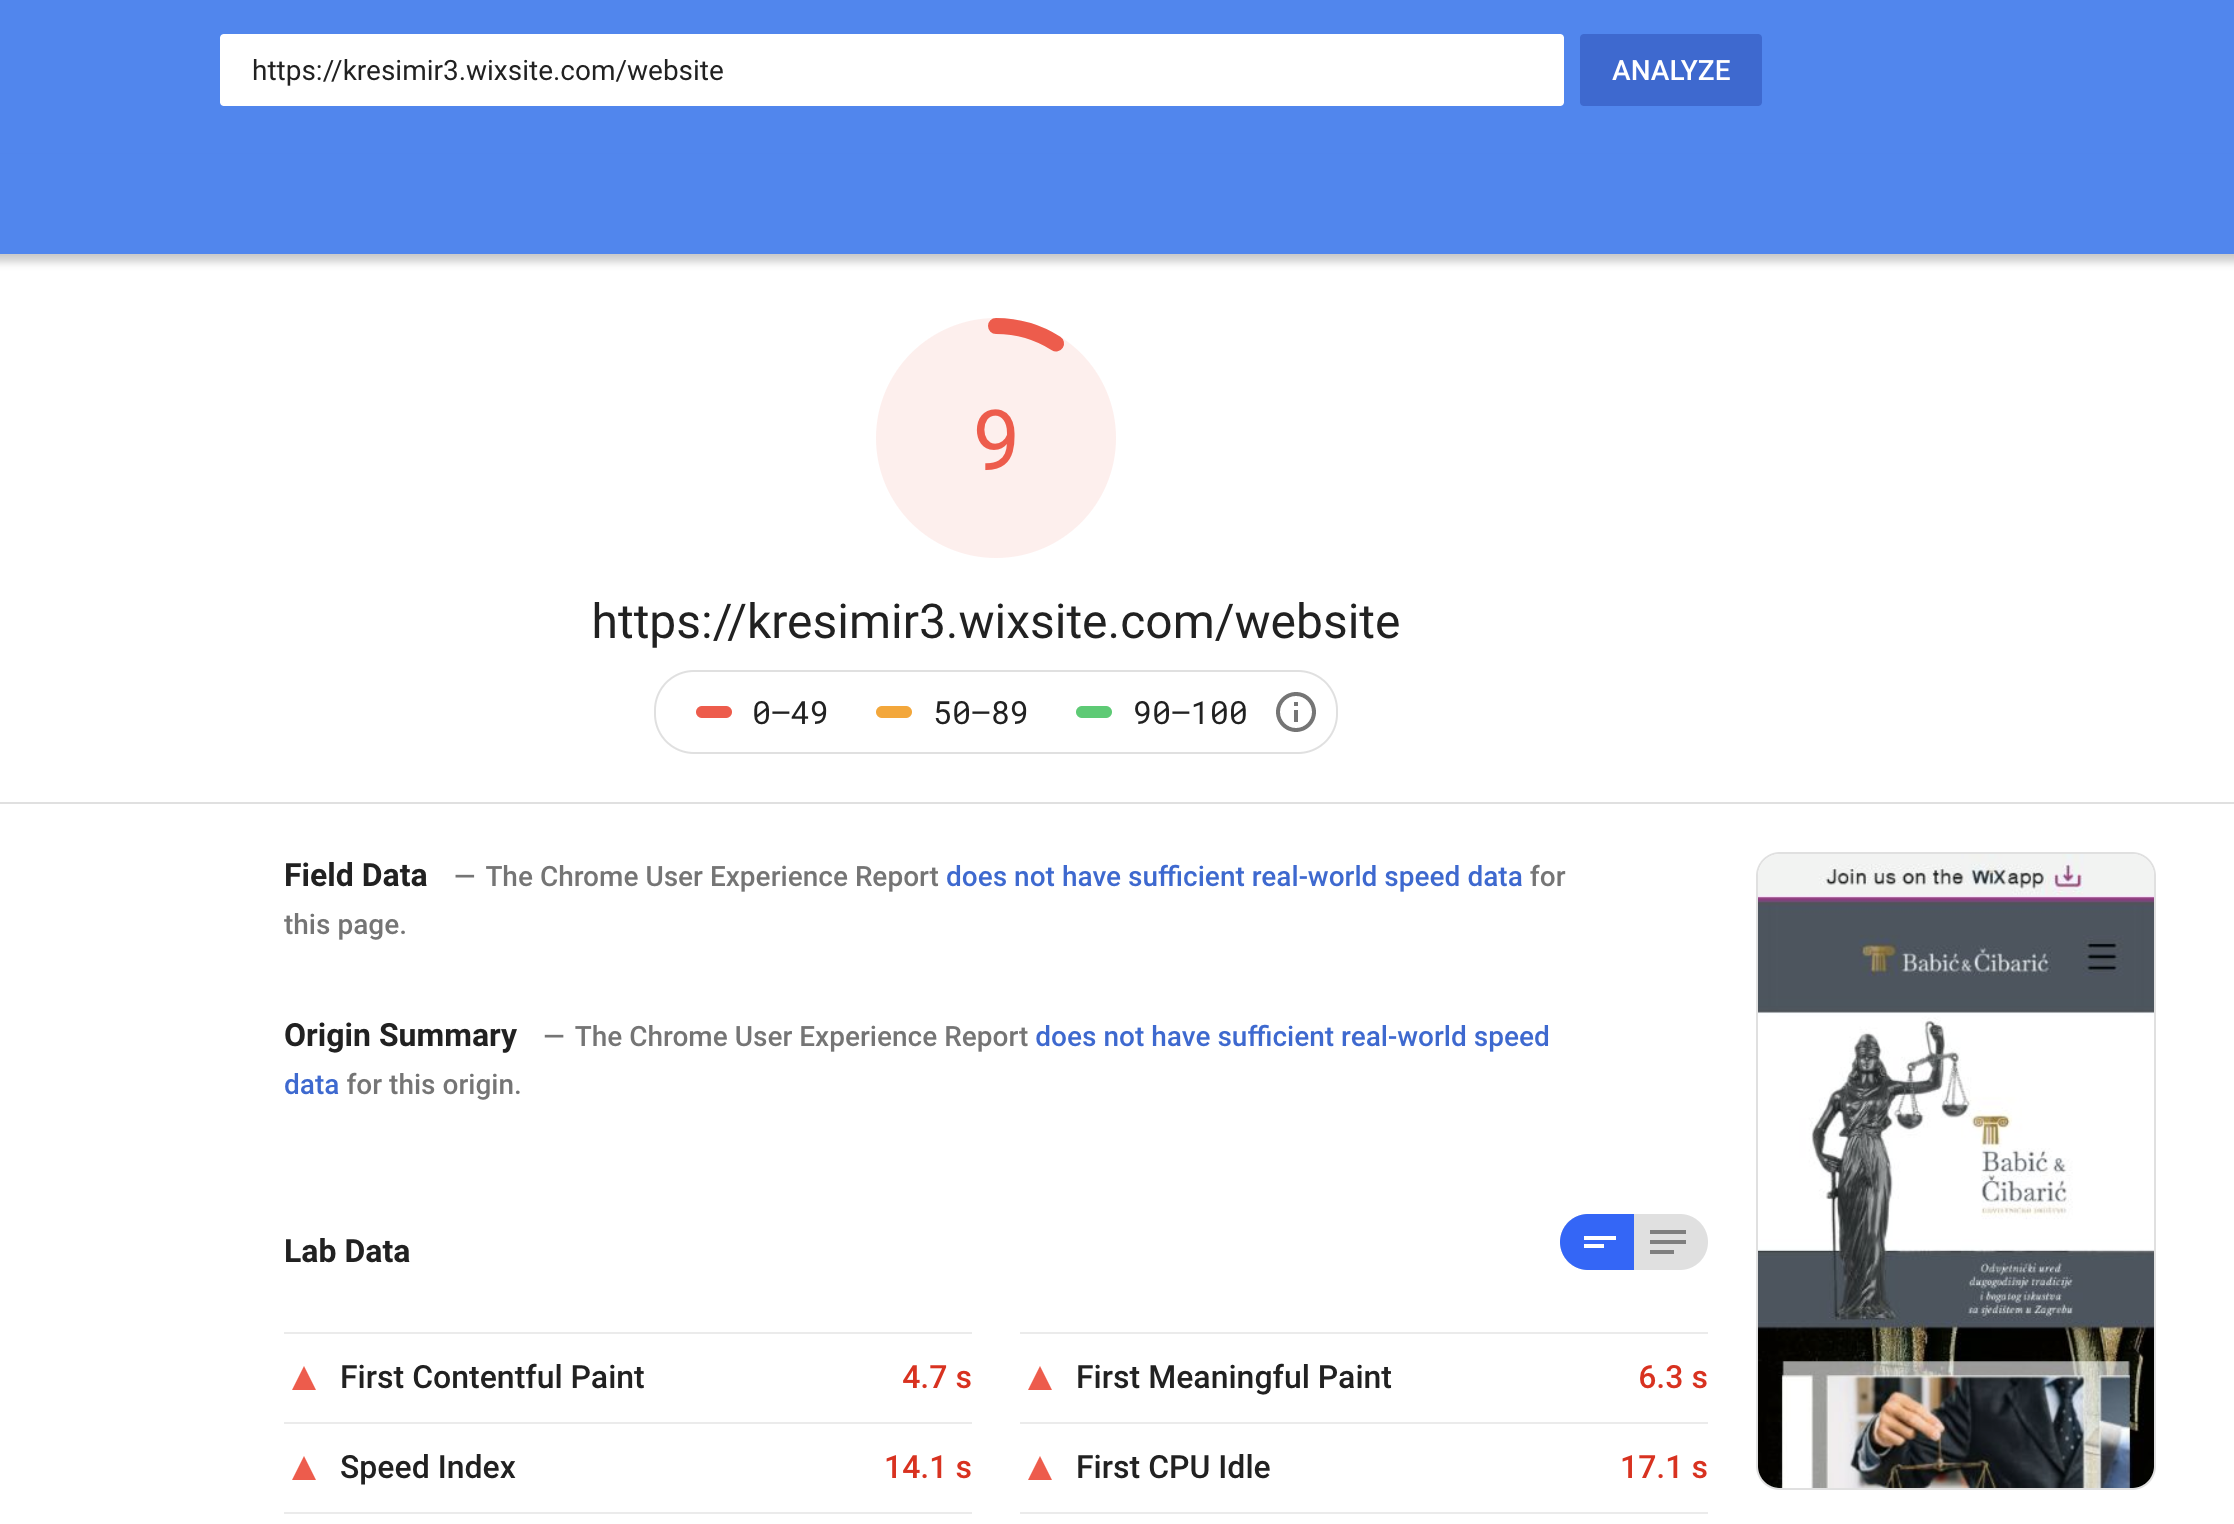
Now let’s take a look at our own test site we built using Jamstack and hosted on Amazon Amplify
https://master.dcgdh1evstevk.amplifyapp.com
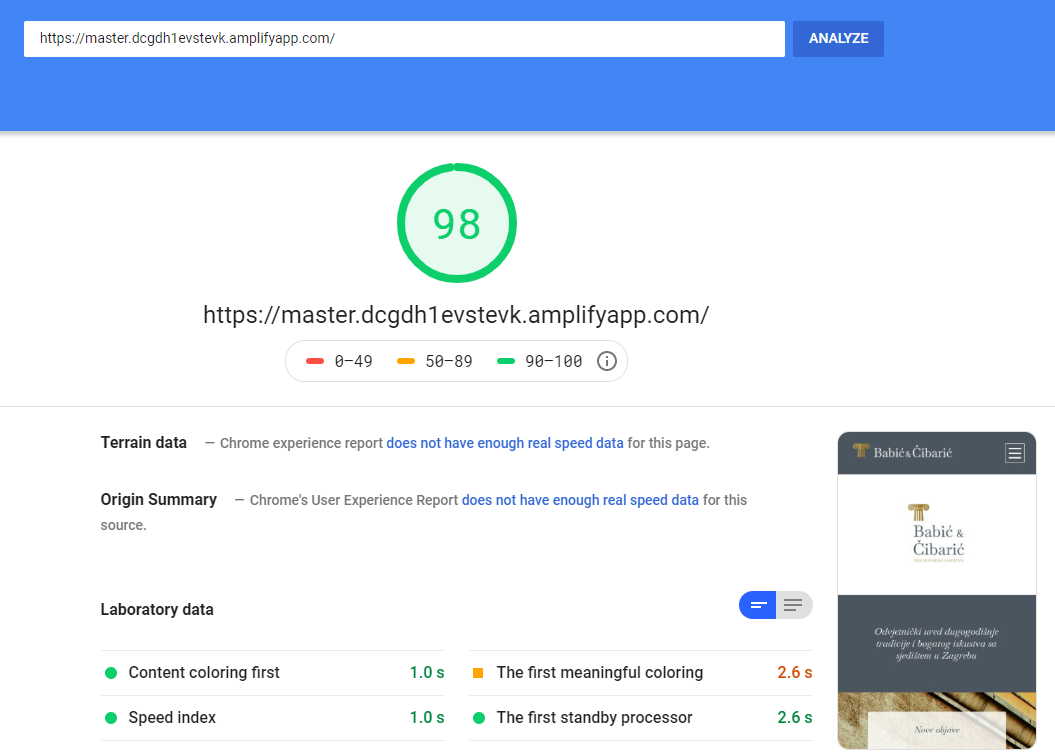
A score such as this is kind of hard to achieve without using Jamstack. They’ve put in a lot of effort and combined a bunch of excellent ideas and concepts to make all this possible. If you’re wondering why I’m making such a big fuss about page speed, it’s because page speed is such an important variable in determining your site’s position and relevance on Google (and other search engines). Rule of thumb: the faster, the better. :)
Overview
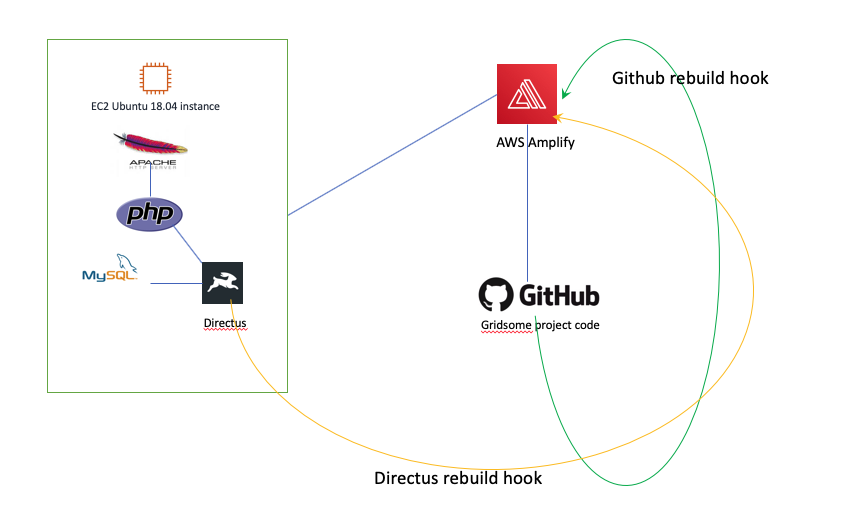
Our plan is to build a custom landing page in Gridsome, style it up a notch using Tailwind.css, and handle the dynamic parts with Vue.js. For content management, we’ll be making use of Directus. This also includes the localization of content. We’ll be hosting it on Amazon Amplify, which will also provide us with a free SSL certificate and handle all of our deployment needs (read: we won’t be messing with it). This means whenever we change the content or the look and feel, we’ll have Amplify reflect the changes without us having to deal with it. We’ll host our code on Github which is where Amplify will pull in the code from.
The general idea is to have this done for your client beforehand so they have an environment where all they require is a user account inside of our CMS of choice (in this case, it’ll be Directus) and all they ever (hopefully) have to touch is the content inside of it. The hosting is dirt cheap. You’ll be paying only for what’s being used which means that - depending on how much traffic you expect - you might be looking at even $10 a month for a page that looks and works as good as a professionally built web page using the latest and greatest tech.
Technologies used
We’ll be using the following stack:
- Jamstack
- Gridsome
- Directus 7
- Amazon Amplify
- Tailwind.css
- Vue.js
- Github
- GraphQL
What is Jamstack?

Jamstack is a trendy new way of building websites and apps that delivers greater performance, better security, and lower scaling costs. It combines pre-rendered sites with JavaScript (in the case of Gridsome, the front-end will be Vue.js). What this allows us to do is host our project on a CDN (Content Delivery Network) so we end up not having to pay for a web server. The CDN gives us superb speed and scaling capabilities for our site. Here’s what the good folks at Jamstack have to say about it:
Fast and secure sites and apps delivered by pre-rendering files and serving them directly from a CDN, removing the requirement to manage or run web servers.
What is Gridsome?

Gridsome is what Gatsby is for React. Although that might not be telling you too much. It’s a Jamstack implementation for Vue.js. Still not sure what this means? Doesn’t matter.
Gridsome builds ultra performance right into each and every page by using the so-called PRPL pattern. You get code splitting (look it up if you don’t know what this means!), asset optimization, progressive images, and on top of that link prefetching right out of the box. Gridsome sites get almost perfect page speed scores by default. Yes, you’ve heard that right. It might sound too good to be true.
What’s PRPL? PRPL is a type of web site architecture developed by Google and meant for building websites and apps that work exceptionally well on smartphones and other devices that have unreliable network connections.
https://developers.google.com/web/fundamentals/performance/prpl-pattern/
PRPL stands for:
- Pushing critical resources for initial URL routing by using and HTTP/2.
- Rendering the initial route
- Pre-caching remaining routes
- Lazy-loading and creating the remaining routes on-demand
A Vue.js framework for Jamstack. Gridsome is a free and open source Vue.js-powered framework for building websites & apps that are fast by default 🚀
What is Directus?

Directus is a headless content management system. What does this mean? What it means is that you can manage content with it without it imposing anything on you. It’s just there and doesn’t stand in the way of how you implement the rest of your web stack. You can use whatever kind of front-end technology you want. Generally, this is what any headless CMS does for you, but we picked Directus because it is completely free and because you can host it yourself for all of your clients. It’s got multi-tenancy, meaning you can have multiple databases or projects at the same time, along with a very granular role based system that allows you to store content securely for as many clients as you like in one place. It also has excellent multi-language support, and to make things even better - Gridsome already has an existing plugin for fetching data from Directus CMS via a GraphQL API, making things quite a lot easier for us. And we don’t like to complicate! Here is what they tell us about it:
Directus is an open-source tool that wraps custom SQL databases with a dynamic API, and provides an intuitive admin app for managing its content. Self-host for free, or use our on-demand Cloud service to manage all your omni-channel digital experiences.
What is AWS Amplify
https://aws.amazon.com/amplify/
AWS Amplify is a development platform for building secure, scalable mobile and web applications. It makes it easy for you to authenticate users, securely store data and user metadata, authorize selective access to data, throw machine learning into the spin, analyze various application metrics, and execute server-side code. Amplify also covers the whole mobile application development workflow, all the way from version control, code testing, up to production deployment and scaling your business from thousands of users up to tens of millions. The Amplify libraries and the CLI - which are part of the Amplify Framework - are all open source and offer a pluggable interface that enables you to customize existing plugins as well as create your own.
What is Tailwind

Tailwind is a utility-first CSS framework for rapidly building custom designs. It is a highly customizable, low-level CSS framework that gives you all of the building blocks you need to build bespoke designs without any annoying, opinionated styles you have to fight to override. They really nailed the utility-first approach, and they’ve been gaining a lot of momentum as of late because of it.
Setting up AWS
Let me show you the details of how to setup Gridsome along with Directus to set up the necessary structure for content and localization hosting on AWS Amplify. If you follow along with the steps, you’ll end up with a working version and an SSL-secured site. Because the way you pay for Amplify is on a per use basis, it’ll come out extremely cheap for the demo site that we’ll be creating. Personally, I think Amplify might be a bit of an overkill as Jamstack can be hosted on S3 or a CDN, but in Amplify’s favor, it also offers atomic backend & fronted deployments as well as SSL and routing for free, so I felt drawn to it. We will not be using a server-less backend, although Amplify makes that an option, too.
I’ve installed Directus 7 on my own hosting (using Ubuntu 18.04) but you are free to use hosted Directus solutions - those start at $4 a month. I’ll try and show you the steps I went through to get it working, as the documentation isn’t that great. We’ll need Amazon EC2 to install Directus, along with a little bit of configuration (security rules and installation). Directus uses the LAMP stack.
I did give the Bitnami LAMP image a whirl, but the thing that I didn’t like about that approach is you end up with a setup customized to someone else’s liking, and then when I needed to do some configuration changes on top of it (e.g. for Apache) I felt lost and as if I was in the middle of nowhere.
I’m also an Nginx guy myself, with little to no experience with PHP meaning I was facing quite a bit of frustration with Bitnami out of the box solution. Just in case someone does prefer the Bitnami approach, here’s the image I’ve been talking about: https://aws.amazon.com/marketplace/pp/B072JNJZ5C?qid=1583828719219&sr=0-1&ref_=srh_res_product_title. It’s got LAMP installed and it’s free to use (you’ll have to pay for the costs of maintaining the EC2 instance, obviously).
Ubuntu 18.04 EC2
We will be installing Directus 7 on top of Ubuntu 18.04 hosted on an AWS EC2, starting from scratch.
- Log into the AWS console
- Head over to the EC2 overview console https://eu-west-1.console.aws.amazon.com/ec2/v2/home?region=eu-west-1#Home:
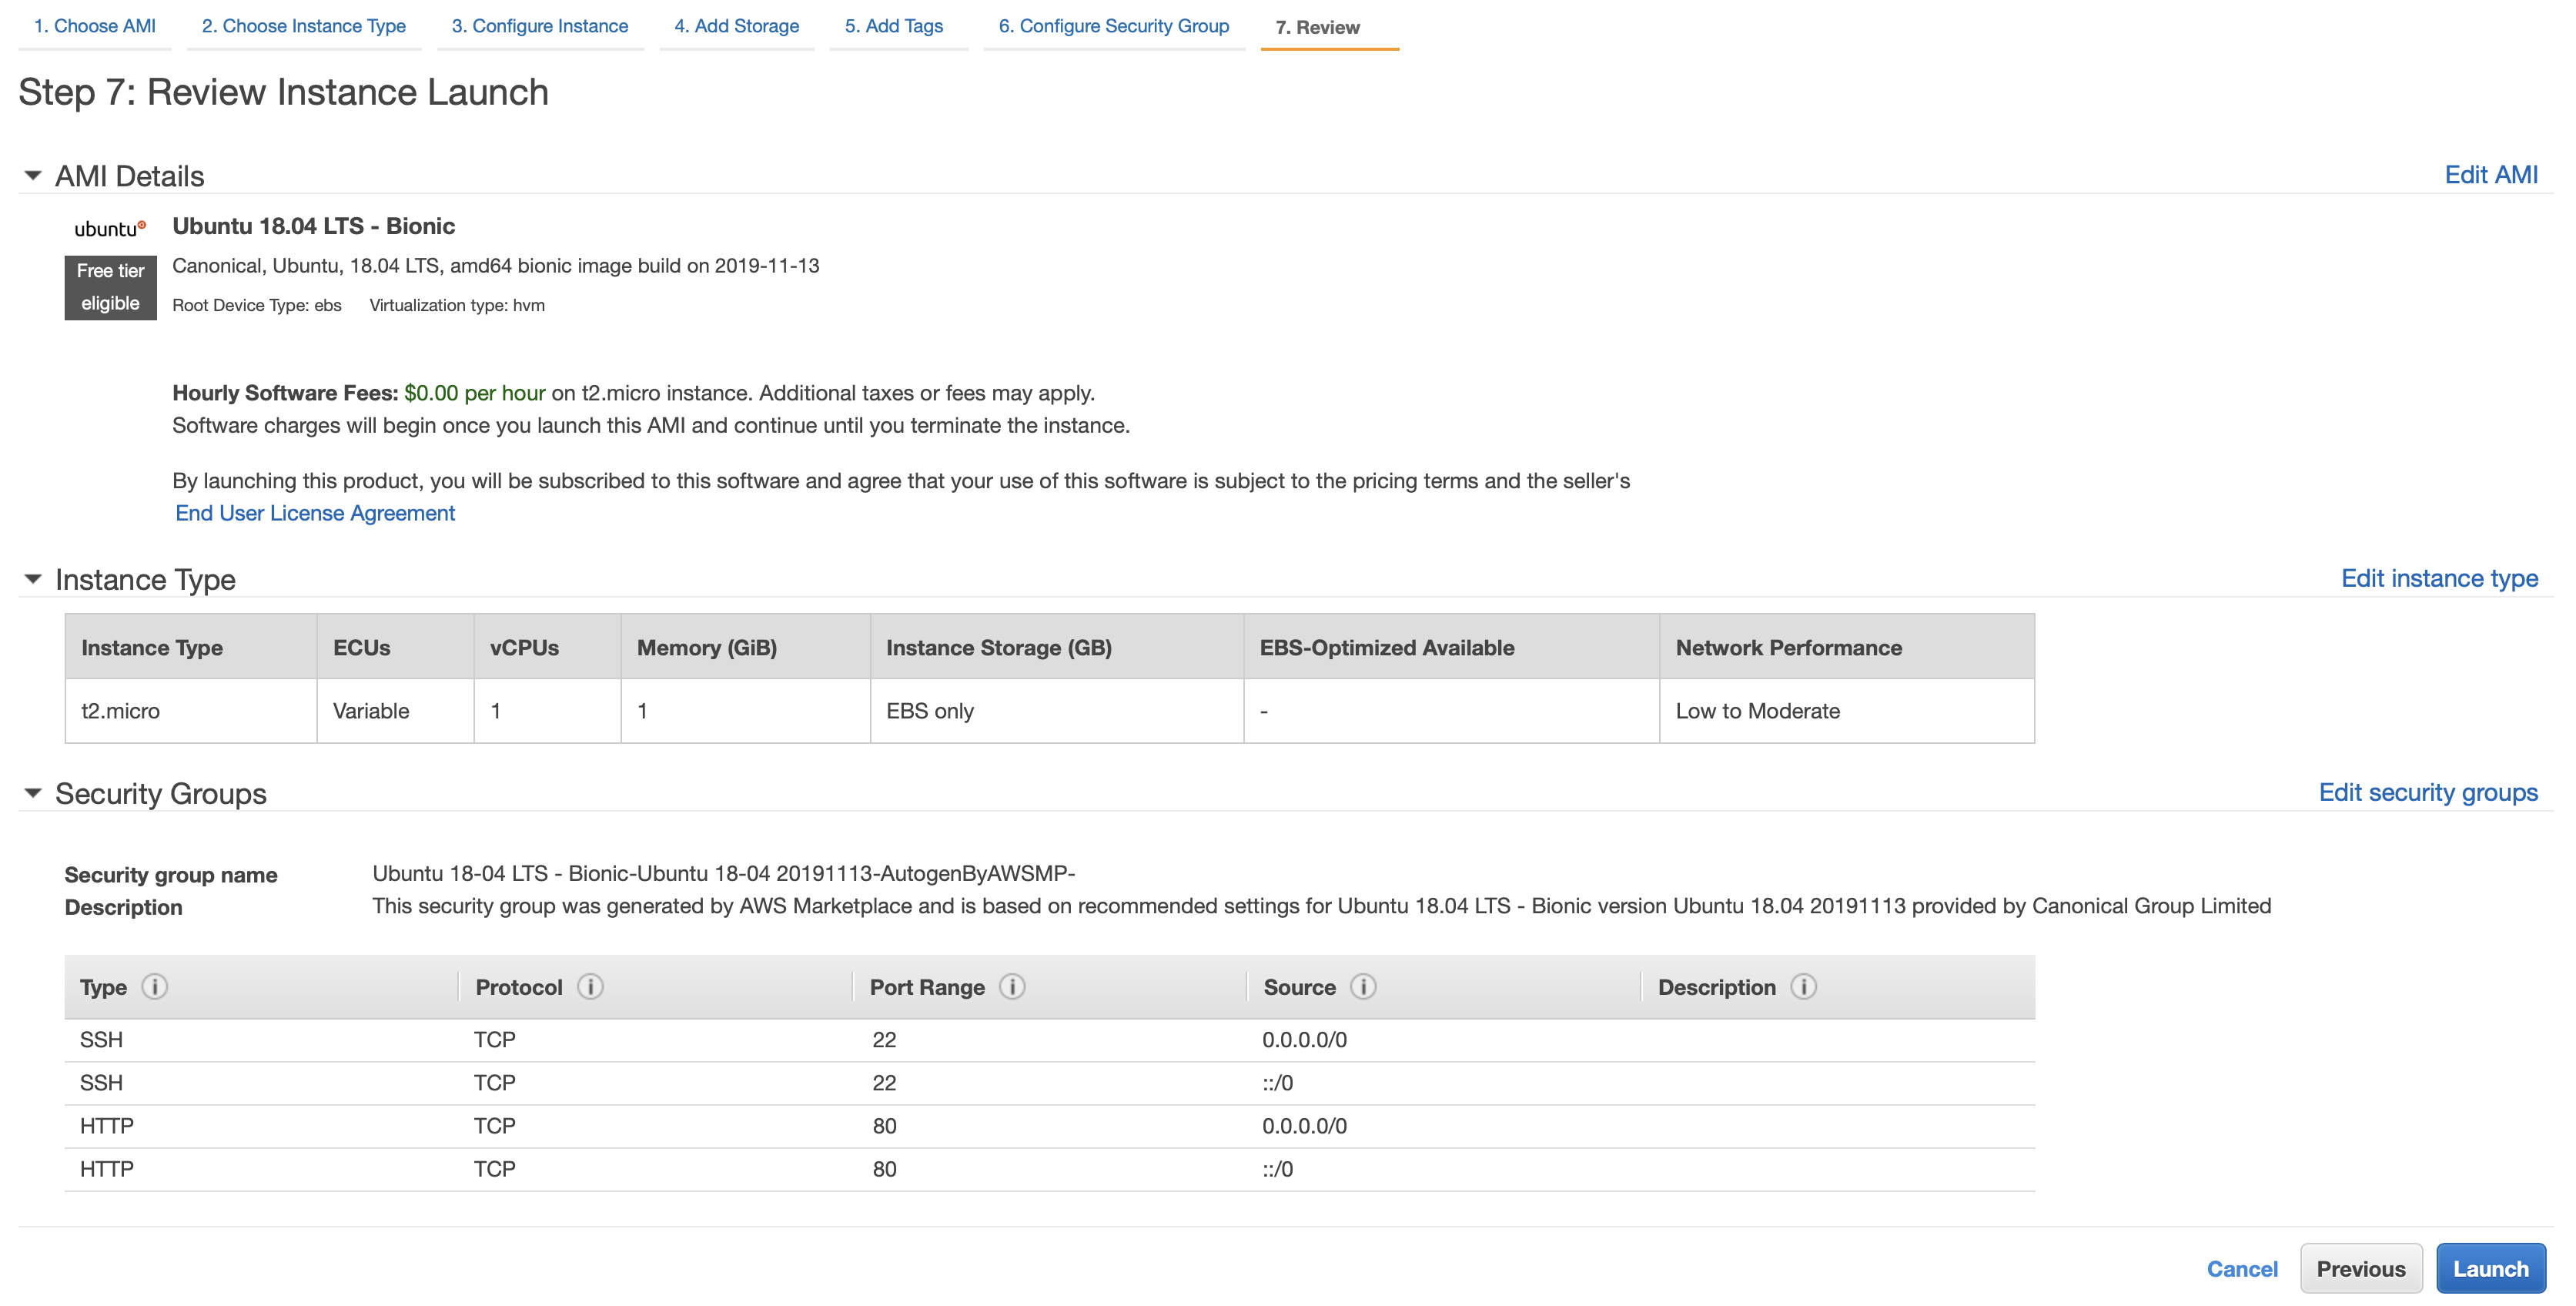
- Hit the Launch Instance button
- Filter down to Ubuntu 18.04 LTS - Bionic and then hit NEXT
- Pick t2.micro
- Click on Next: Configure Instance Details - leave all the defaults
- Hit Next: Add Storage - change the value to 20GB
- For Security Groups select Create a New Security Group

- Click Review and Launch, then click Launch
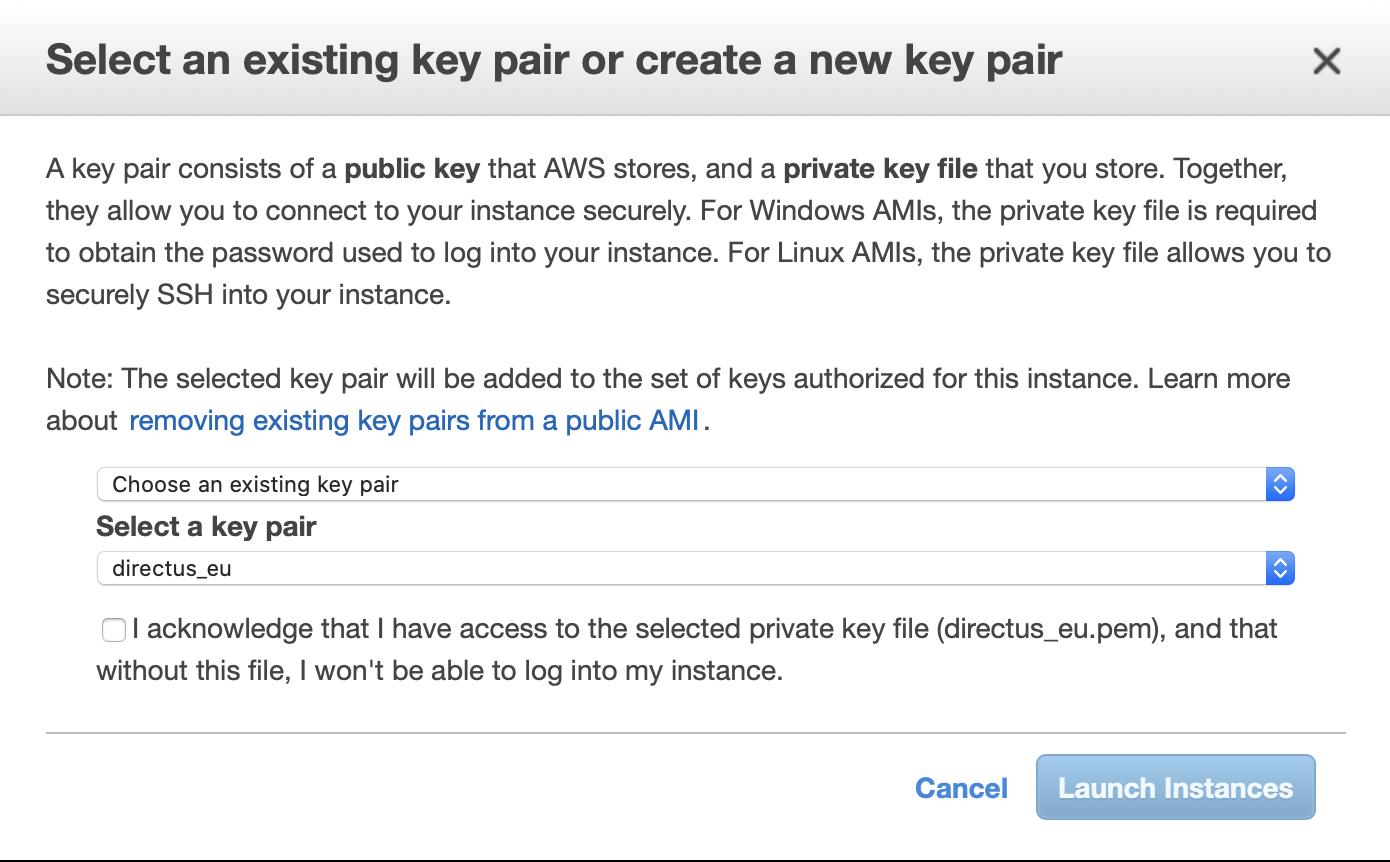
Make sure you’ve got an existing key pair or if not, create a new key pair to be used for accessing the server via SSH. You need to have the private part of the key in your ~/.ssh folder along with proper access rights
chmod 400 ~/.ssh/directus_eu.pemClick to go to your new instance and wait until it boots up.

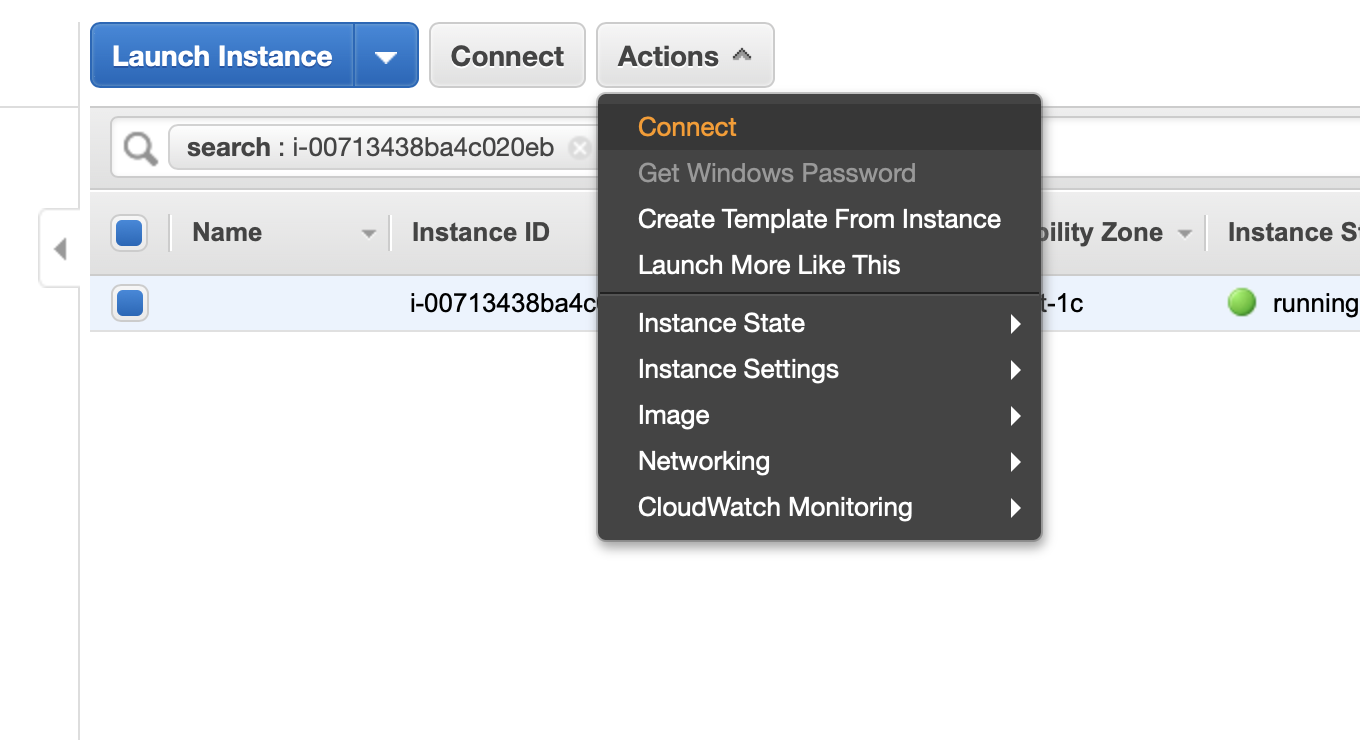
Hit Actions/Connect to see how you can access your instance.
Copy the example. For me it’s the following
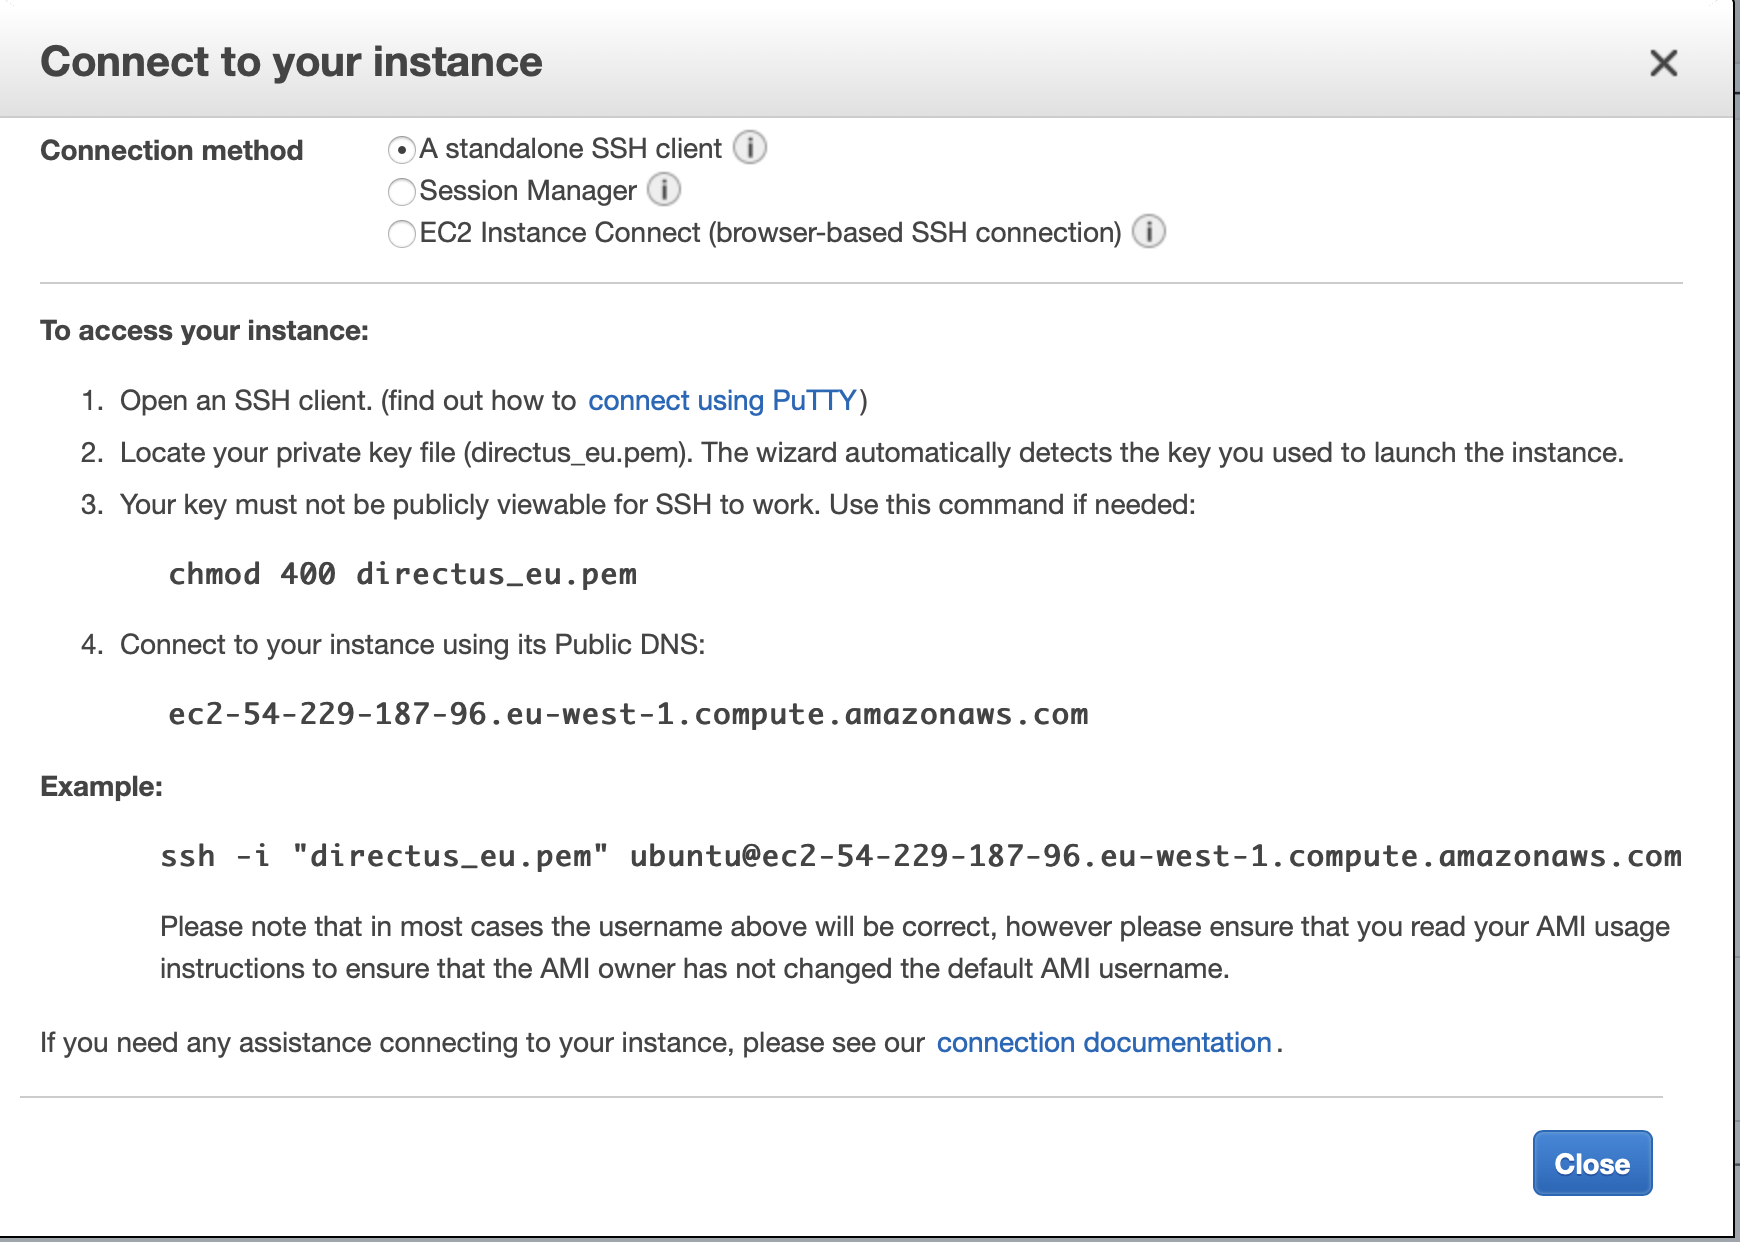
Go ahead and log into your instance. For the usual production scenario we would also be adding an elastic IP so that your instance has a DNS server pointing at a readable and human-friendly domain (e.g. cms.kodius.com as is the case for us), but this is outside of the scope of this tutorial.
Apache2
sudo apt update
sudo apt install apache2
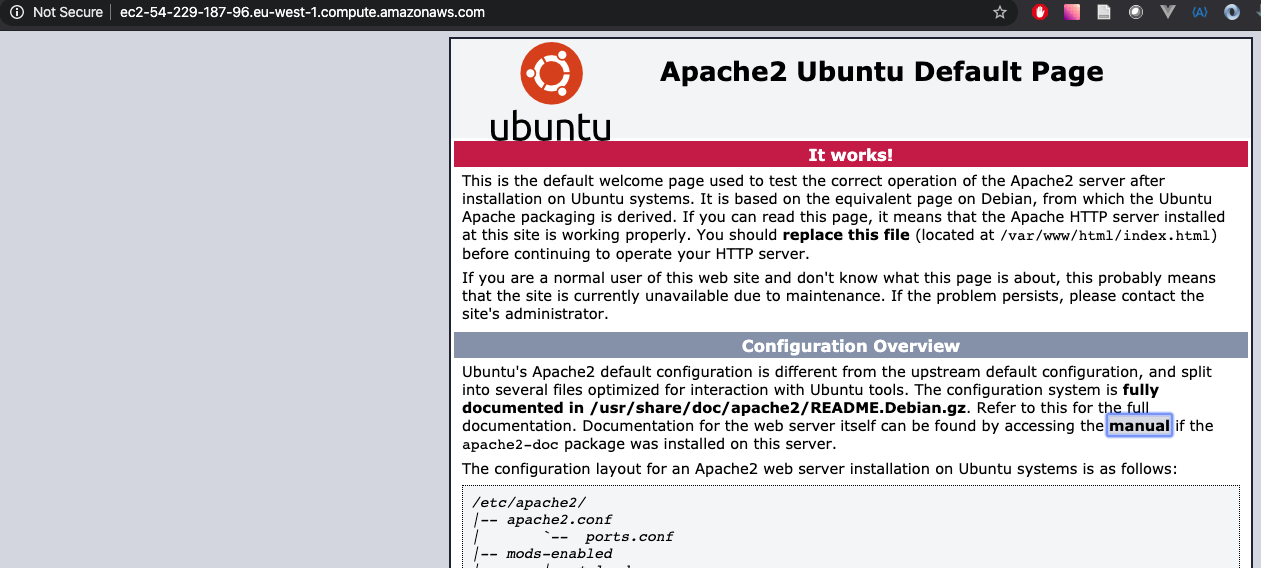
To test out our installation, let’s visit it with a browser. In my case the address is https://ec2-54-229-187-96.eu-west-1.compute.amazonaws.com
Install MySQL
sudo apt install mysql-server
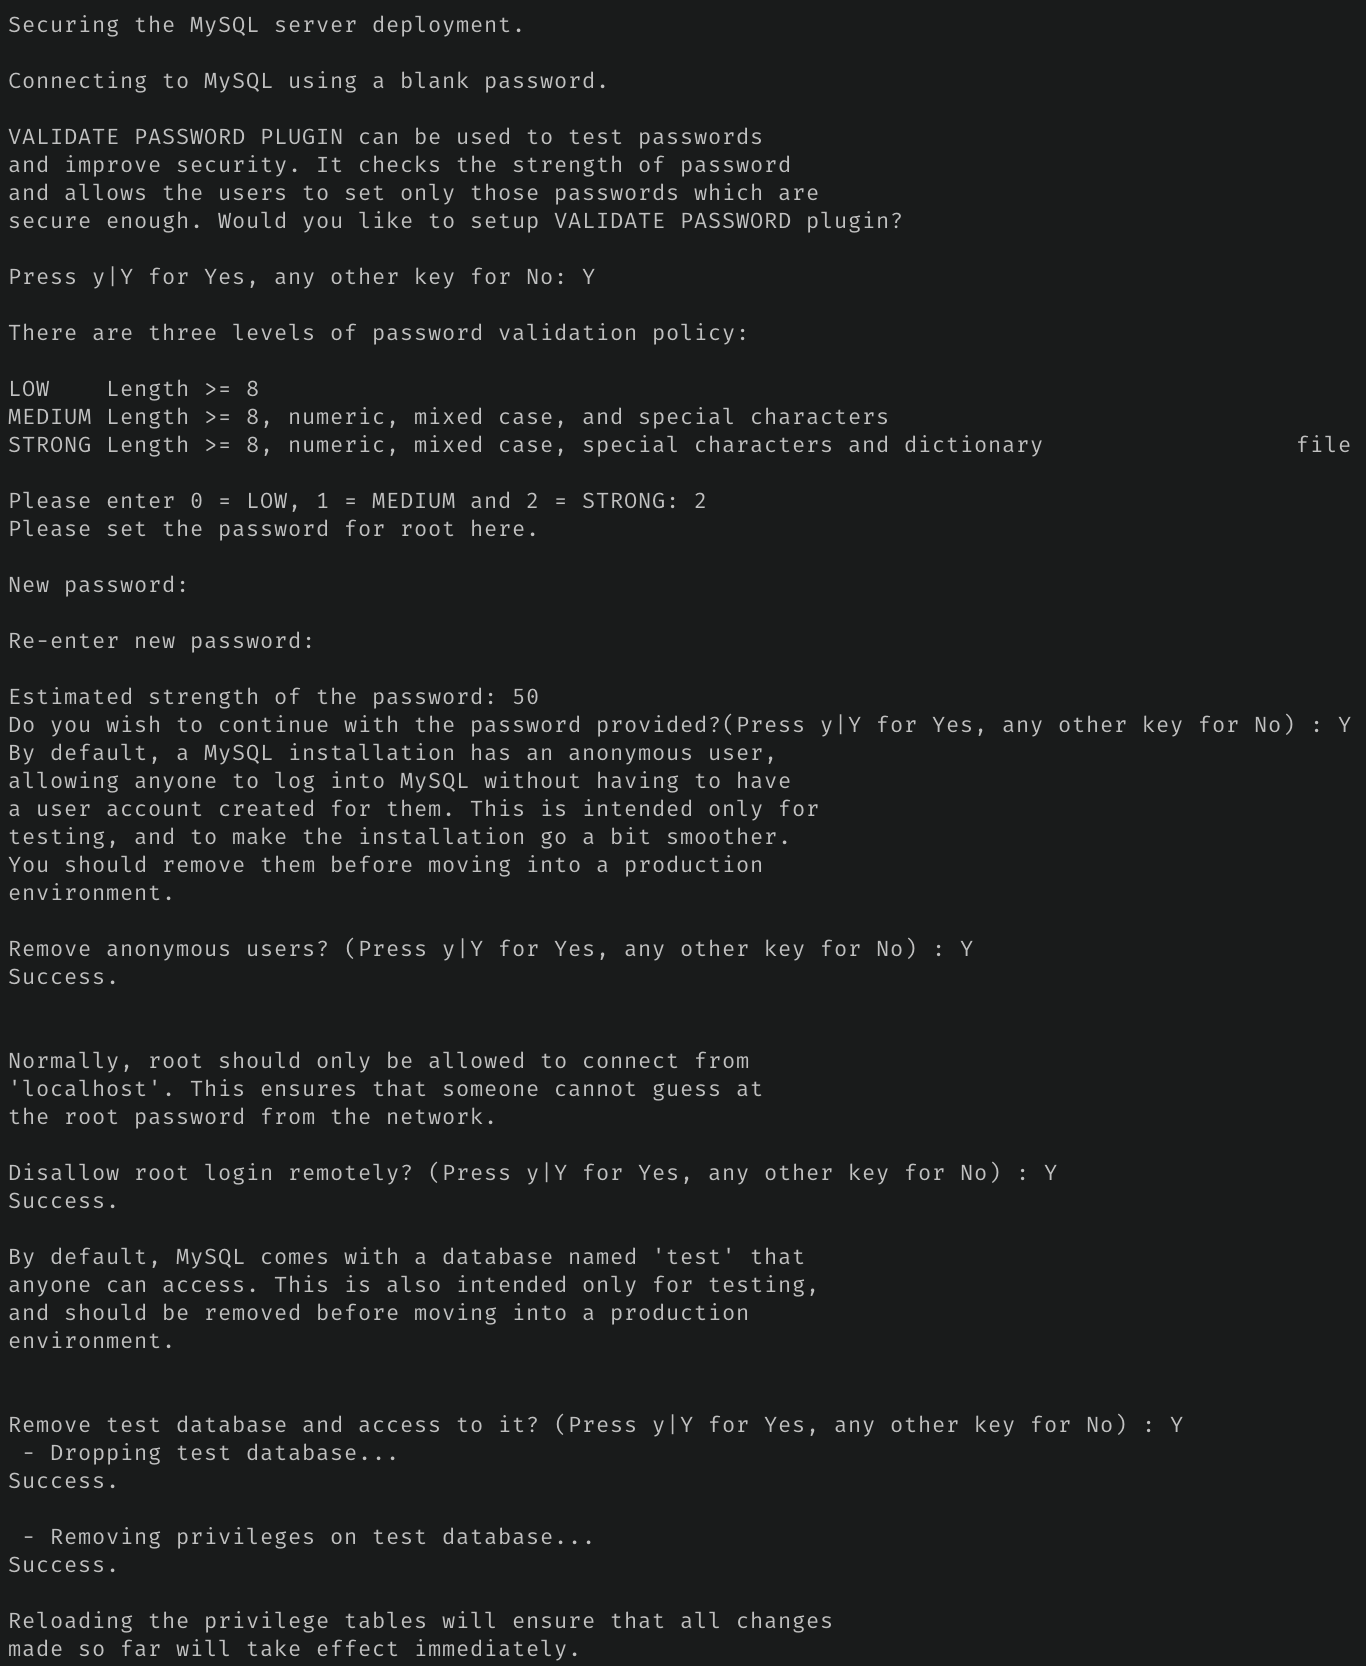
sudo mysql_secure_installation
I opted for the secure installation, but it’s completely up to you whether you want it or not. Here’s how my answers looked like during the secure installation wizard.
Let’s check whether Mysql is in working order
sudo mysql -u root -p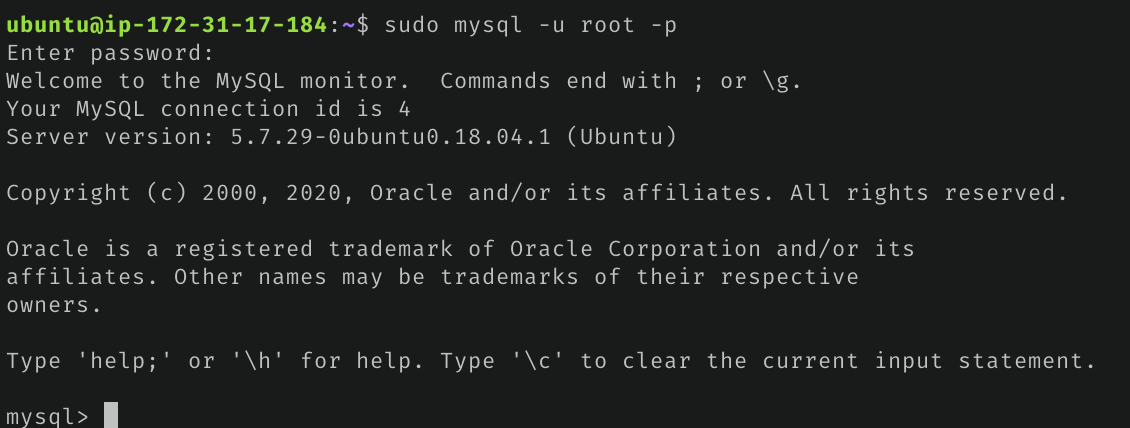
Exit the mysql console for now
quitNote: Some tutorials suggest using MariaDB. I actually did give that a try, but I came across issues in trying to use it in conjunction with Directus 7 (https://docs.directus.io/getting-started/troubleshooting.html#why-is-my-mariadb-installation-not-working)
While we don’t officially support MariaDB, many successfully use that database type. Some users have noted seeing the following error message:
not able to install database: ./directus install:database SQLSTATE[42000]: ==Syntax error or access violation: 1071 Specified key was too long; max key length is 767 bytes==
So use it at your own risk. :) When you’re using MariaDB - though based on the same source code as MySQL - there will be subtle differences. Directus requires the use of the utf8mb4 charset. MariaDB V10.2 or higher will be required for this to work.
PHP 7.2
php
sudo apt-get install software-properties-common
sudo add-apt-repository ppa:ondrej/php
sudo apt update
sudo apt install php7.2 libapache2-mod-php7.2 php7.2-common php7.2-sqlite php7.2-curl php7.2-intl php7.2-mbstring php7.2-xmlrpc php7.2-mysql php7.2-gd php7.2-xml php7.2-cli php7.2-zip
Edit the configuration:
sudo vim /etc/php/7.2/apache2/php.ini
#put on bottom of .inifile_uploads = On
allow_url_fopen = On
short_open_tag = On
memory_limit = 512M
upload_max_filesize = 50M
max_execution_time = 300
date.timezone = America/Boston
Restart Apache2
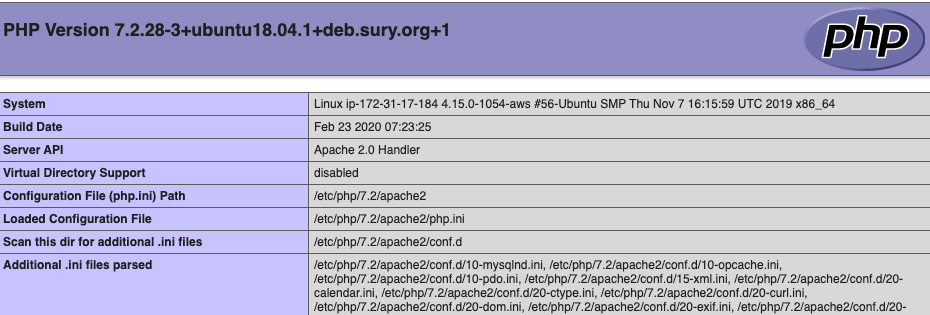
sudo systemctl restart apache2.serviceCheck the PHP installation
sudo vim /var/www/html/phpinfo.phpType in the following snippet
<?php phpinfo( ); ?>Check whether PHP is working http://ec2-54-229-187-96.eu-west-1.compute.amazonaws.com/phpinfo.php
Data-schema
Directus is multi-tenant, which in short means you can use it for multiple “projectsj”. Each project is mapped to a database. We will create one project/database for our showcase purposes. To achieve this we’ll use the previously shown MySQL console.
Log into the MySQL console:
sudo mysql -u root -p#type one by one inside of the MySQL console
CREATE DATABASE directus;
CREATE USER 'directususer'@'localhost' IDENTIFIED BY 'new_password_heRe2343434,%%5$';
GRANT ALL ON directus.* TO 'directususer'@'localhost' IDENTIFIED BY 'new_password_heRe2343434,%%5$';
FLUSH PRIVILEGES;
EXIT;Directus
cd /var/www/
sudo git clone https://github.com/directus/directus.git
sudo chown -R www-data:www-data /var/www/directus
#Enable mod_rewrite
sudo a2enmod rewrite
sudo vim /etc/apache2/sites-available/000-default.conf
Have it look something like this:
<VirtualHost *:80>
        ServerAdmin webmaster@localhost
        DocumentRoot /var/www/directus/public

        <Directory /var/www/directus/public/>
            Options Indexes FollowSymLinks
            AllowOverride All
            Require all granted
        </Directory>

        ErrorLog ${APACHE_LOG_DIR}/error.log
        CustomLog ${APACHE_LOG_DIR}/access.log combined

        <IfModule mod_dir.c>
            DirectoryIndex index.php index.pl index.cgi index.html index.xhtml index.htm
        </IfModule>
</VirtualHost>
Restart Apache:
sudo systemctl restart apache2Have a look at the Directus project wizard over at http://ec2-54-229-187-96.eu-west-1.compute.amazonaws.com/admin/#/install
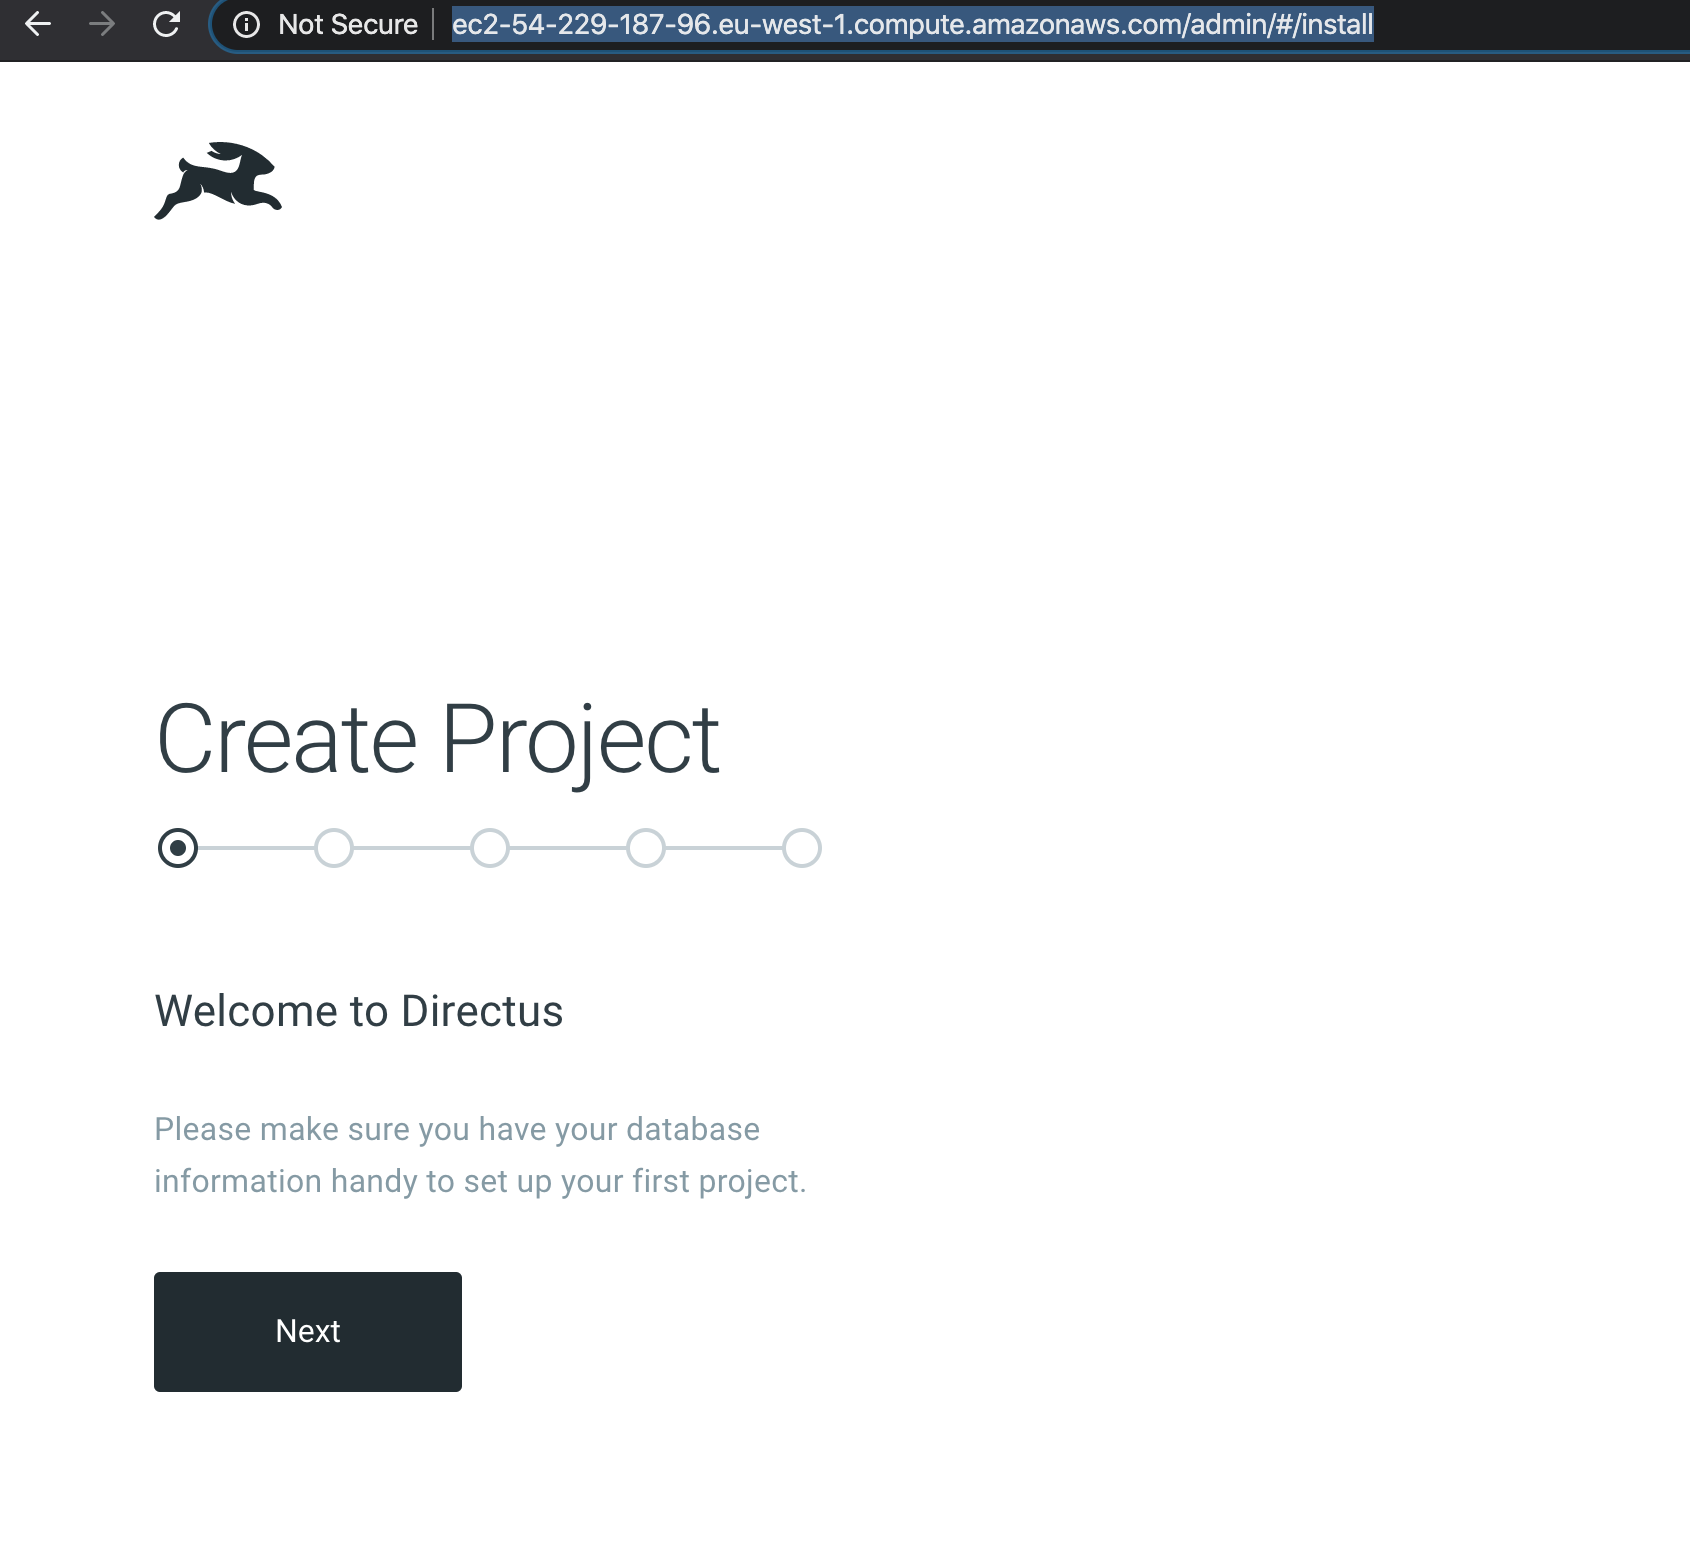
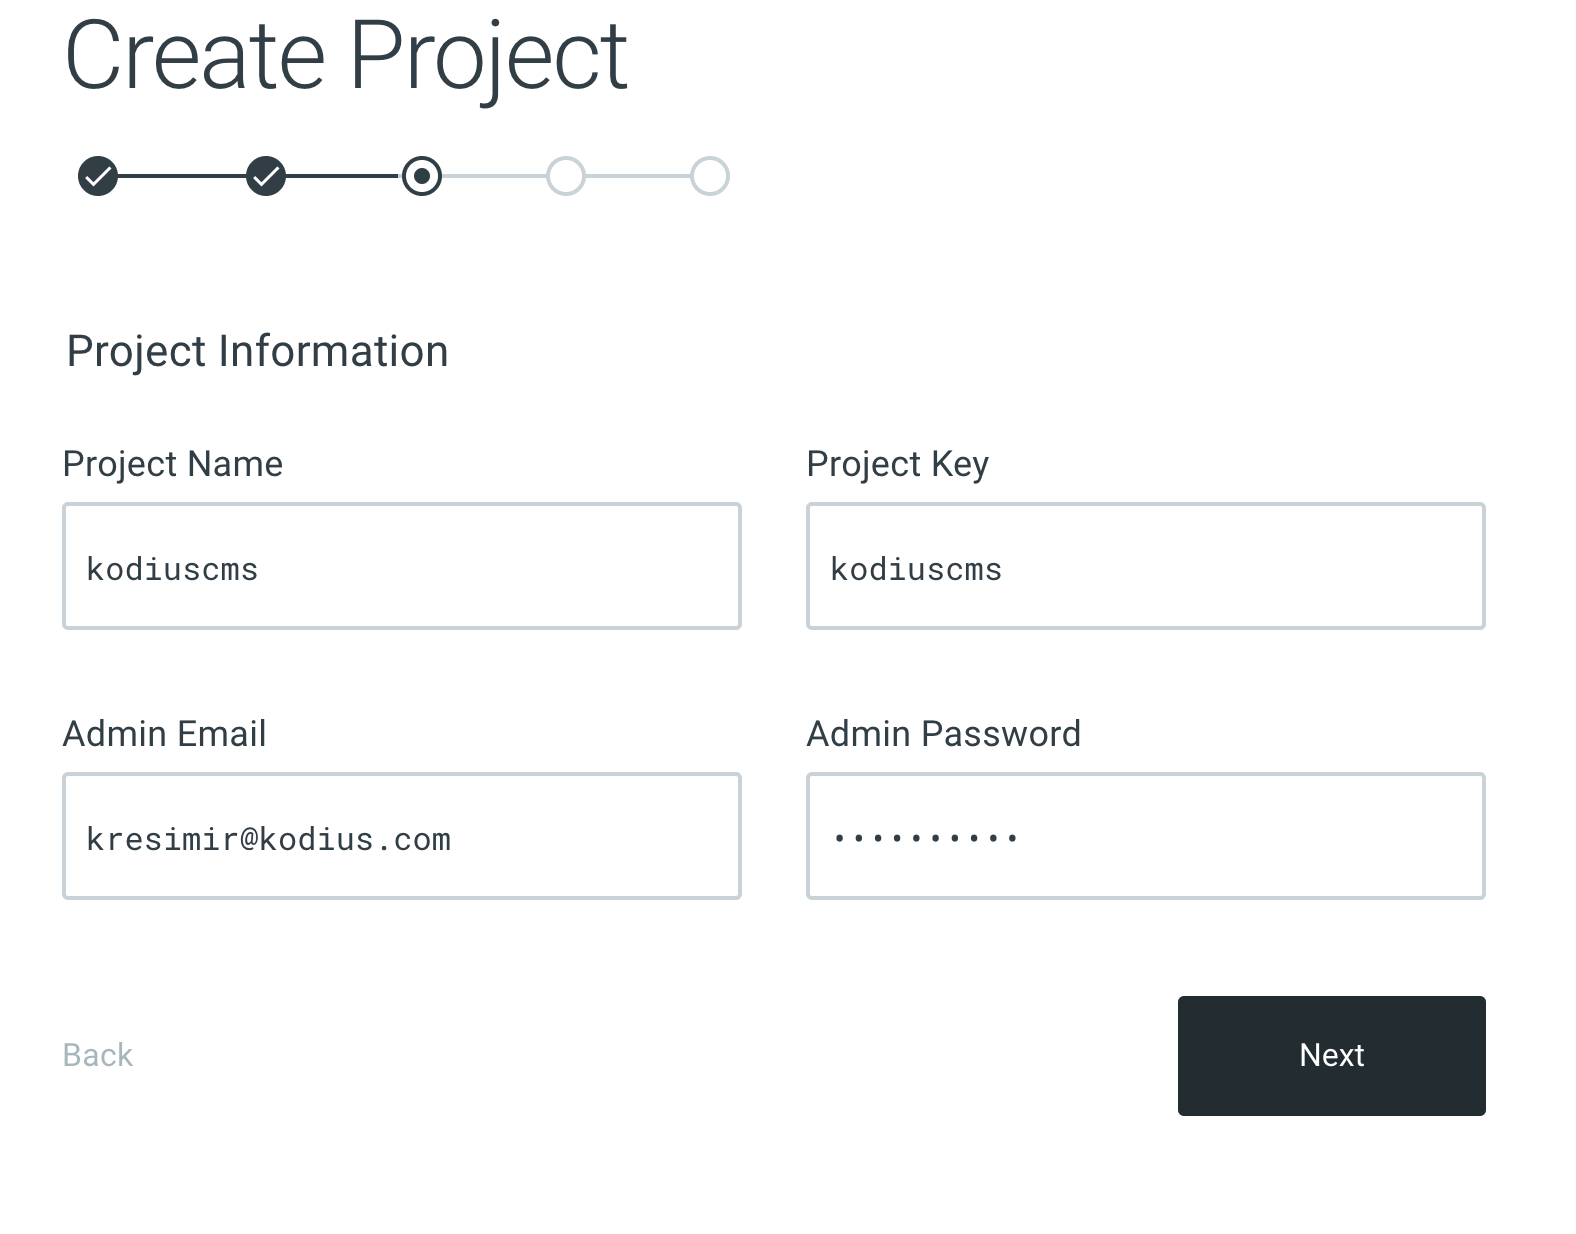
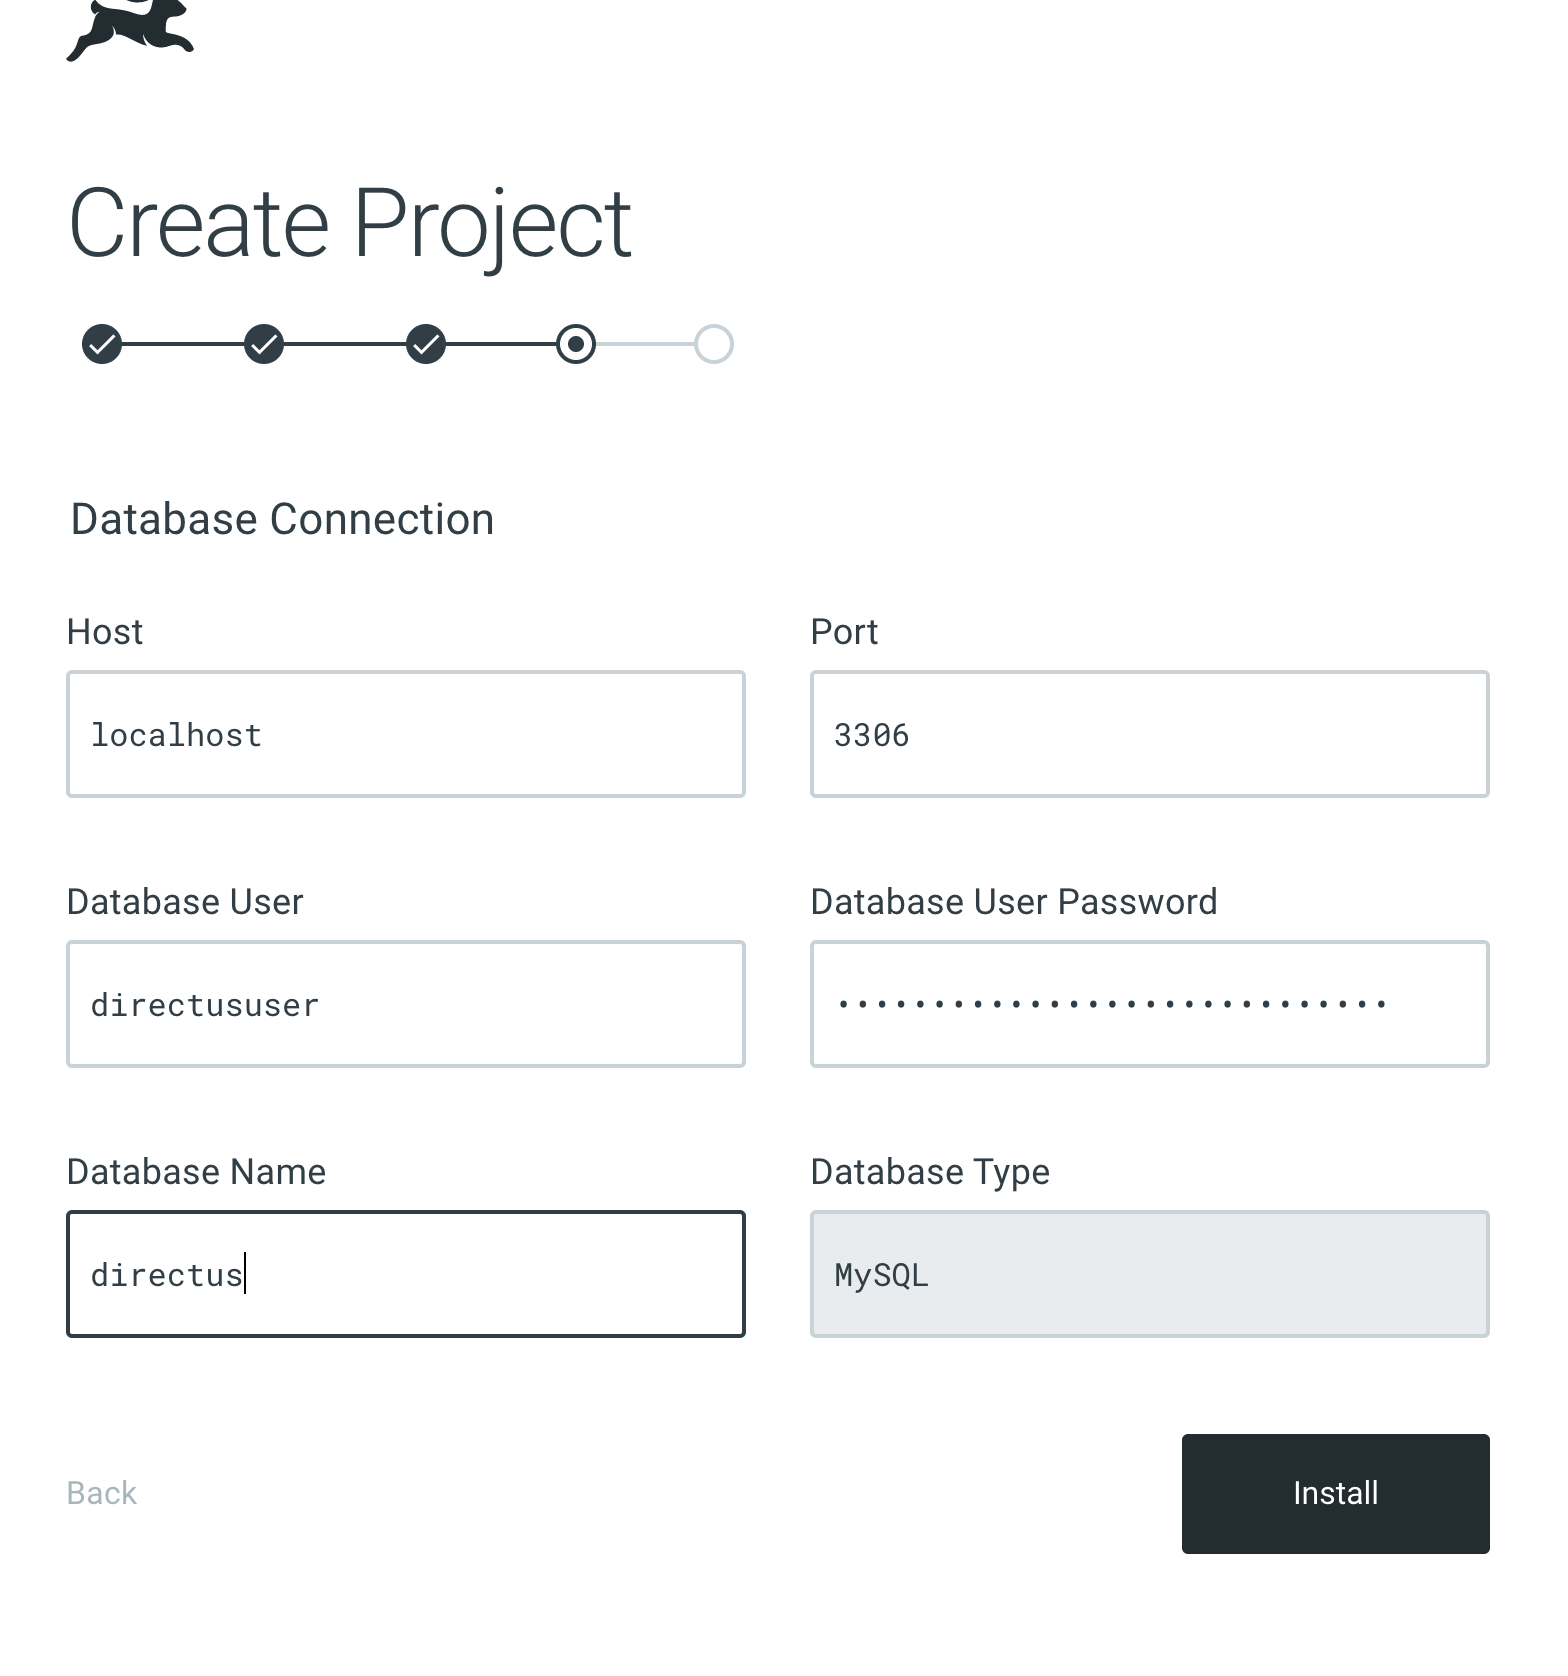
At the end you’ll get the admin password which you’ll need for additional projects. Make sure you write it down somewhere.
Gridsome & Tailwind
Now that we got EC2 out of our way, let us build our local project in Gridsome. It’s what we’ll be using to show off how to use AWS Amplify and demonstrate how to connect Amplify with both Github as well as our EC2-hosted installation of the Directus CMS. You might be asking - why Gridsome? For me, Gridsome happens to hit the sweet spot in terms of the modern web. This is largely due to the fact that it uses Vue.js - one of my favorite front-end. Were I more of a React guy, I might’ve picked Gatsby. Regardless, you end up with a modern solution for all your web needs. To quote them:
“The modern web is decoupled and modular. Gridsome makes it painlessly easy to build JAMstack websites using data from multiple sources such as Content API’s, Headless CMSs, and other web services.”
First check your Node version
node --version
#> v12.4.0
I am running v12.4.0. Next let’s install Gridsome
npm install --global @gridsome/cli
gridsome create villa-ankon
cd villa-ankon
gridsome develop
The site will be available at: http://localhost:8080/
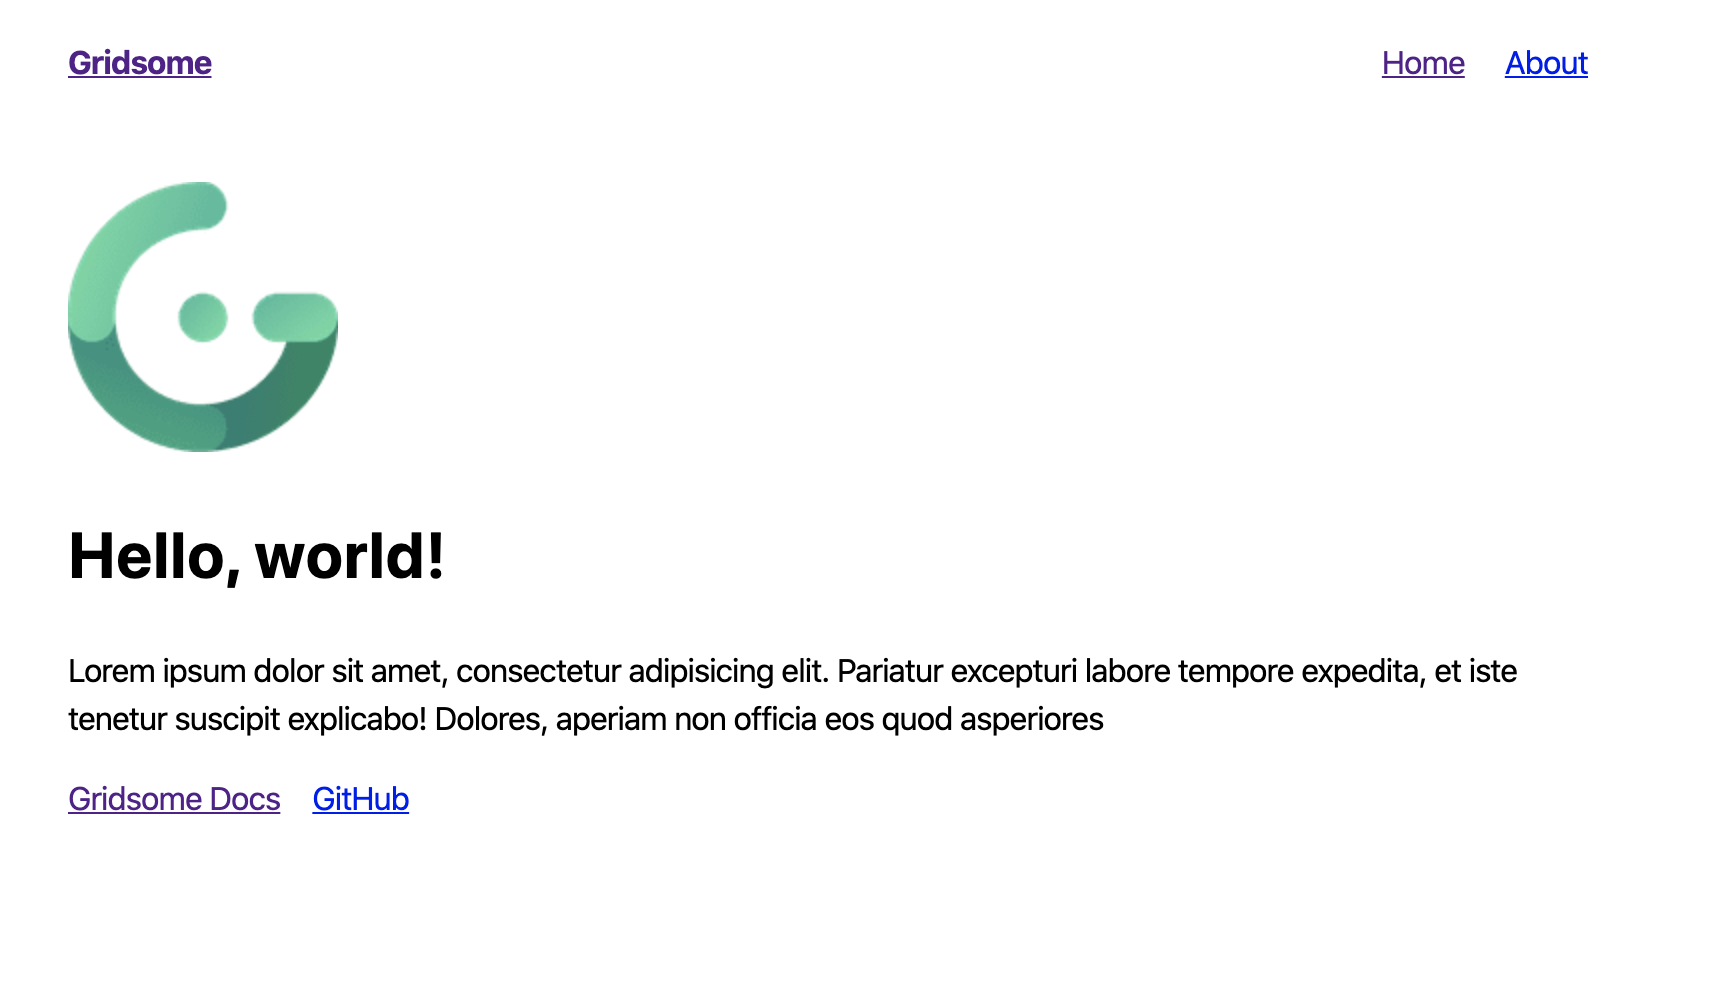
Just looking at this beauty gives me goosebumps. I still got it (building hello worlds).
Let’s add Tailwind into the mix. As I’ve already stated, I am in love with their utility-first concept. To quote what they have to say about it:
Tailwind CSS is a highly customizable, low-level CSS framework that gives you all of the building blocks you need to build bespoke designs without any annoying opinionated styles you have to fight to override.
I highly recommend Tailwind. It is polished, has well-named utility classes and is very well documented.
Let’s add a tailwind button to index page src/pages/Index.vue
#src/pages/Index.vue

	<Layout>
		<button class="bg-blue-500 hover:bg-blue-600 text-white font-bold py-2 px-4 rounded">Button</button>
		...</Layout
	></template
>
Let’s see what it looks like. No bueno. The button is supposed to be blue.
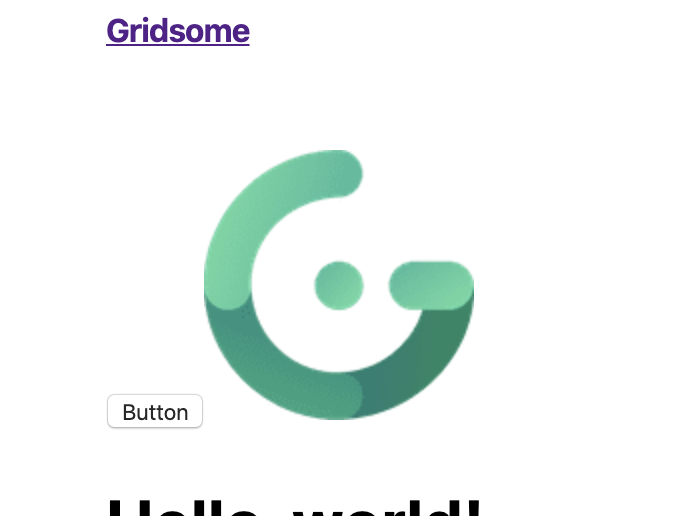
npm install -D gridsome-plugin-tailwindcssAdd the following to your gridsome.config.js file.
#gridsome.config.js
module.exports = {
  siteName: "Gridsome",
  plugins: [
    {
      use: "gridsome-plugin-tailwindcss"
      /* These are the default options. You don't need to set any options to get going.
        options: {
          tailwindConfig: './some/file/js',
          purgeConfig: {},
          presetEnvConfig: {},
          shouldPurge: true,
          shouldImport: true,
          shouldTimeTravel: true
        */
    }
  ]
};
Change Default.vue to use tailwindcss and remove all scaffold styling
#src/layouts/Default.vue
<template>
	<main class="h-screen flex flex-col justify-center items-center">
		<slot />
	</main>


<static-query> query { metadata { siteName } } </static-query>

<style></style>
stop the server and re-run:
gridsome develop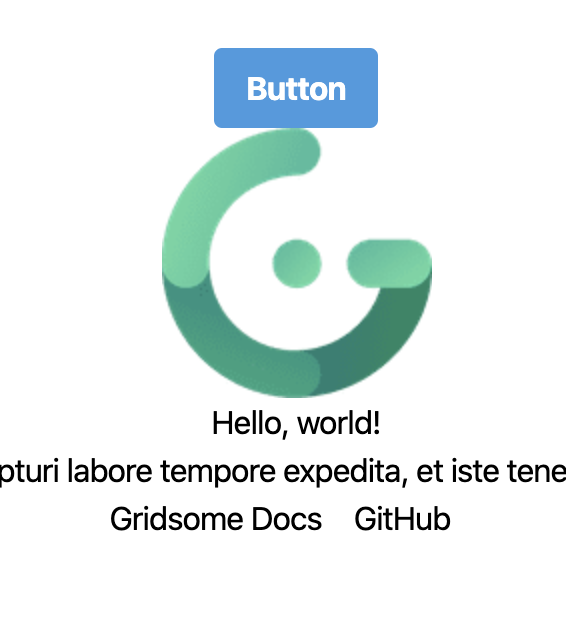
Great success!
Push to Github
Let’s add this to Github. I’ve opened up a project on Github named villaankon.
git init
git add .
git commit -m "first commit"
git remote add origin git@github.com:drKreso/villaankon.git
git push -u origin master
We’ll be using this repository for AWS Amplify deployments.
Host on AWS Amplify
Connect to the AWS Console and head over to ASW Amplify and hit “Connect app”. I’m picking Github integration as that’s what I’m using and I’m selecting my repository. You can leave build settings as they are and click “Next”.
Deploy went fine and I got my app over at https://master.dcgdh1evstevk.amplifyapp.com/
However, I’ve noticed it’s not really working. That’s because we still need to set up the Amplify configuration file in our project.

Start by installing the ASW Amplify CLI
$ npm install -g @aws-amplify/cli
$ amplify configure #to configure AWS user
Follow the tutorial, open up the Amazon console, and log into Amplify.
Then hit “Enter”, create a new API user, click Next on all and download the secrets .csv file.
$ amplify initMake sure the app’s name is the same as the one you used before. You can also skip the first step (manual opening of the application) because CLI will already do this for you. All the other defaults seem good, just change the build command to build Gridsome:
? Build Command: gridsome buildThis will generate all the necessary setup files. Commit them and push them to Github.

If it’s still not working make sure your settings have baseDirectory set to “dist” folder
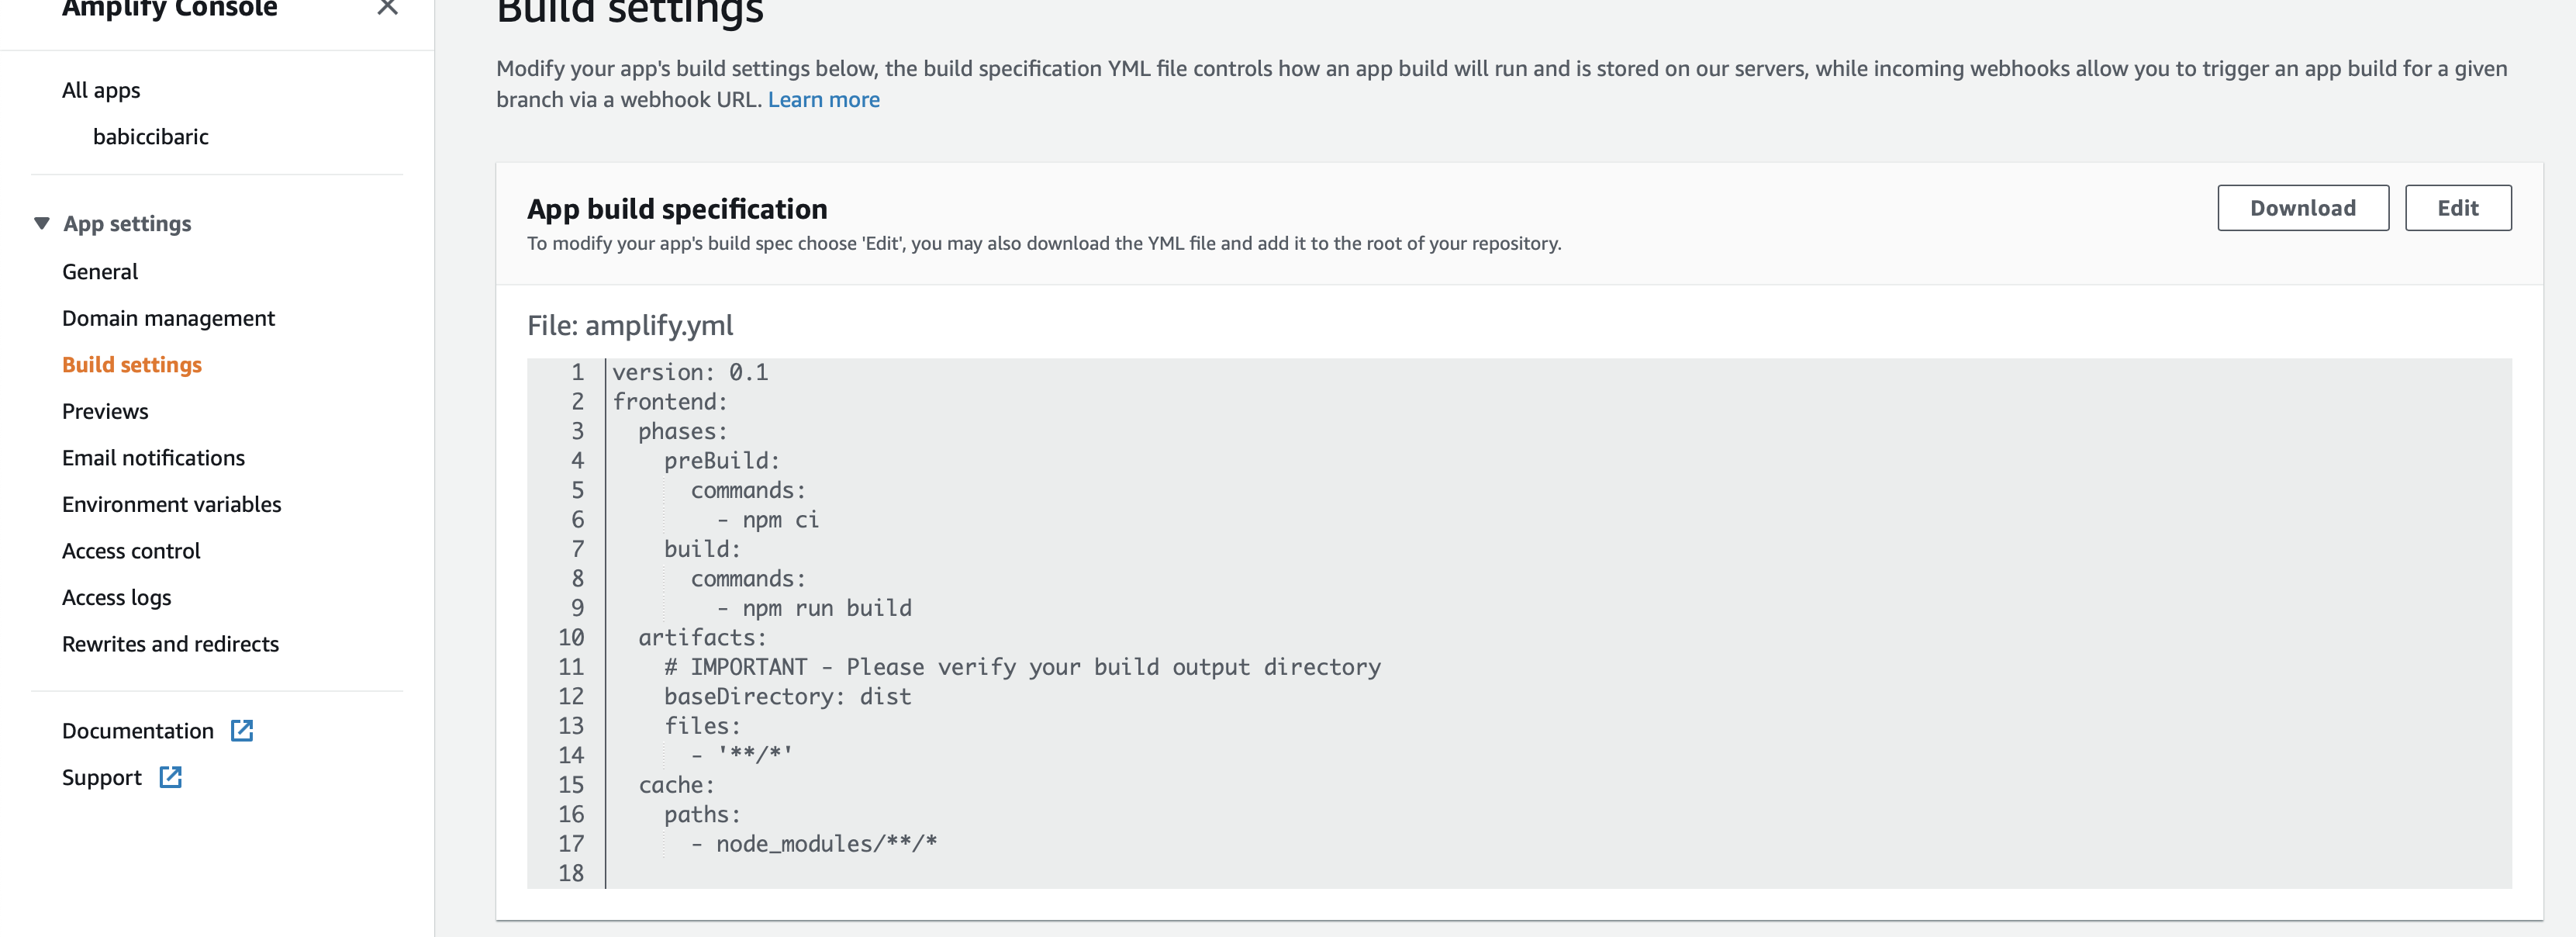
After re-deploying, your site should be up and running. Such a sweet sight of victory.
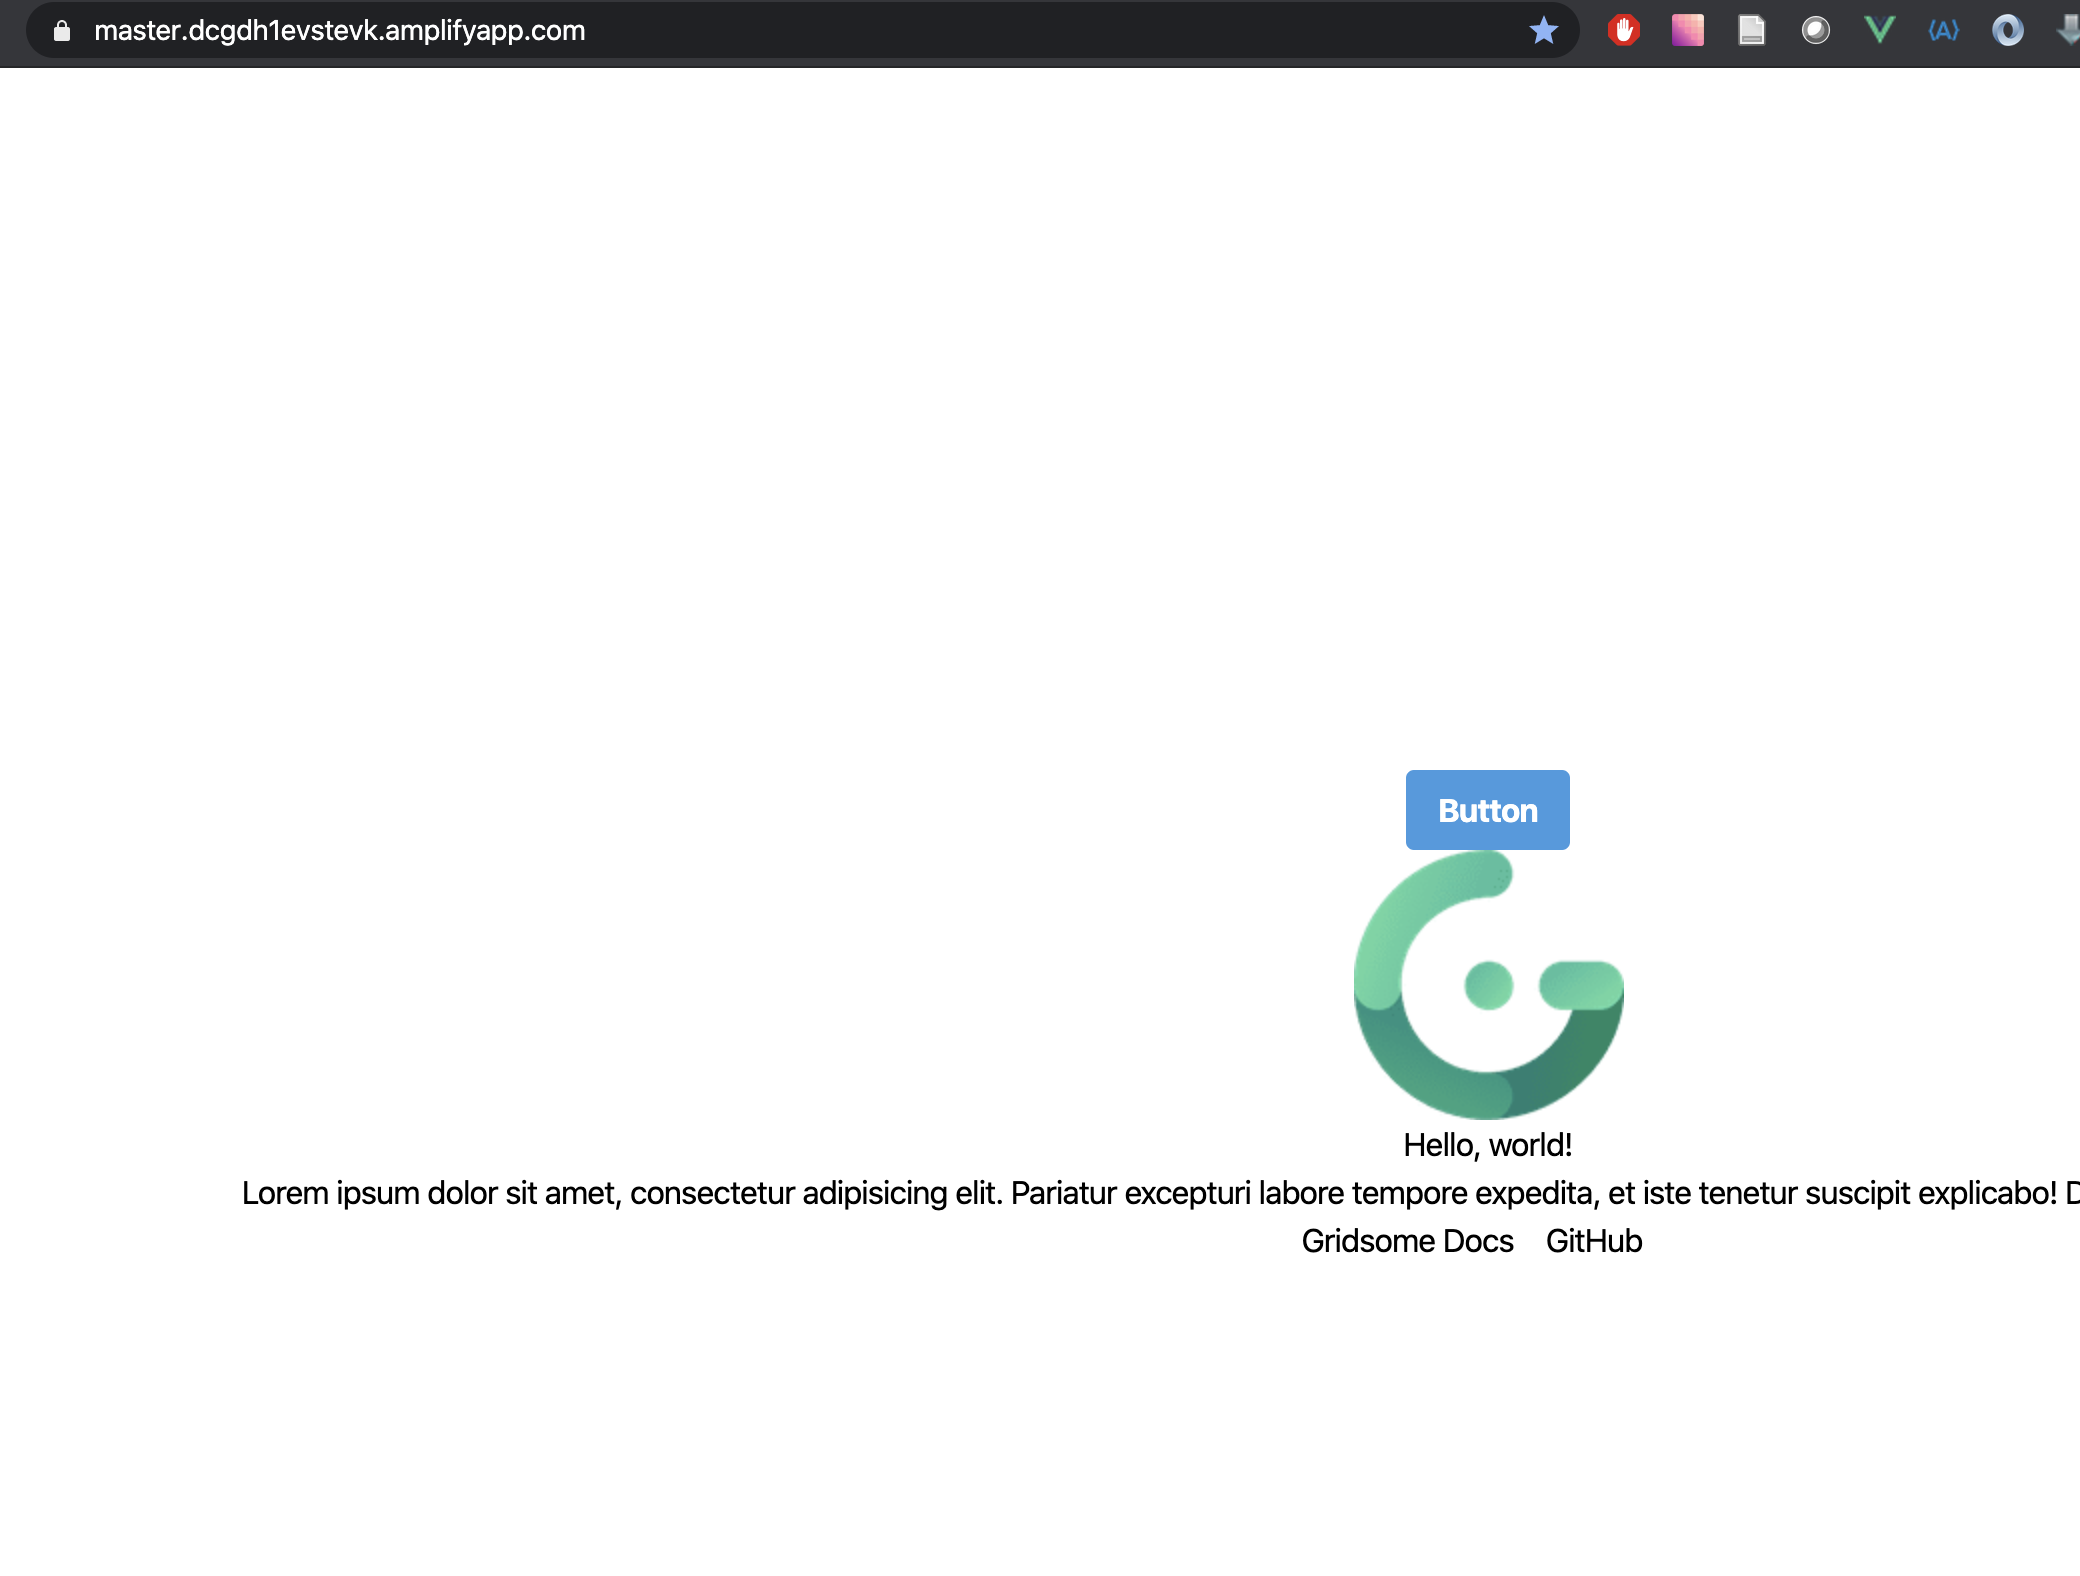
It’s really easy to add a domain with SSL but it’s outside the scope of this little overview that I’m giving you.
Connect to CMS
There are a bunch of headless CMSs out there. They all do pretty much the same thing, with more or less success. I picked Directus because it’s free. Each and every headless CMS offers an API to expose its data through. What’s really cool about Gridsome is that it encapsulated this in its own GraphQL API using different plugins for different CMS systems. They call it “The GraphQL data layer”. I’ll be using the gridsome-source-directus plugin. It’s enough to add this to gridsome.config
Install the plugin:
npm install -D gridsome-source-directusand add the following to your configuration:
# gridsome.config.js
module.exports = {
  siteName: 'Gridsome',
  plugins: [
    ...
    {
        apiUrl: 'http://cms.kodius.com',
        project: 'kodius',
        email: 'apiuser@kodius.com',
        password: '********', //put real password here :)
        collections: [  //define what you want to fetch from CMS
          {
            name: 'technologies',
            status: 'published',
            fields: '*'
          }
        ]
      }
    }
  ]
}
You can now explore the data layer by using the included graphQL client located at http://localhost:8080/___explore
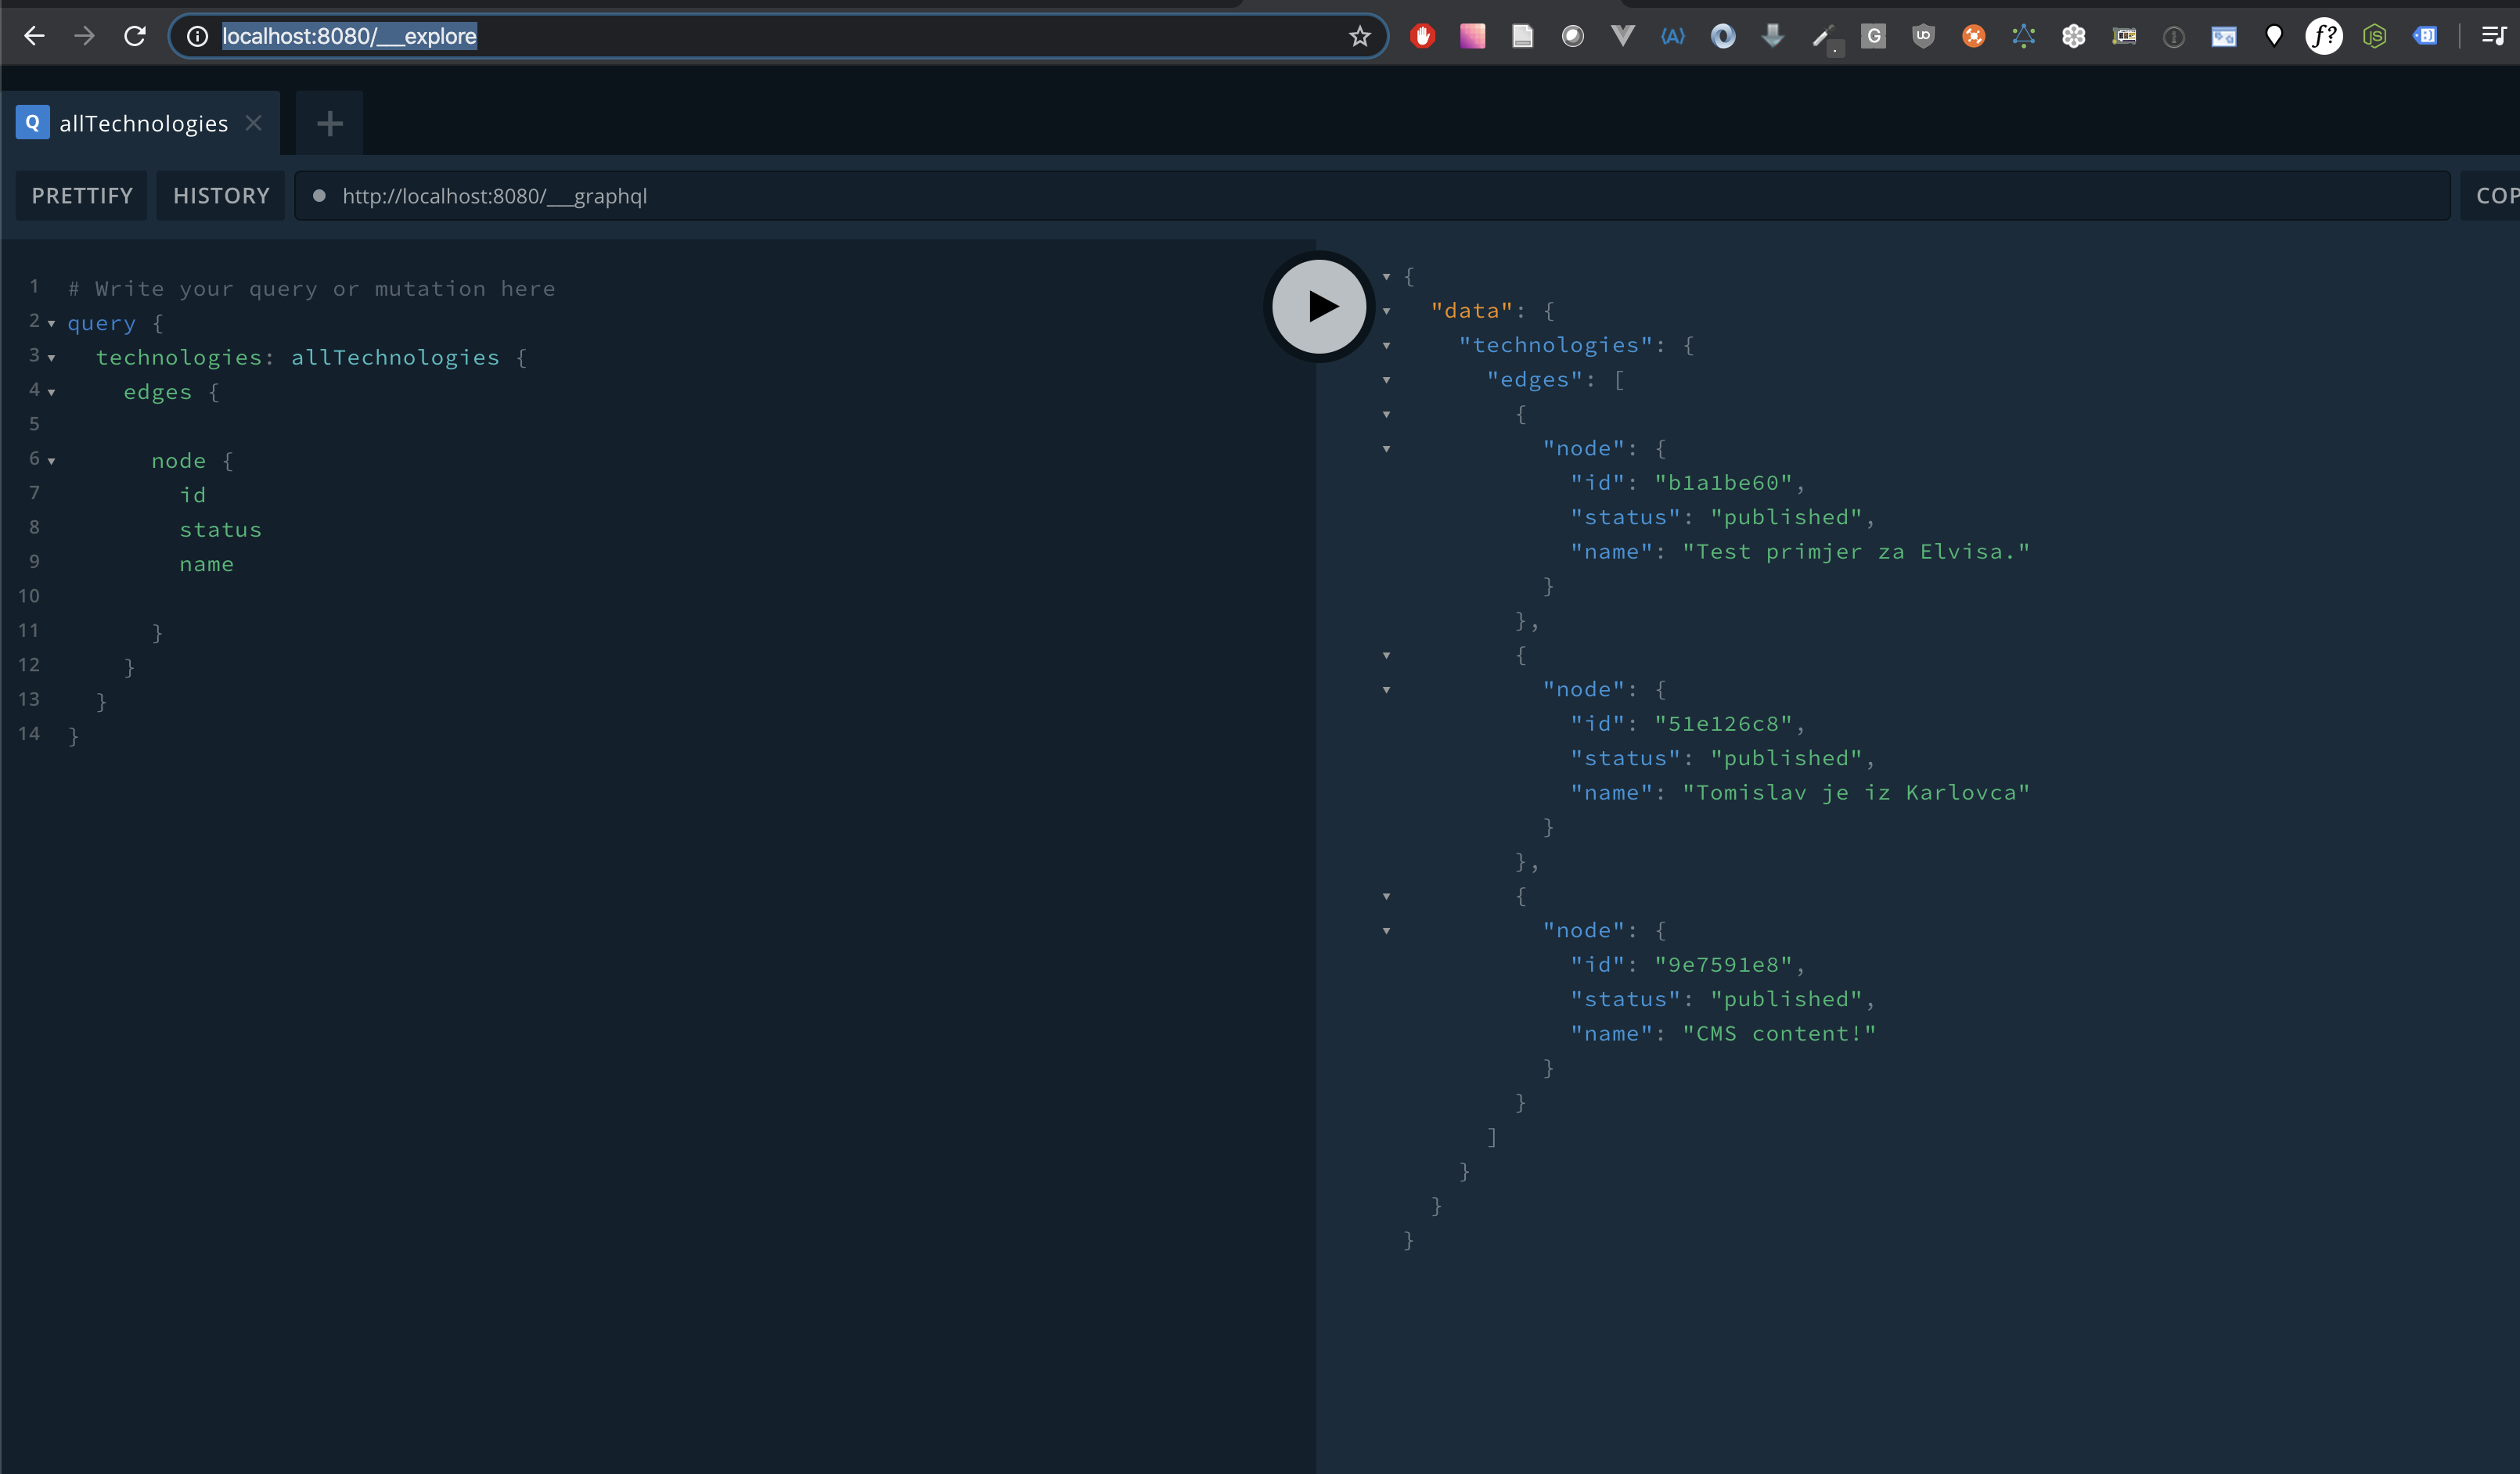
I’ll add some dummy data schema on Directus, turn on multi-language support and connect it to Gridsome. An important thing to note is that we can access all our required data (content) during the build step. This matters a lot because if we access the data at the build step then what this means is we don’t need our CMS to be up and running to serve our content at all times - we only need it during the build step and we trigger the rebuild of the content change itself. All of this is fairly easy to do and I’ll show you just how to setup a web-hook call from CMS to our Amplify app
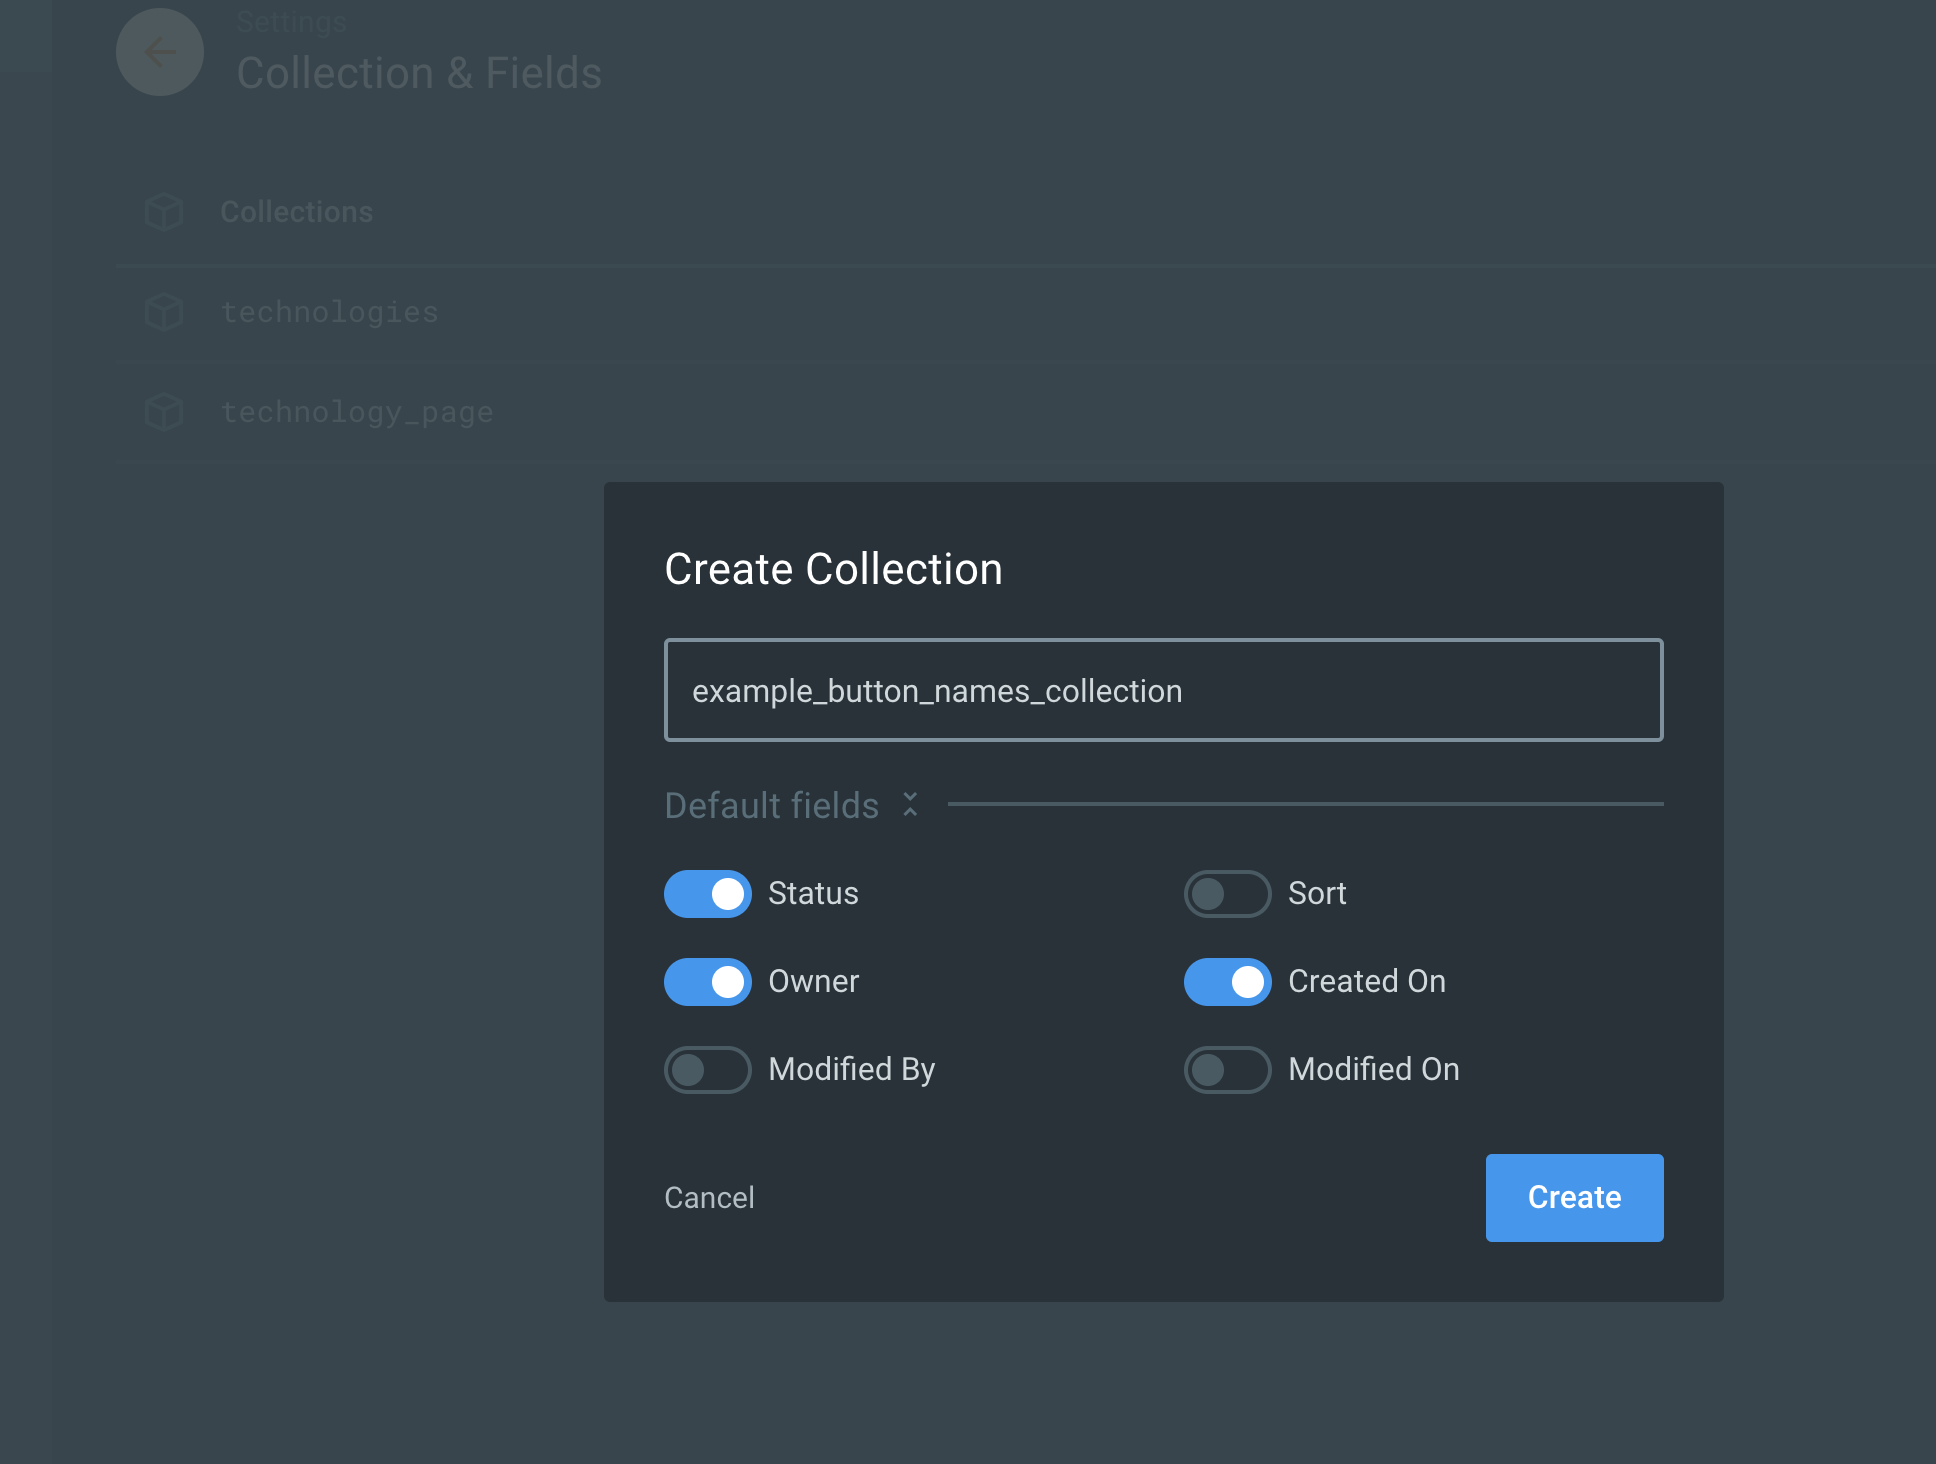
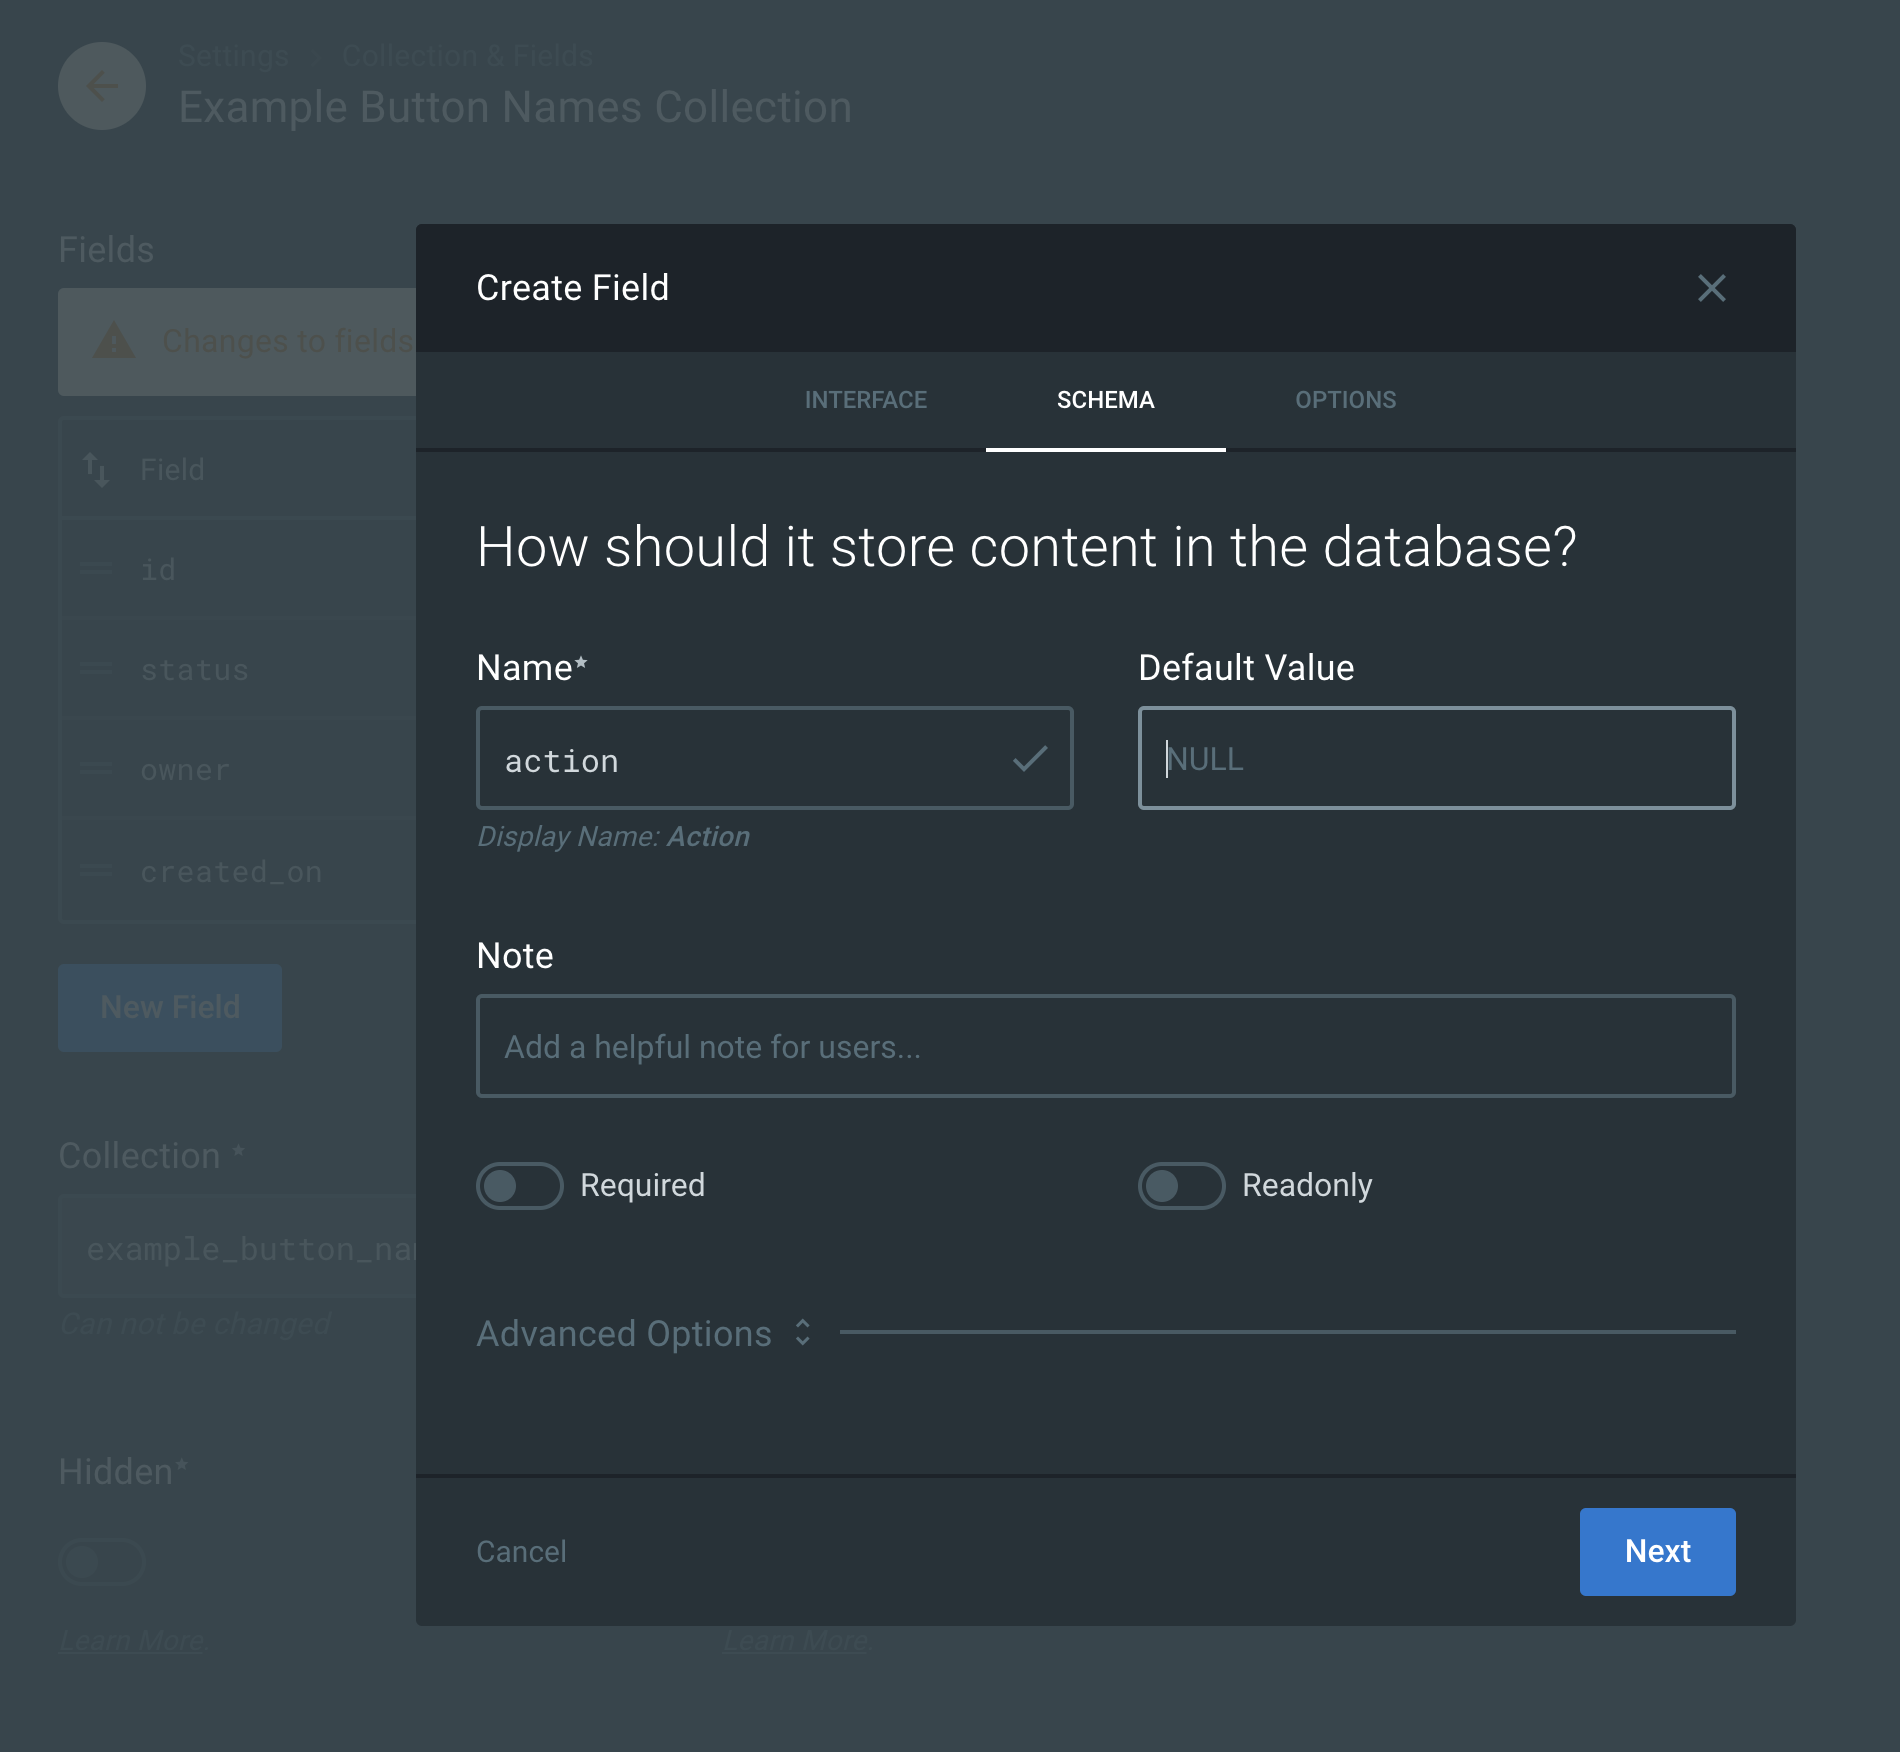
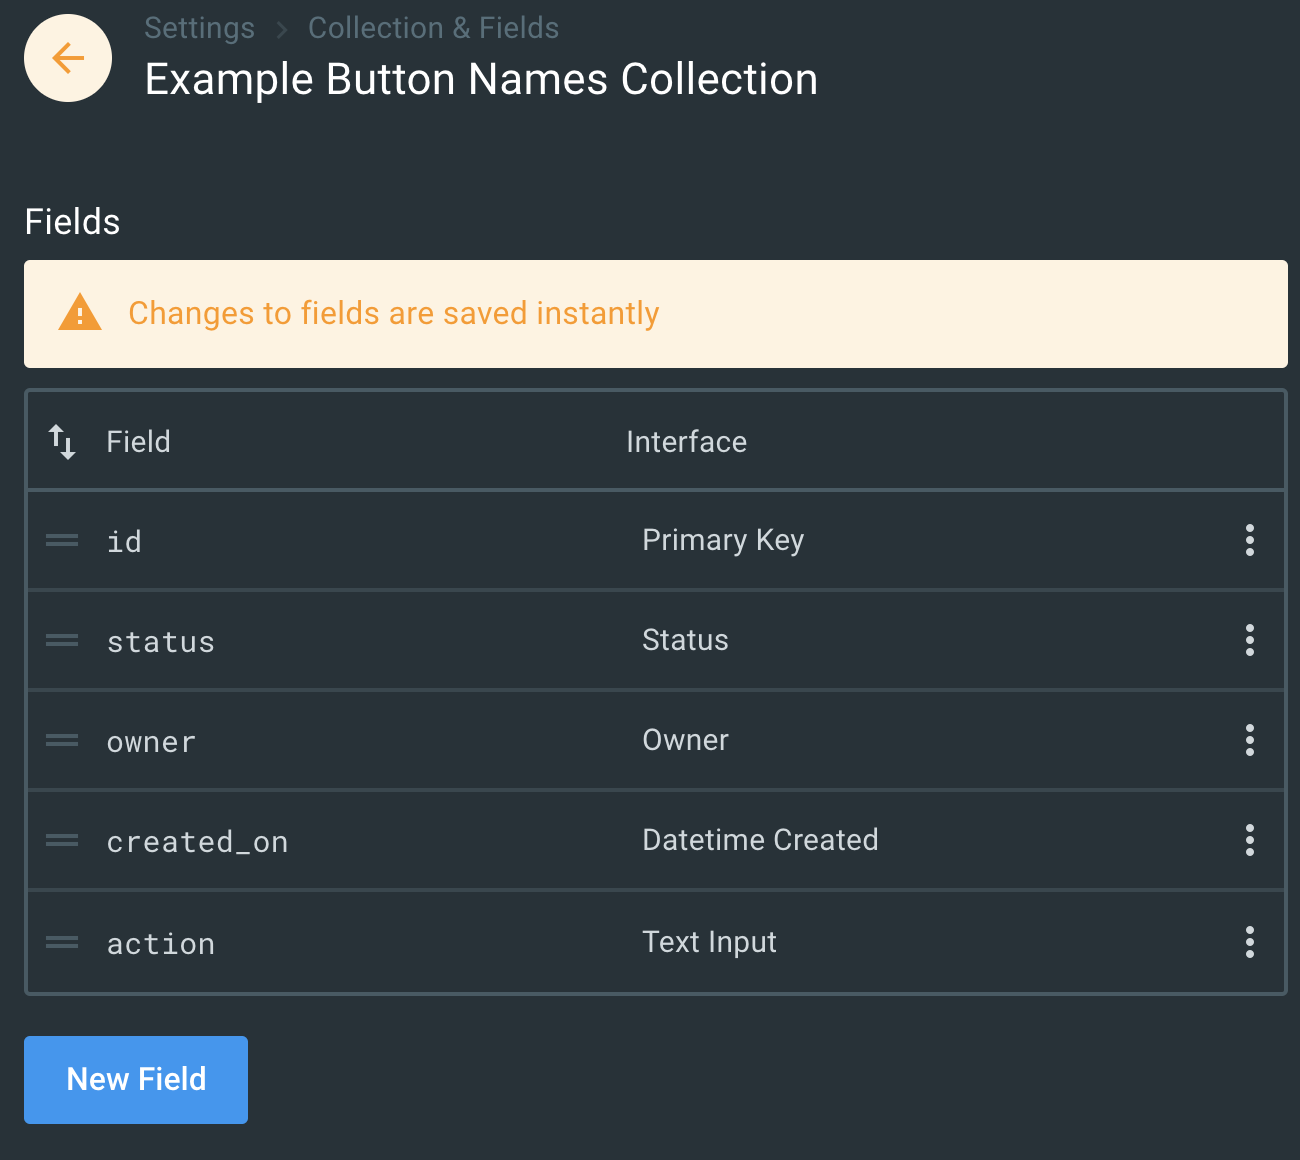
Directus makes the data schema manipulation really easy and it’s got a pretty Admin interface on top. There’s a whole plethora of different field types (more than 50 last time I checked). For localizable content, the idea is to have one header “table” (they call it a collection) and in it you’d have multiple “content” rows across different tables. Let me show you the first and second schema that I’ve got, it’ll be much easier to understand that way!
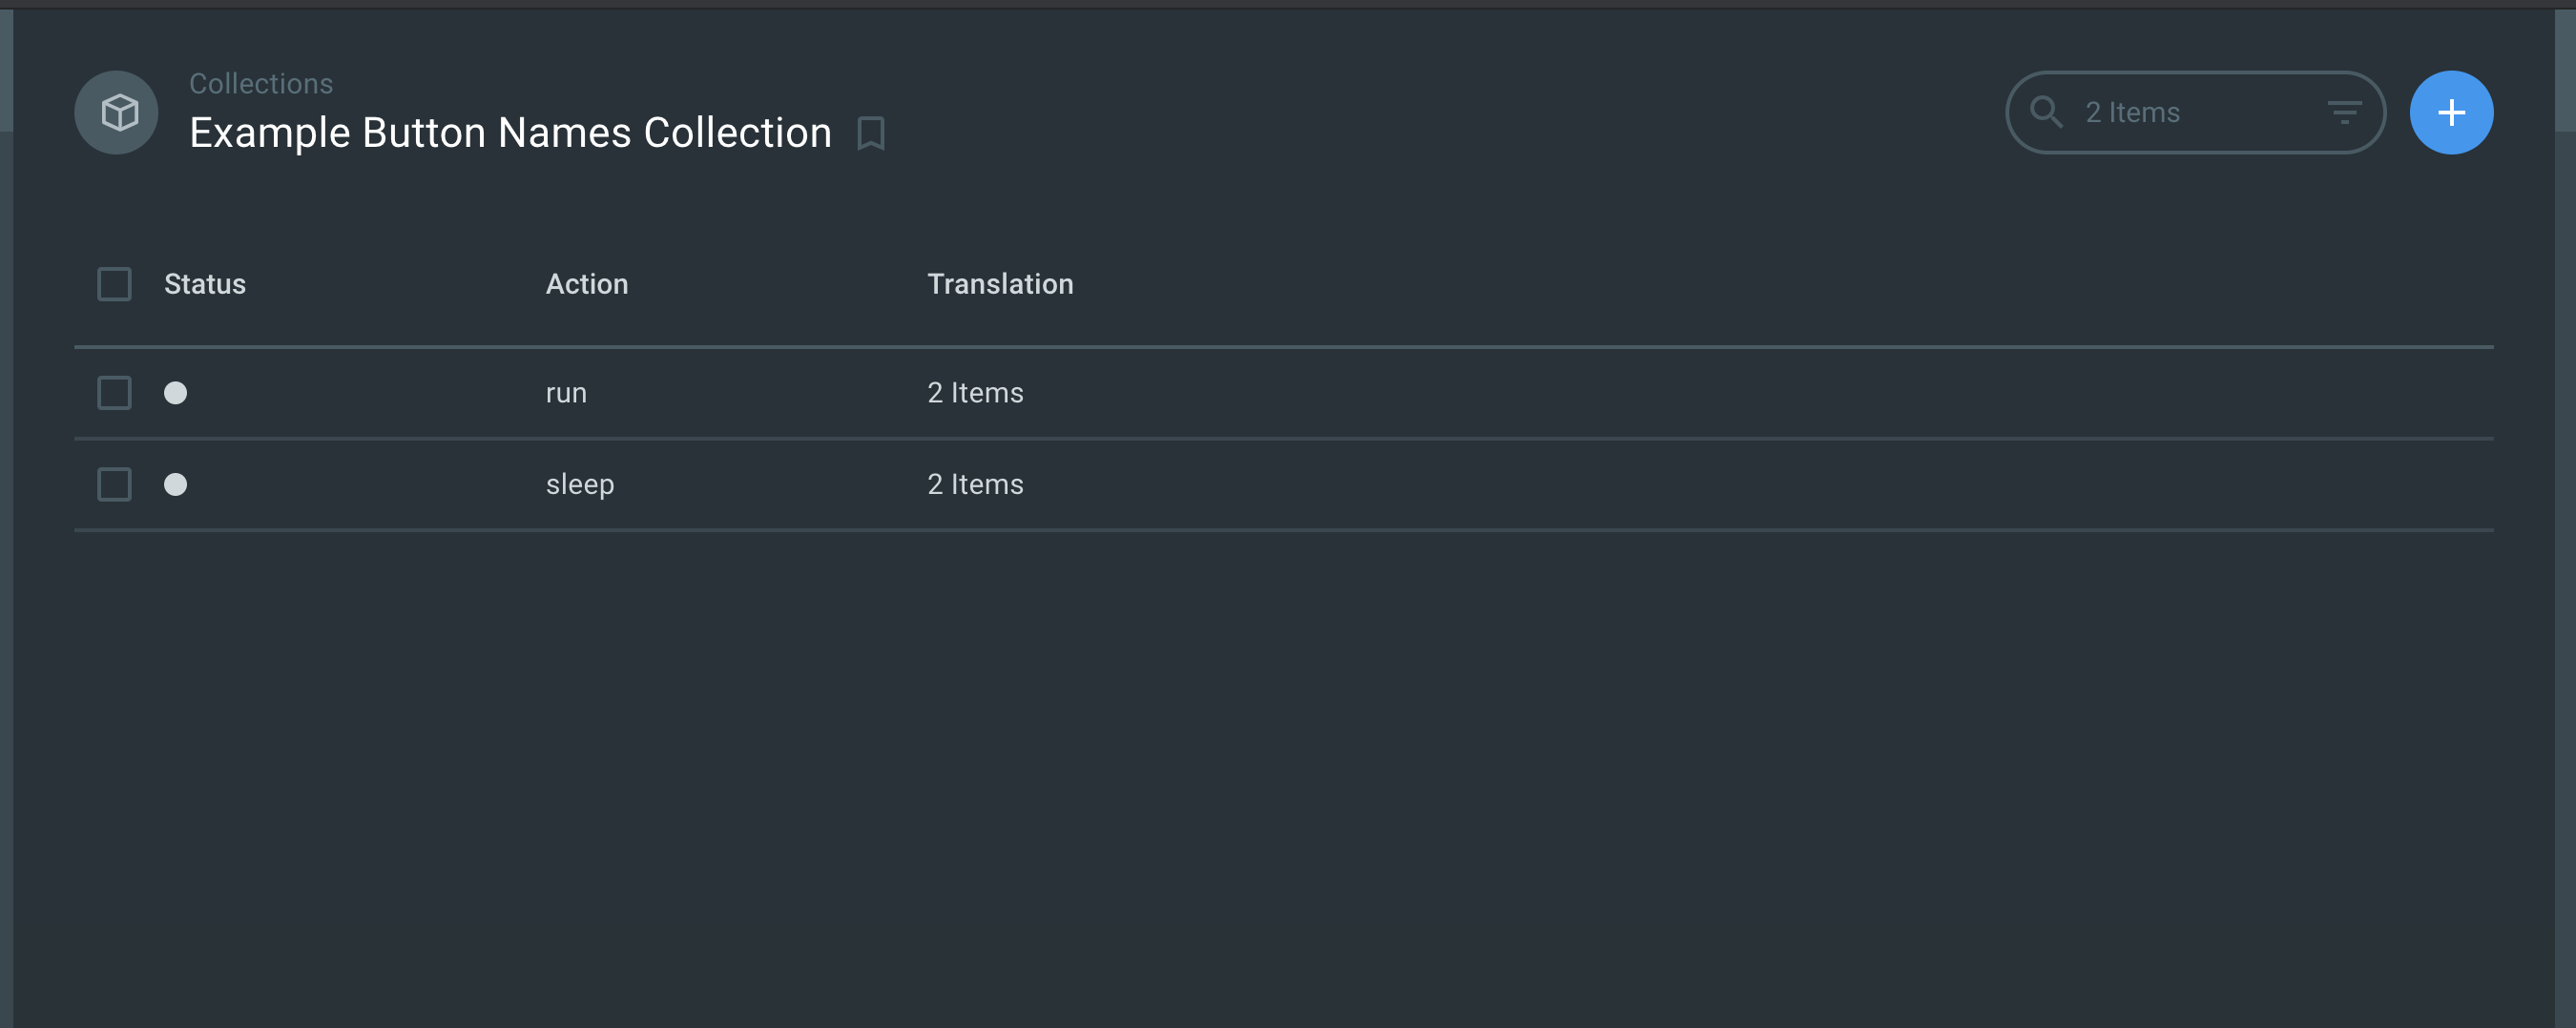
We added a buttons collection with just one text field (“action”) allowing us to trigger an action.
Multilanguage support
We now need to add an additional collection to use for connecting to the buttons collection via the “Translation” field in Directus. Let’s add the “button names” collection. It will have the buttons “name” and “language”
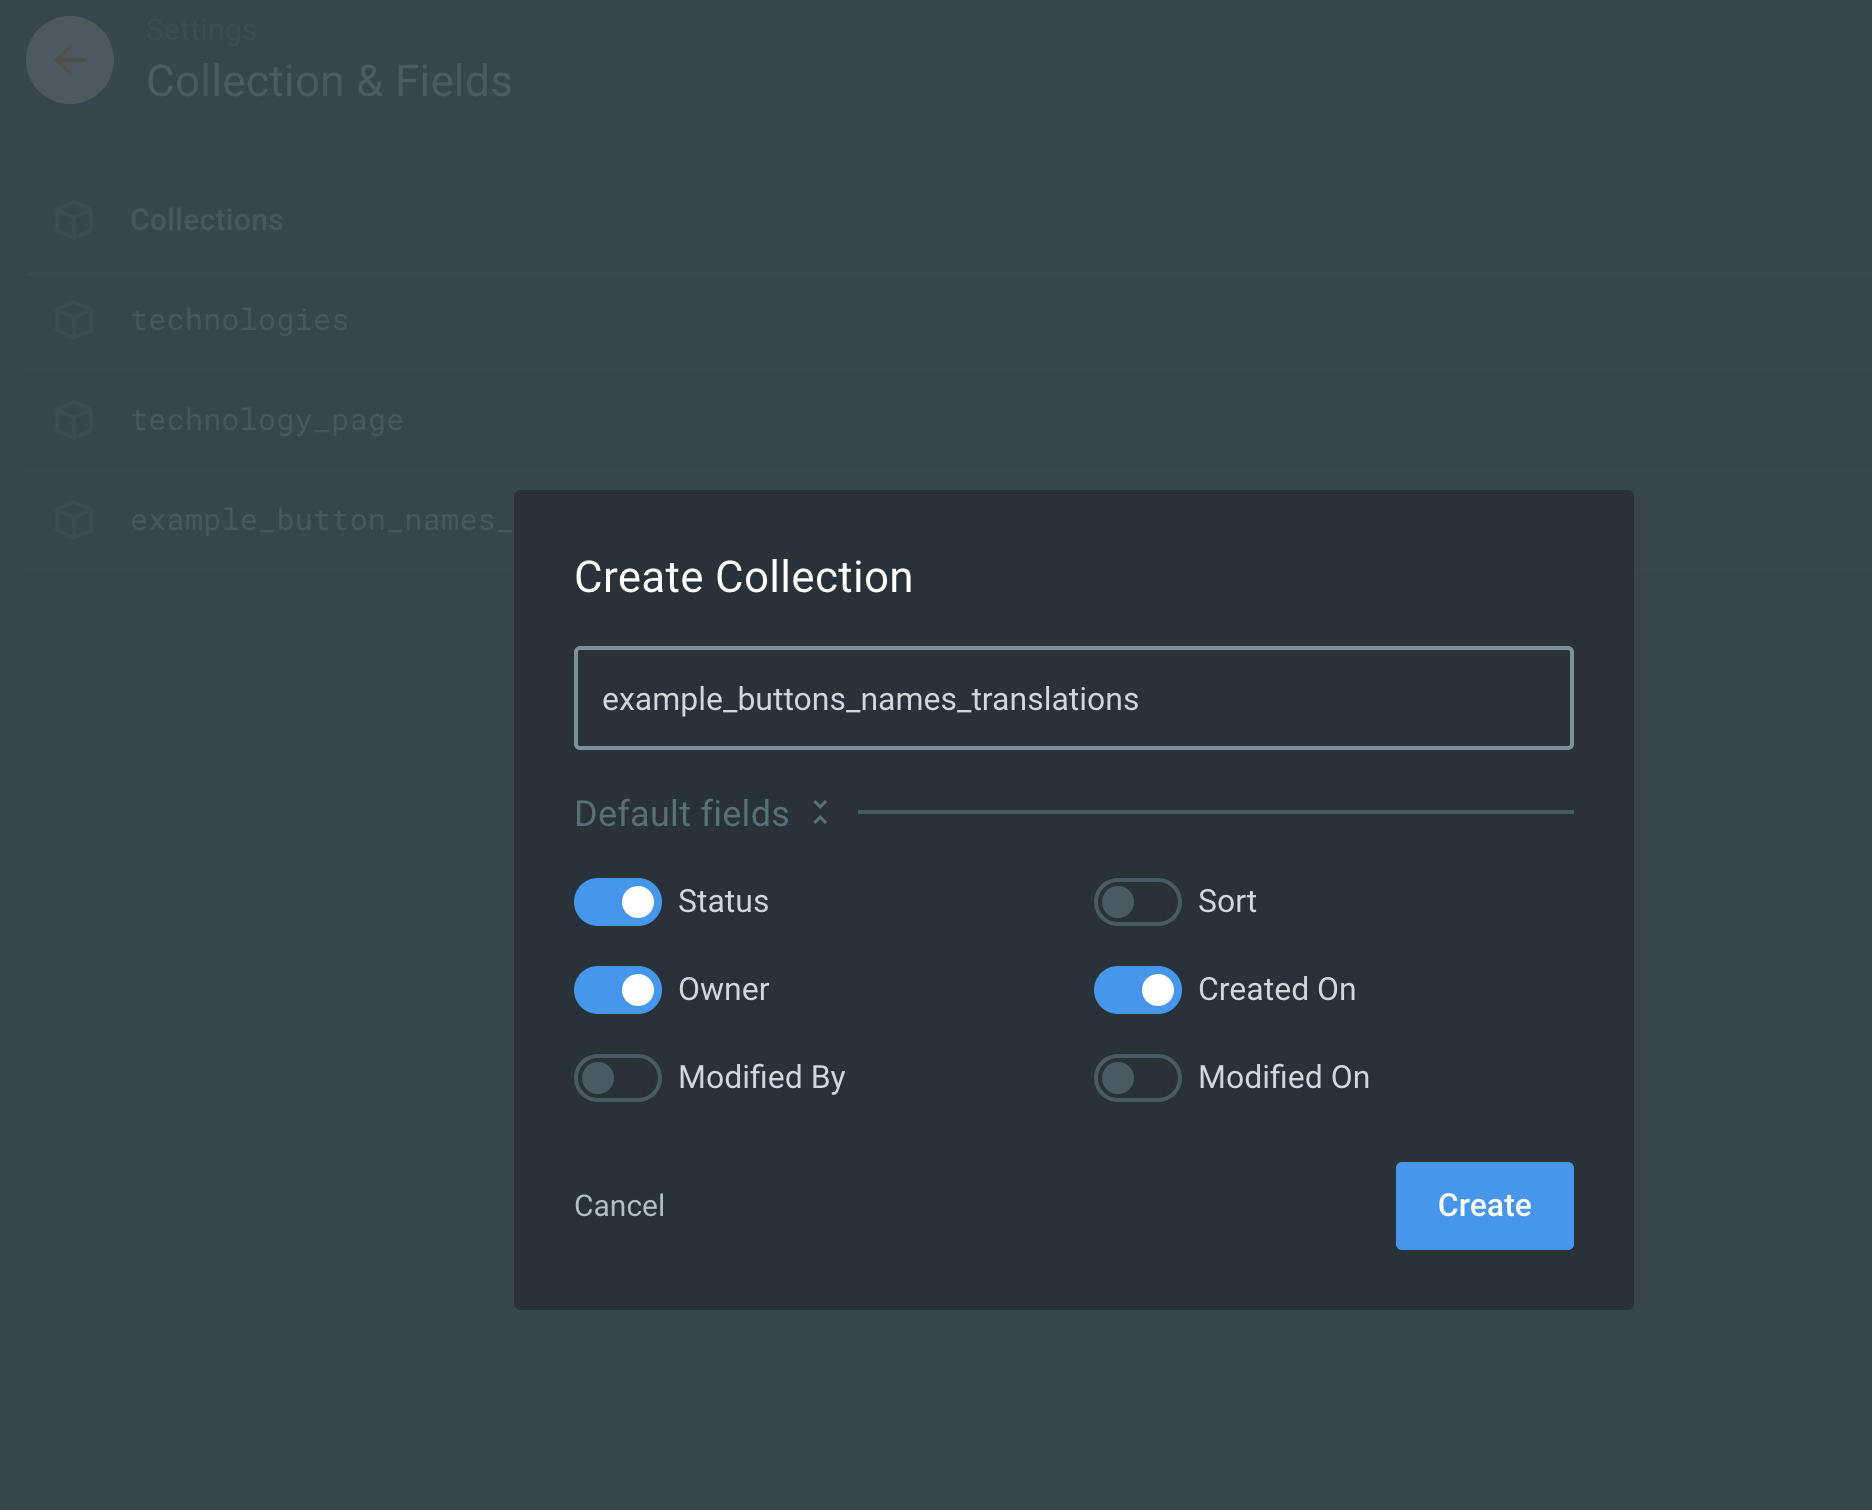
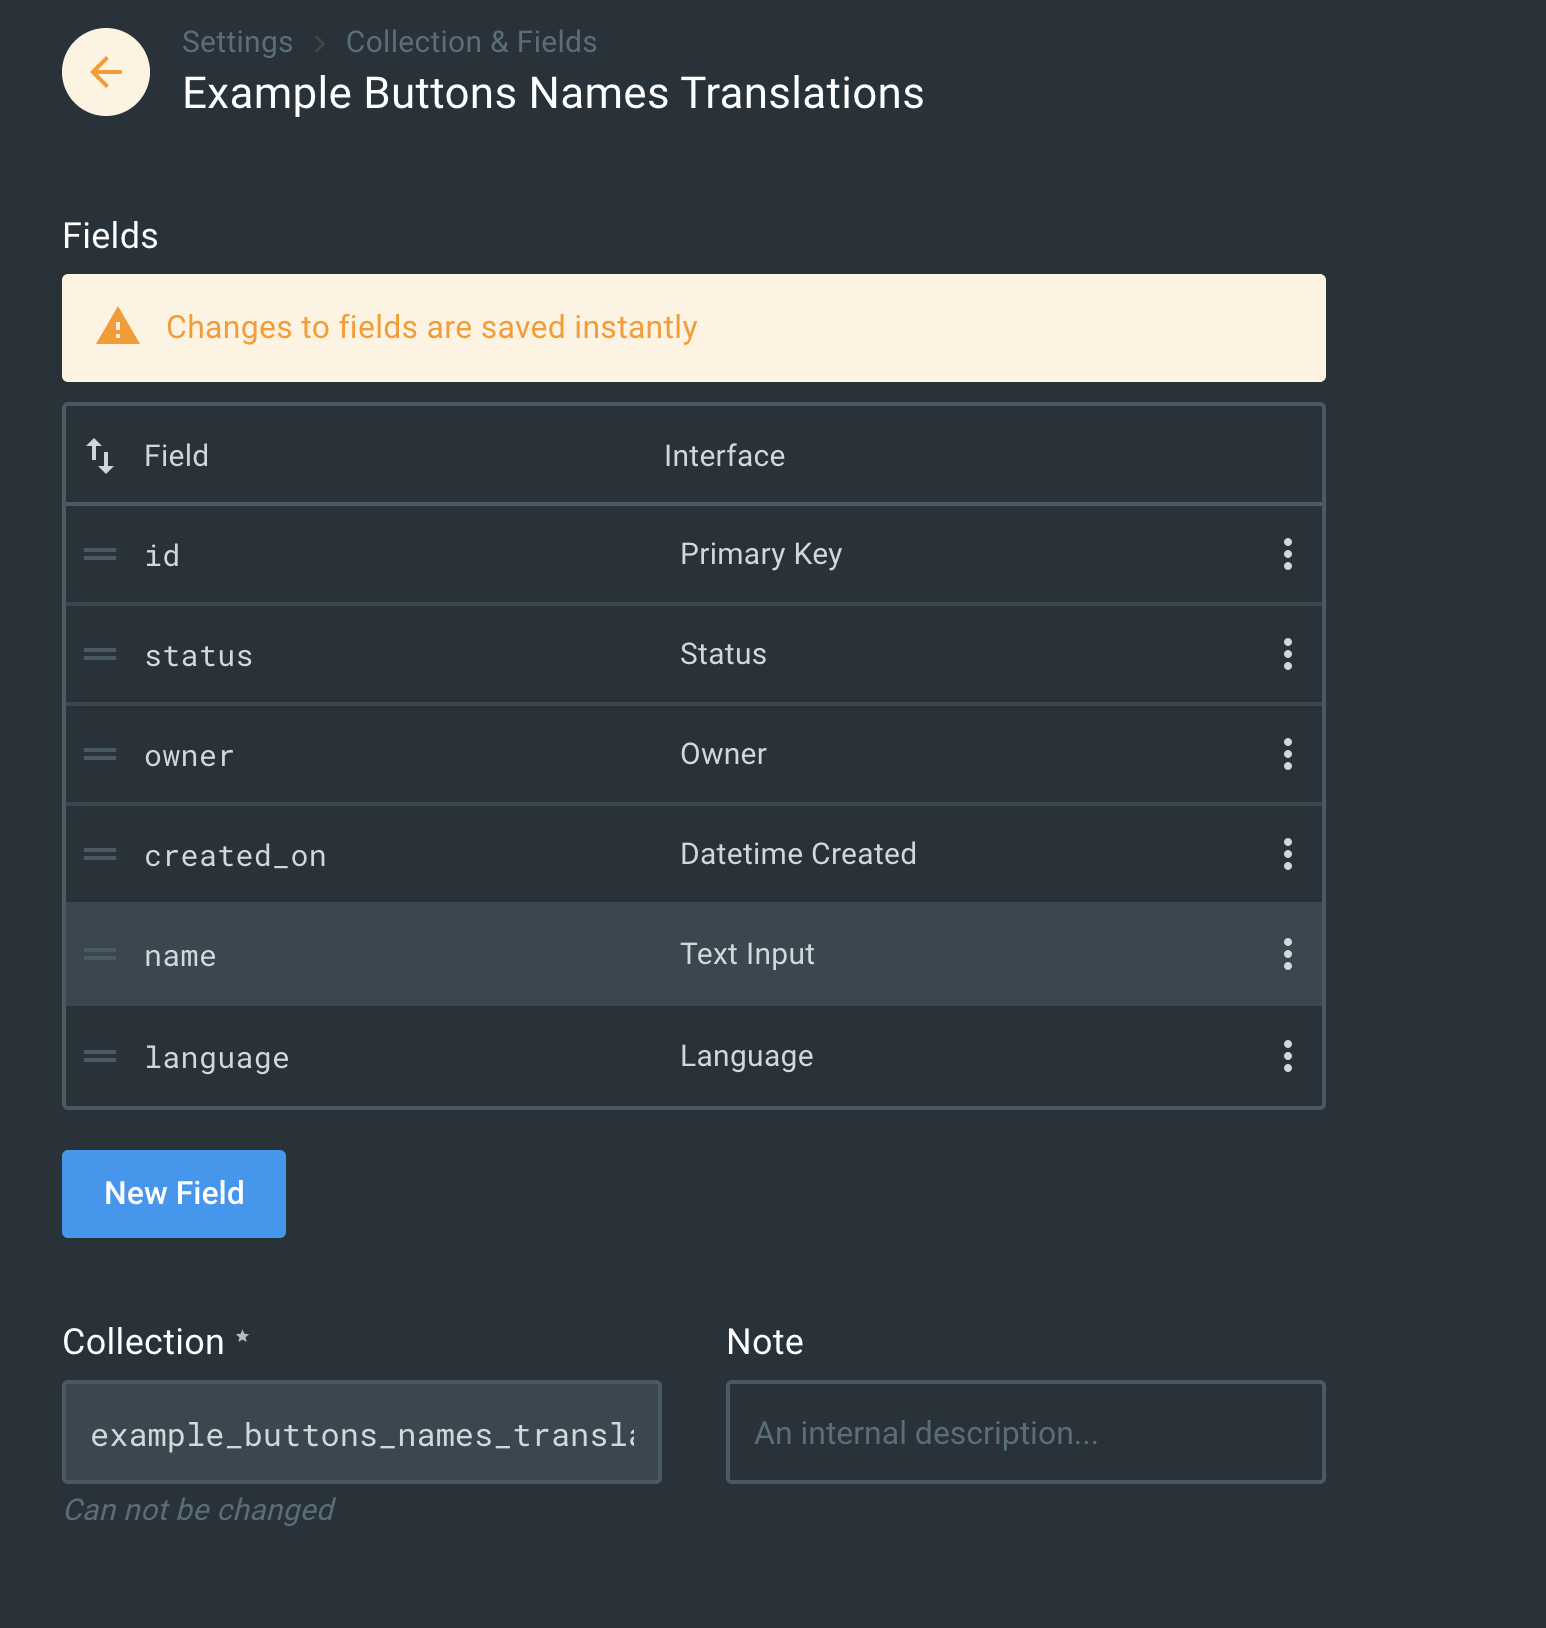
The next thing we need to do is add an ‘id’ field to the translation collection. It should be an integer type, and it’ll be used for pointing back to the button names collection item. Each button name item will have multiple “translation” items.

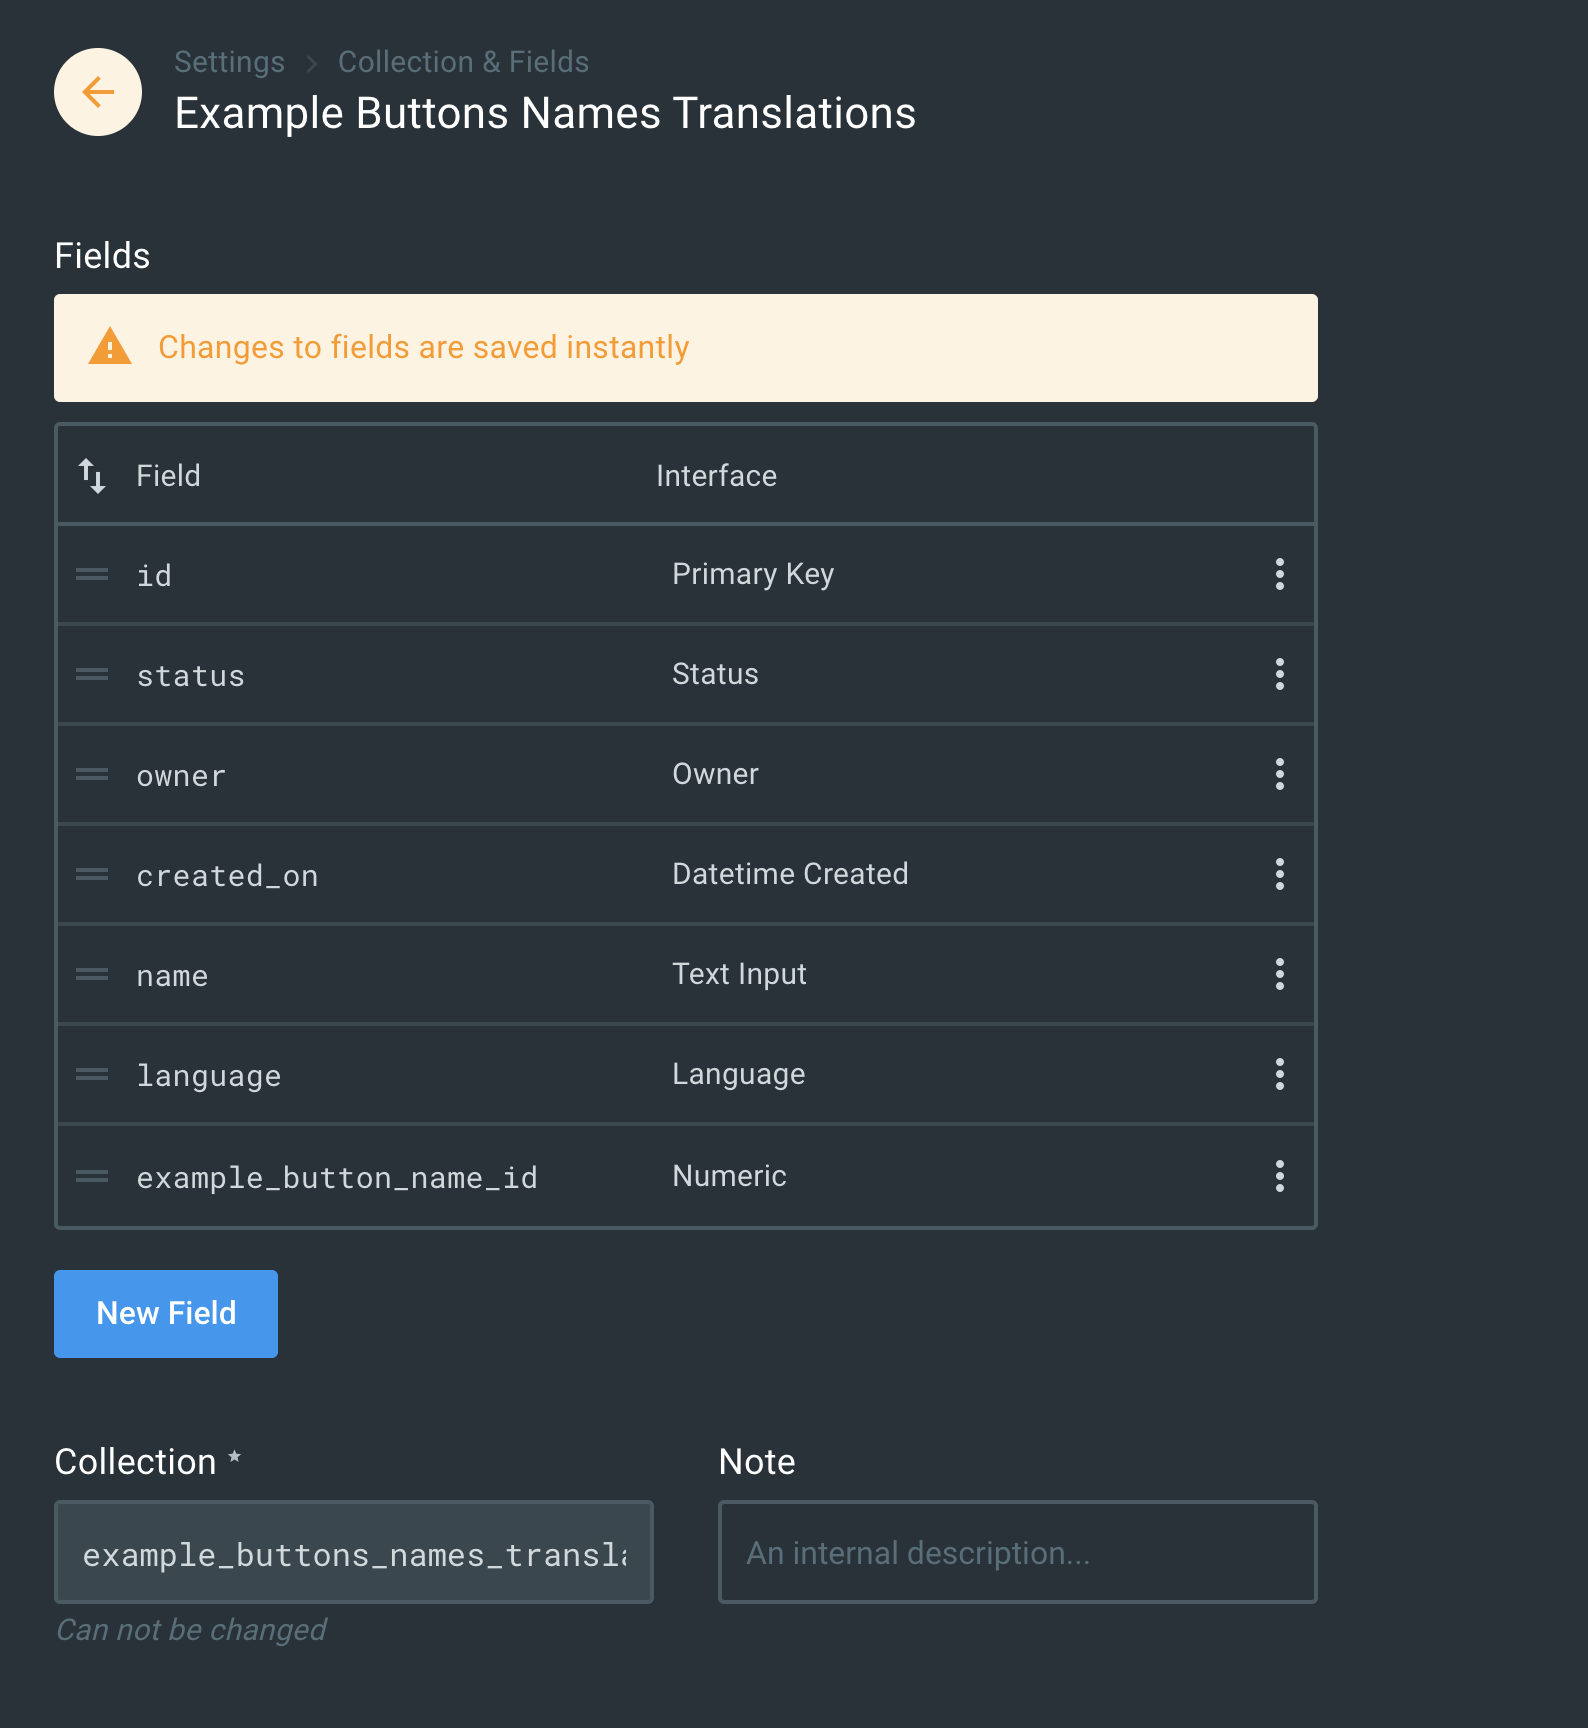
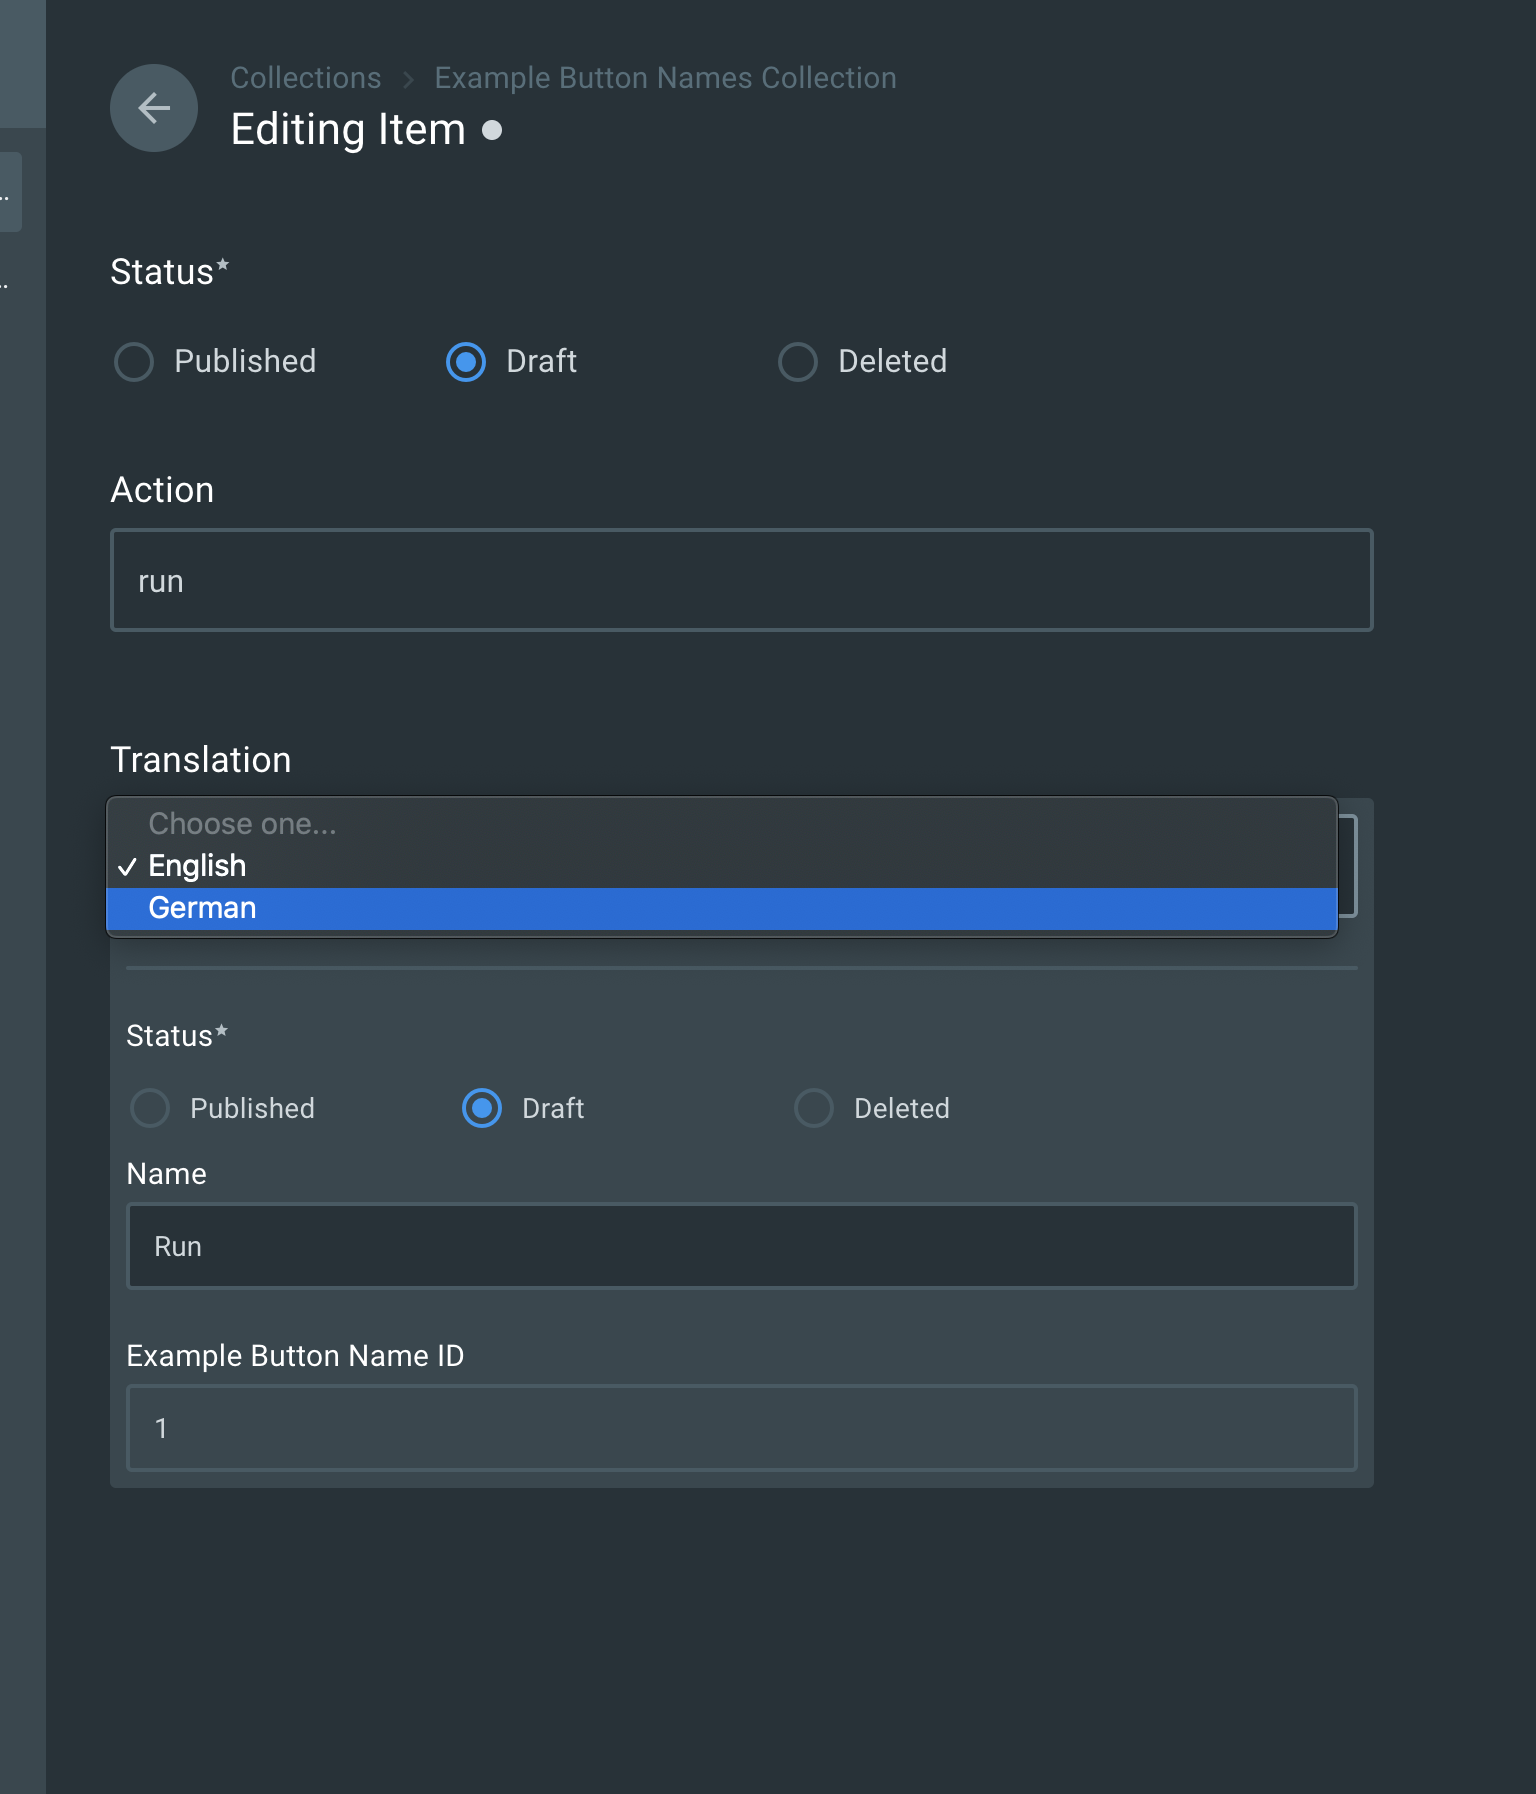
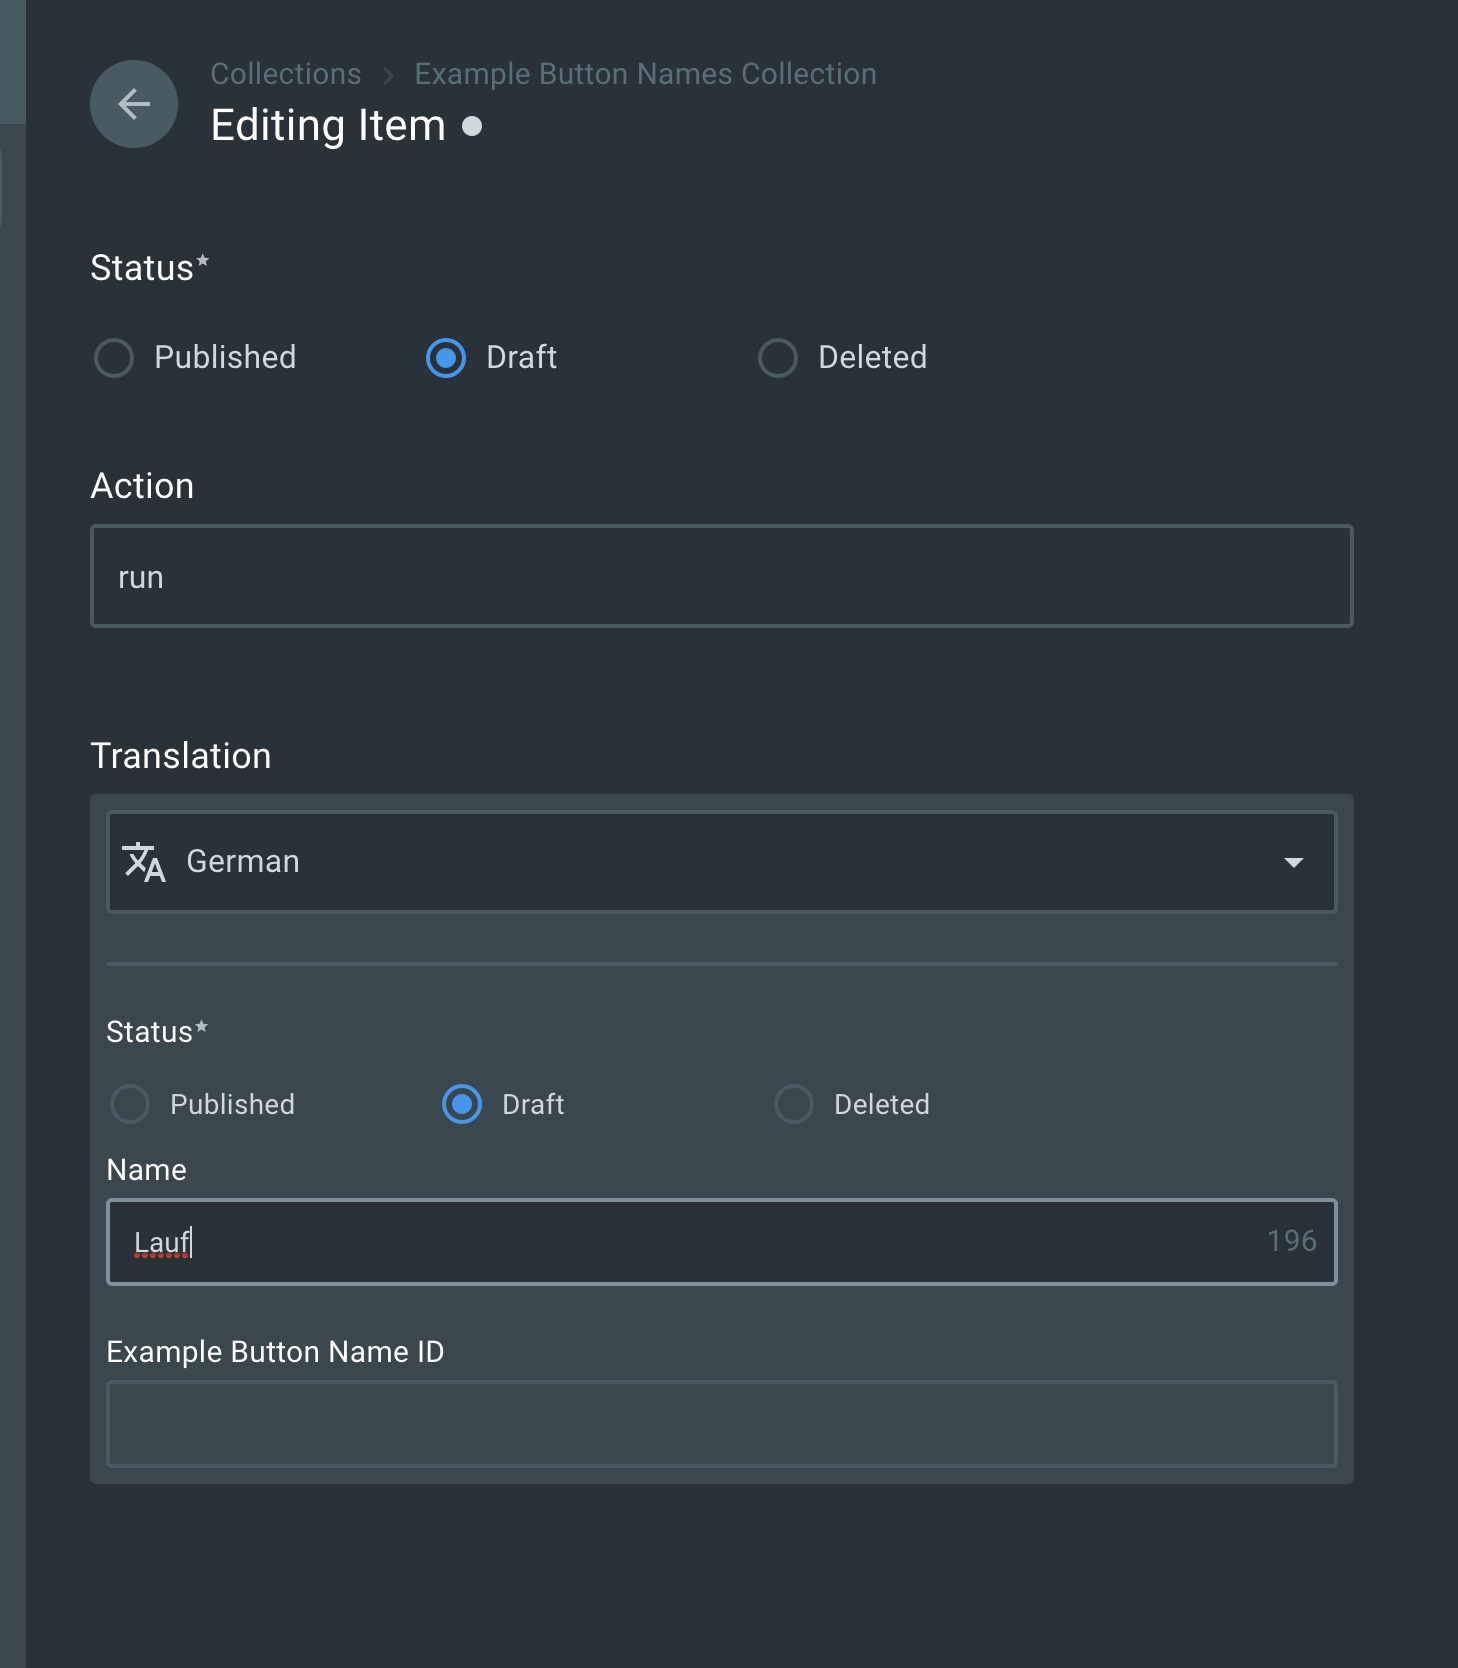
Let’s go back to the example_buttons_names collection and add a “Translation” field to it
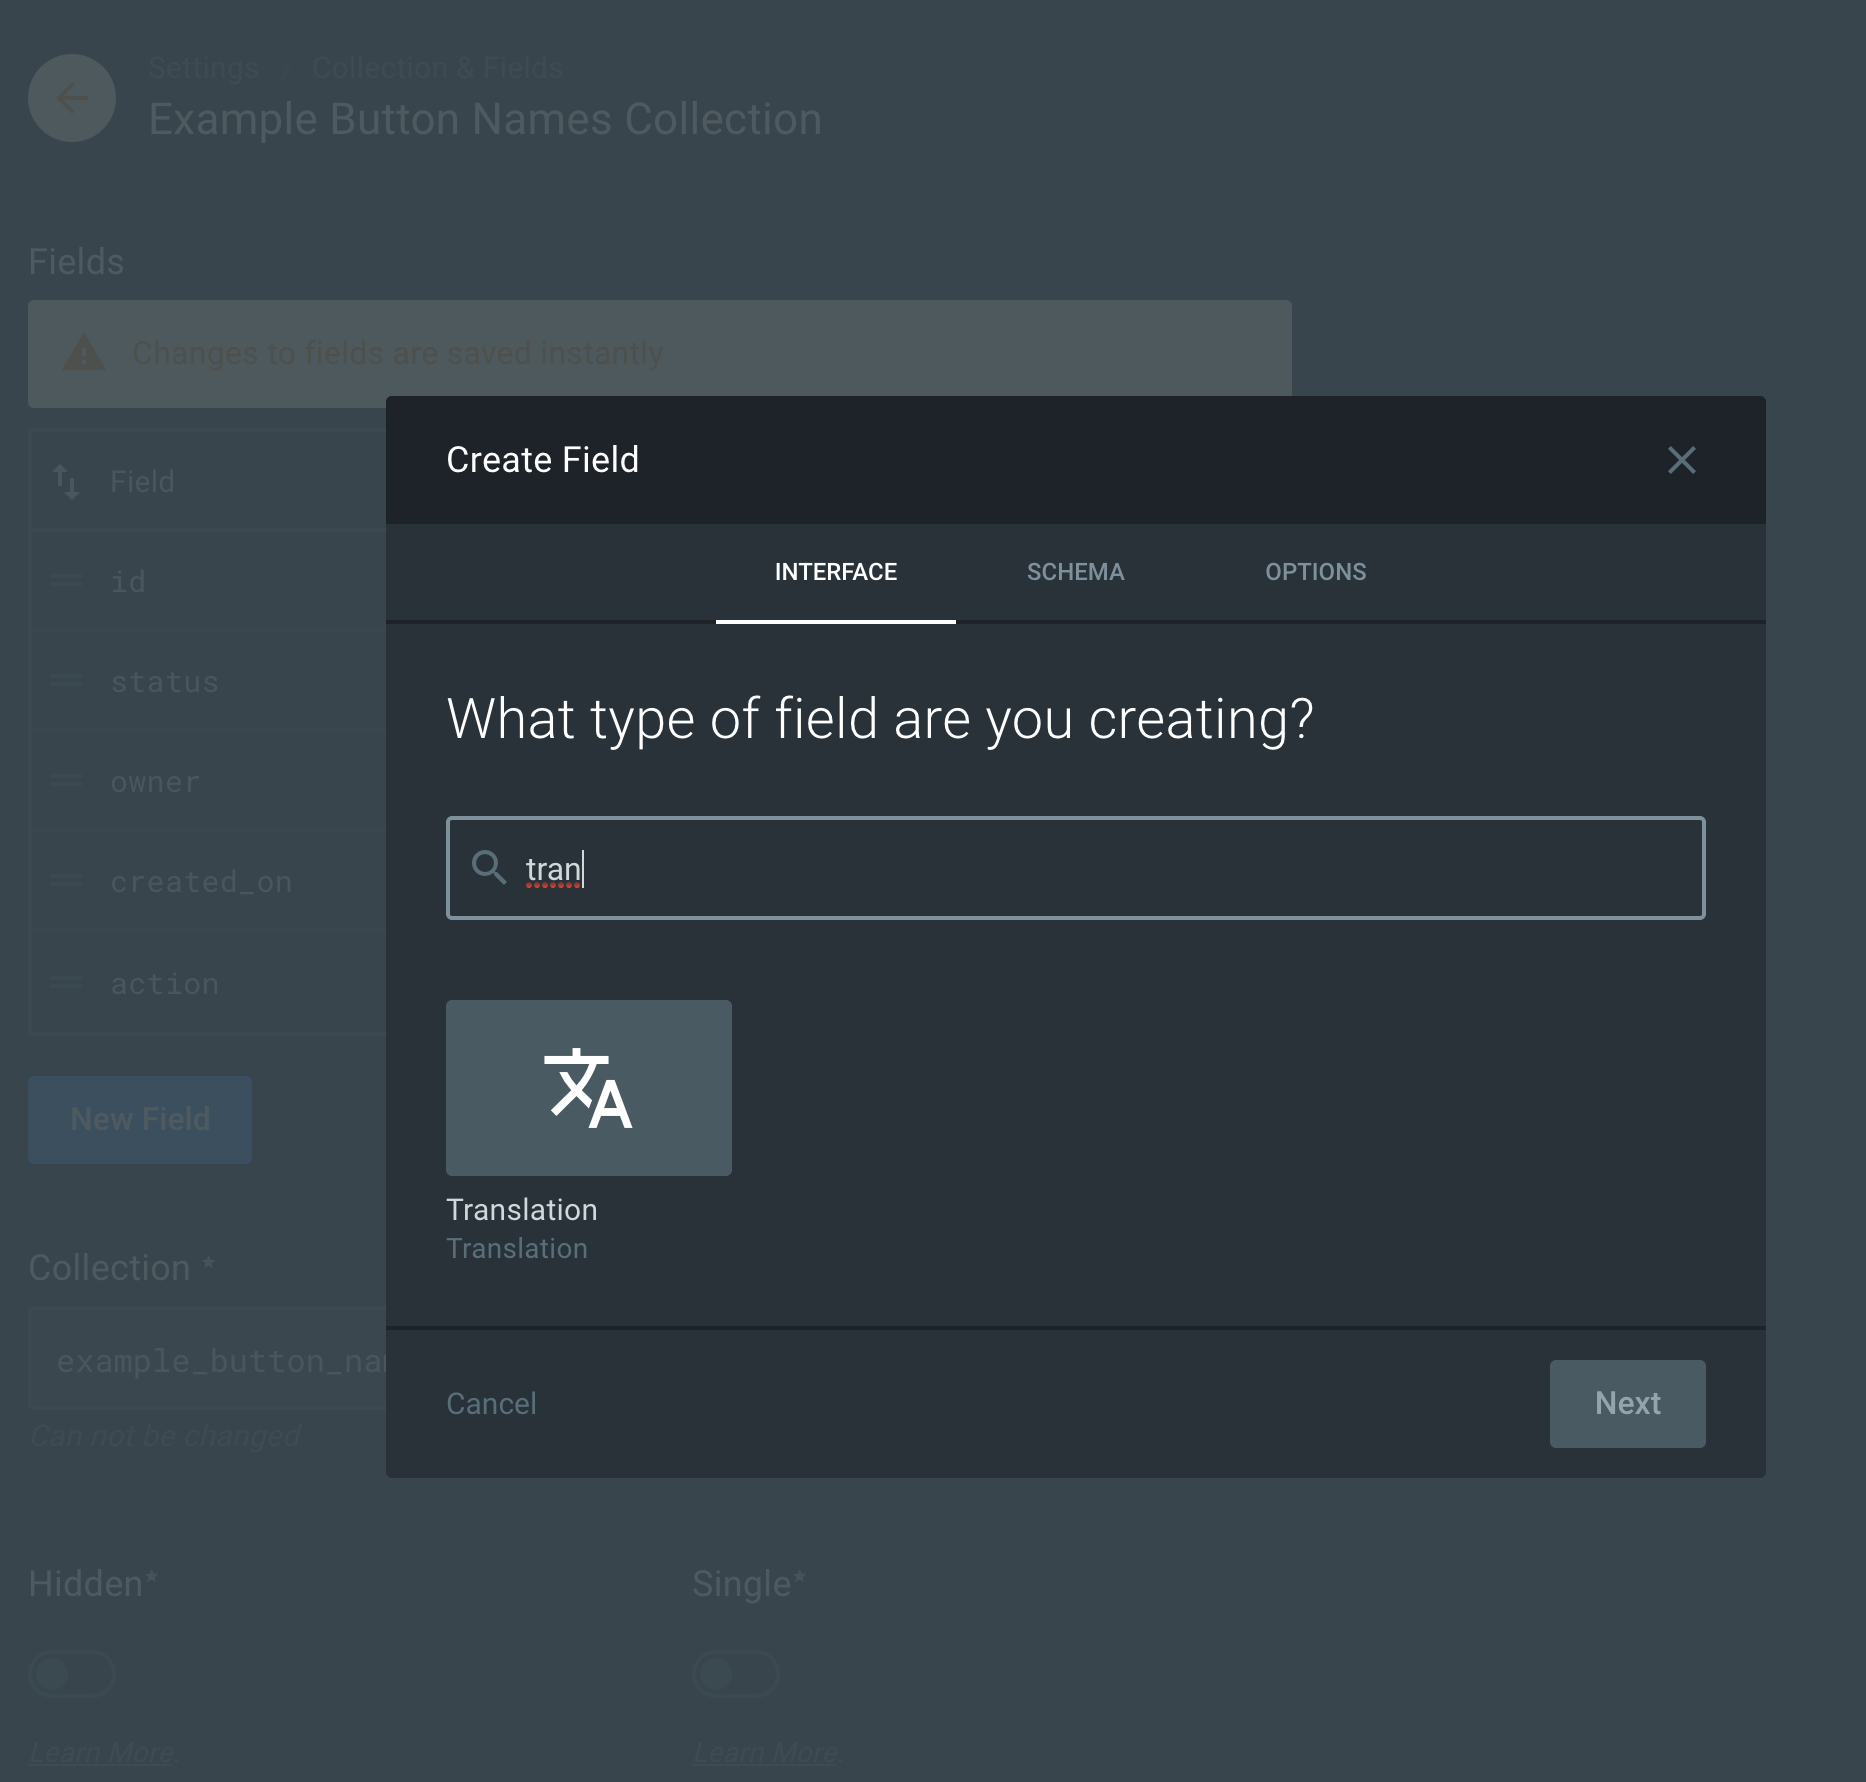
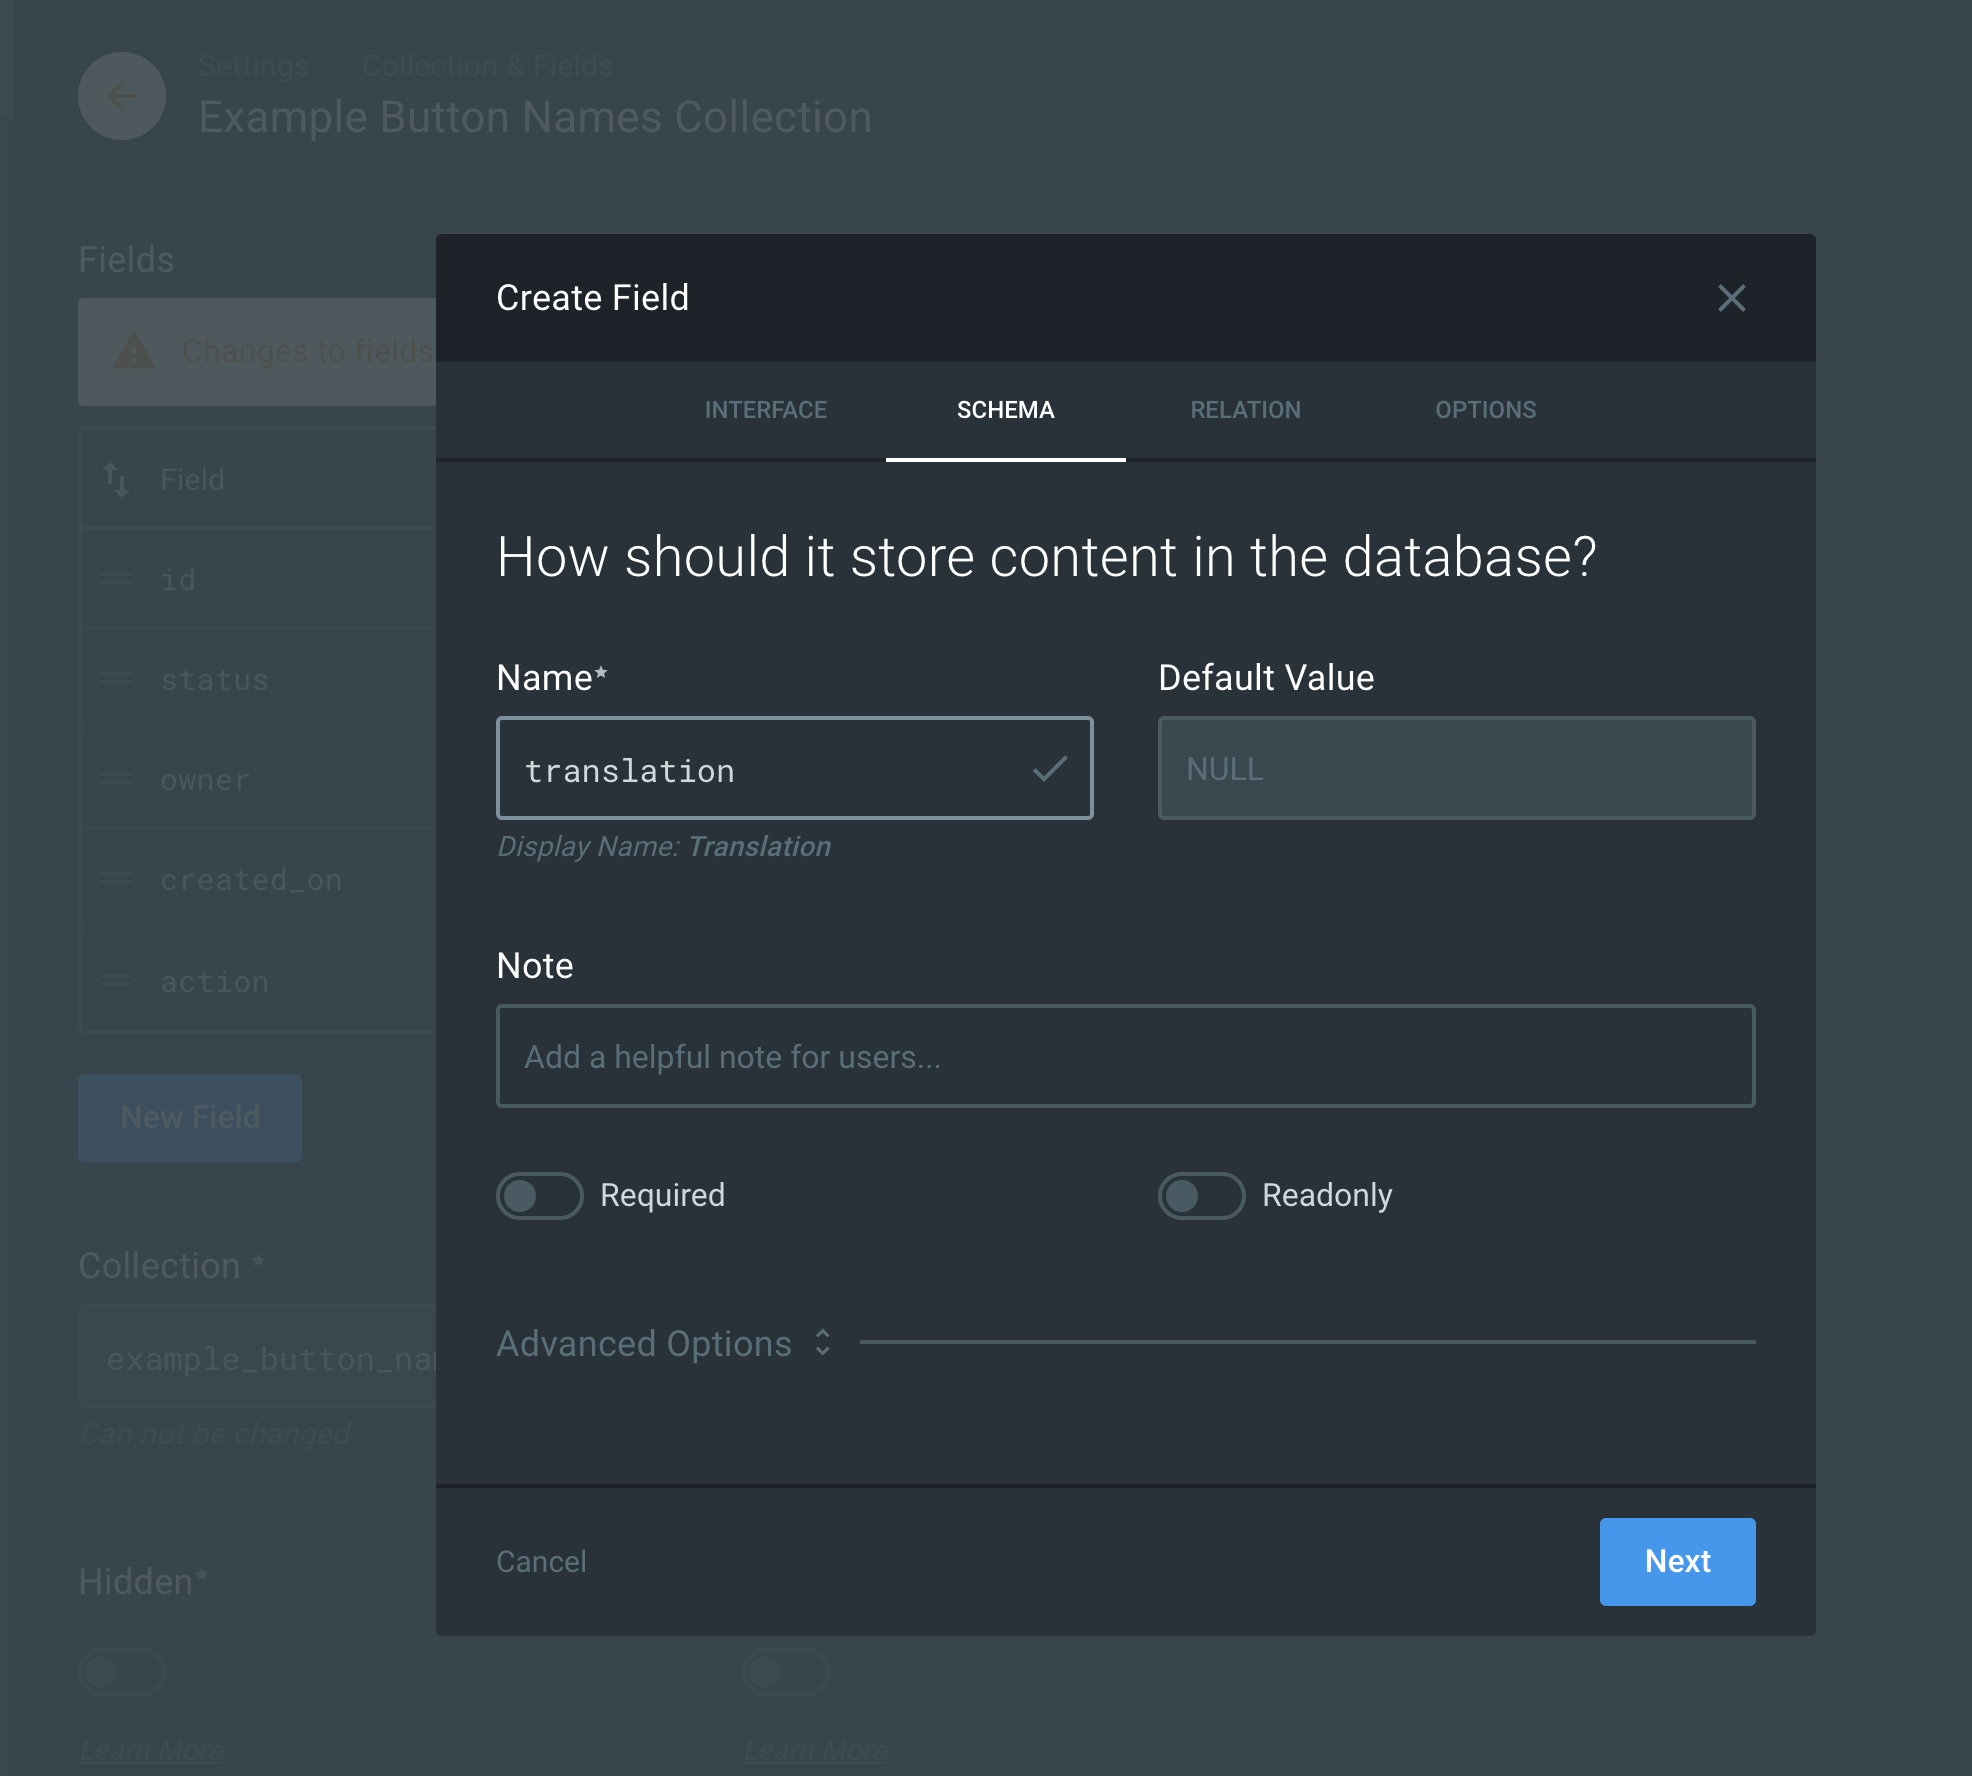
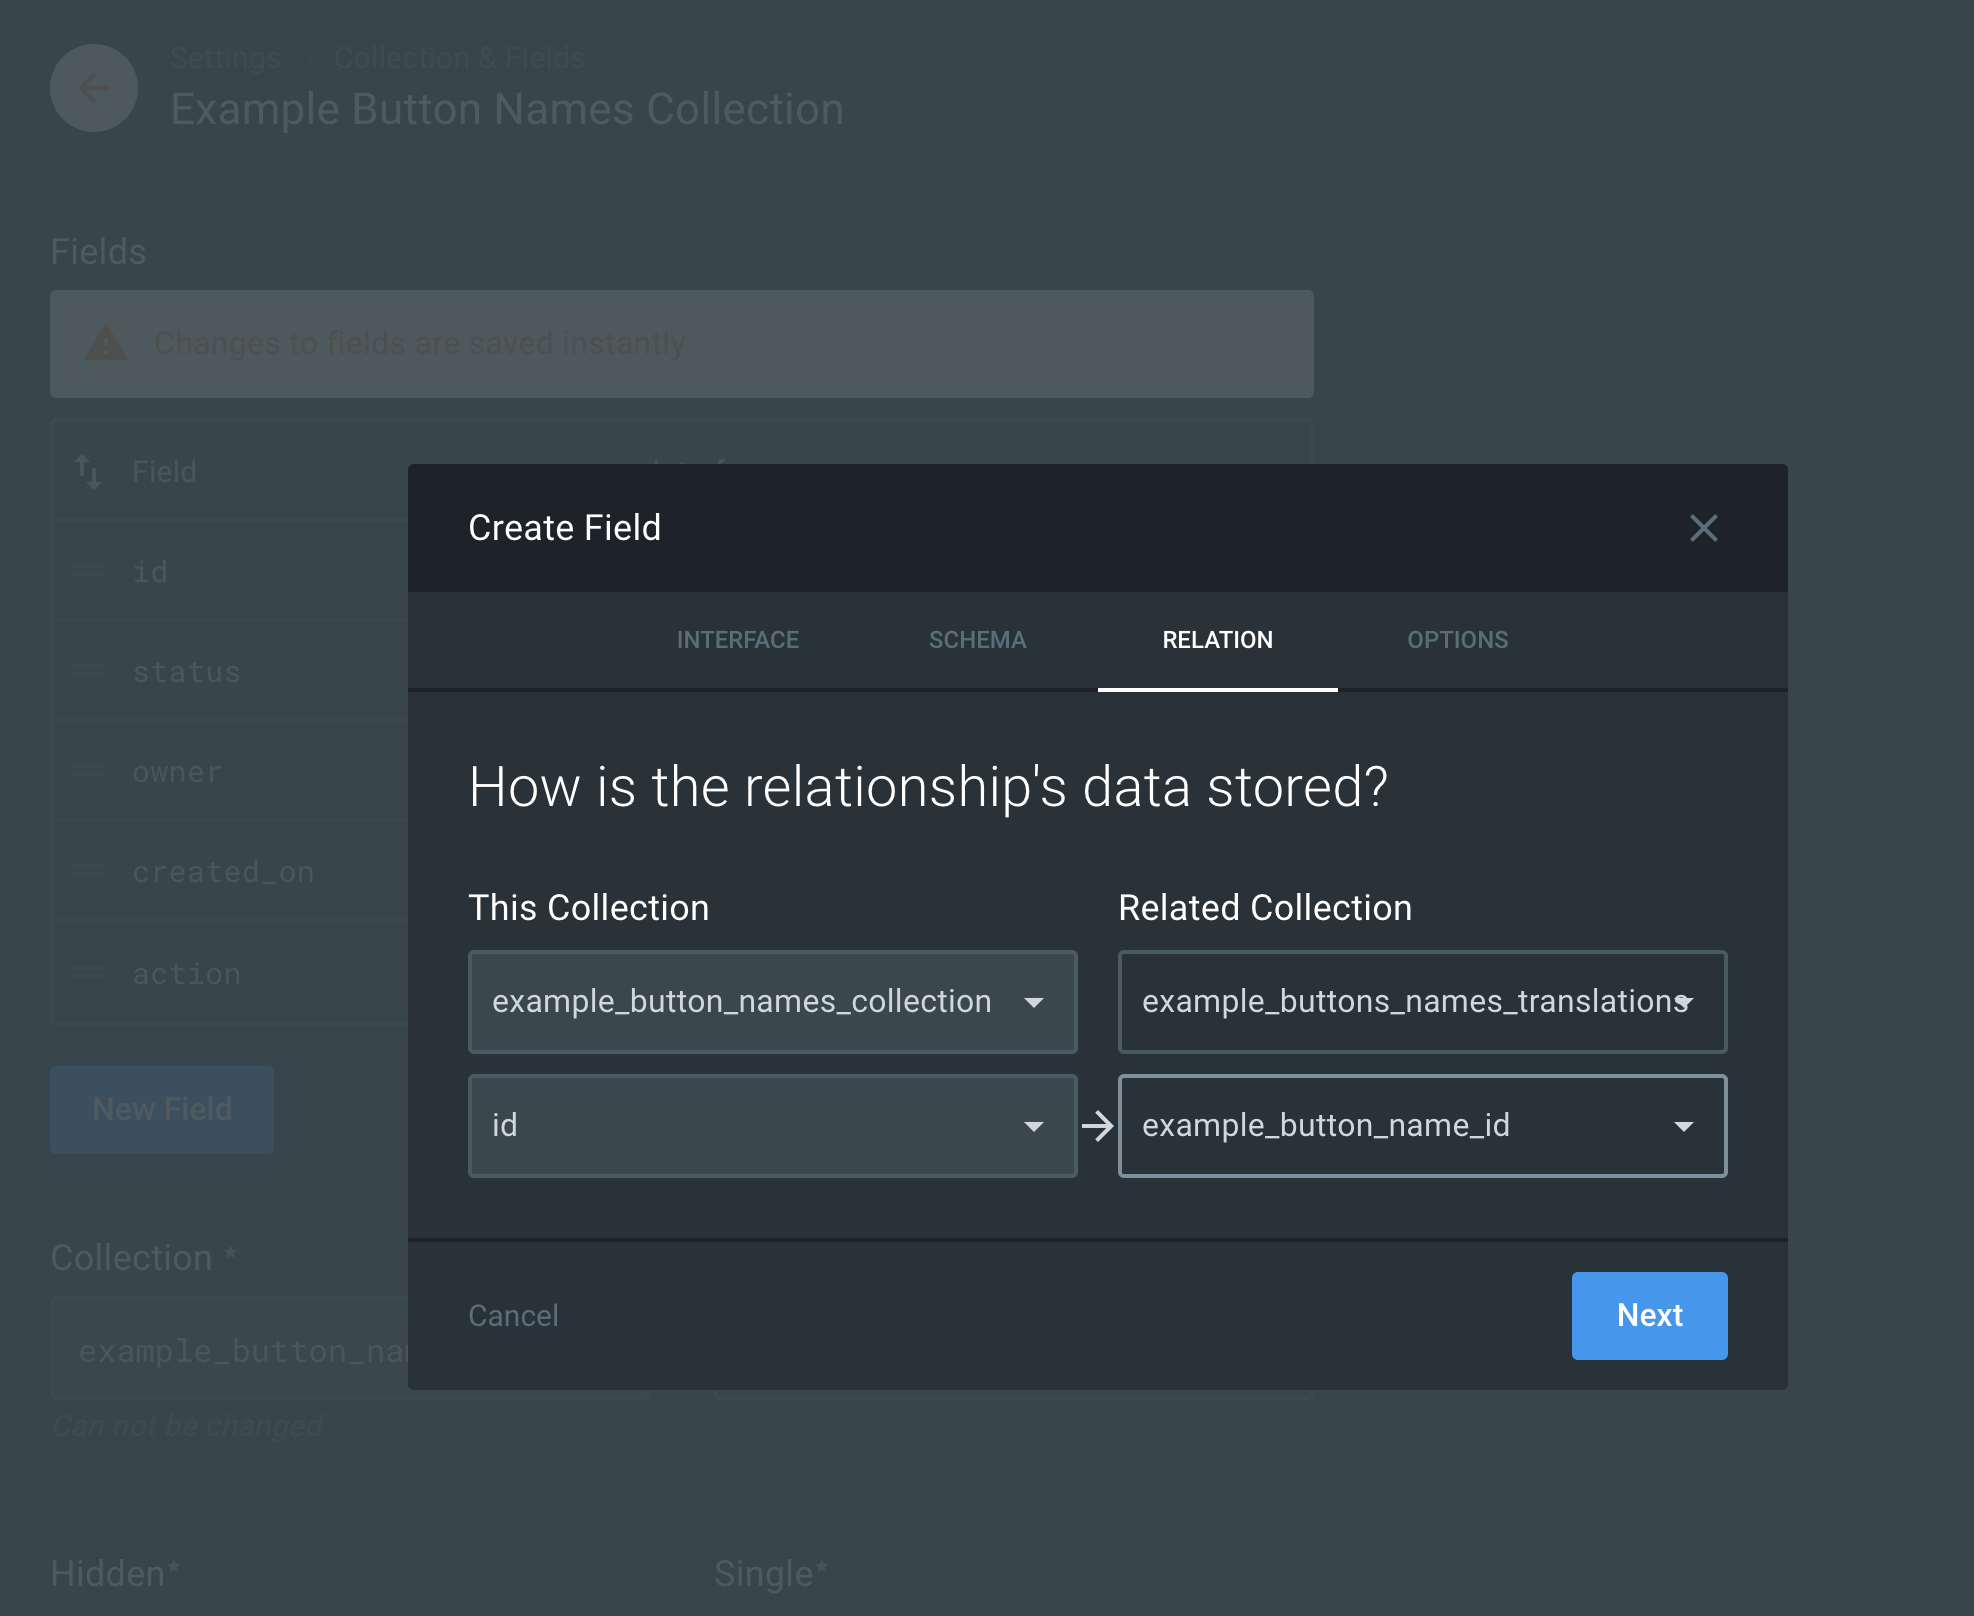
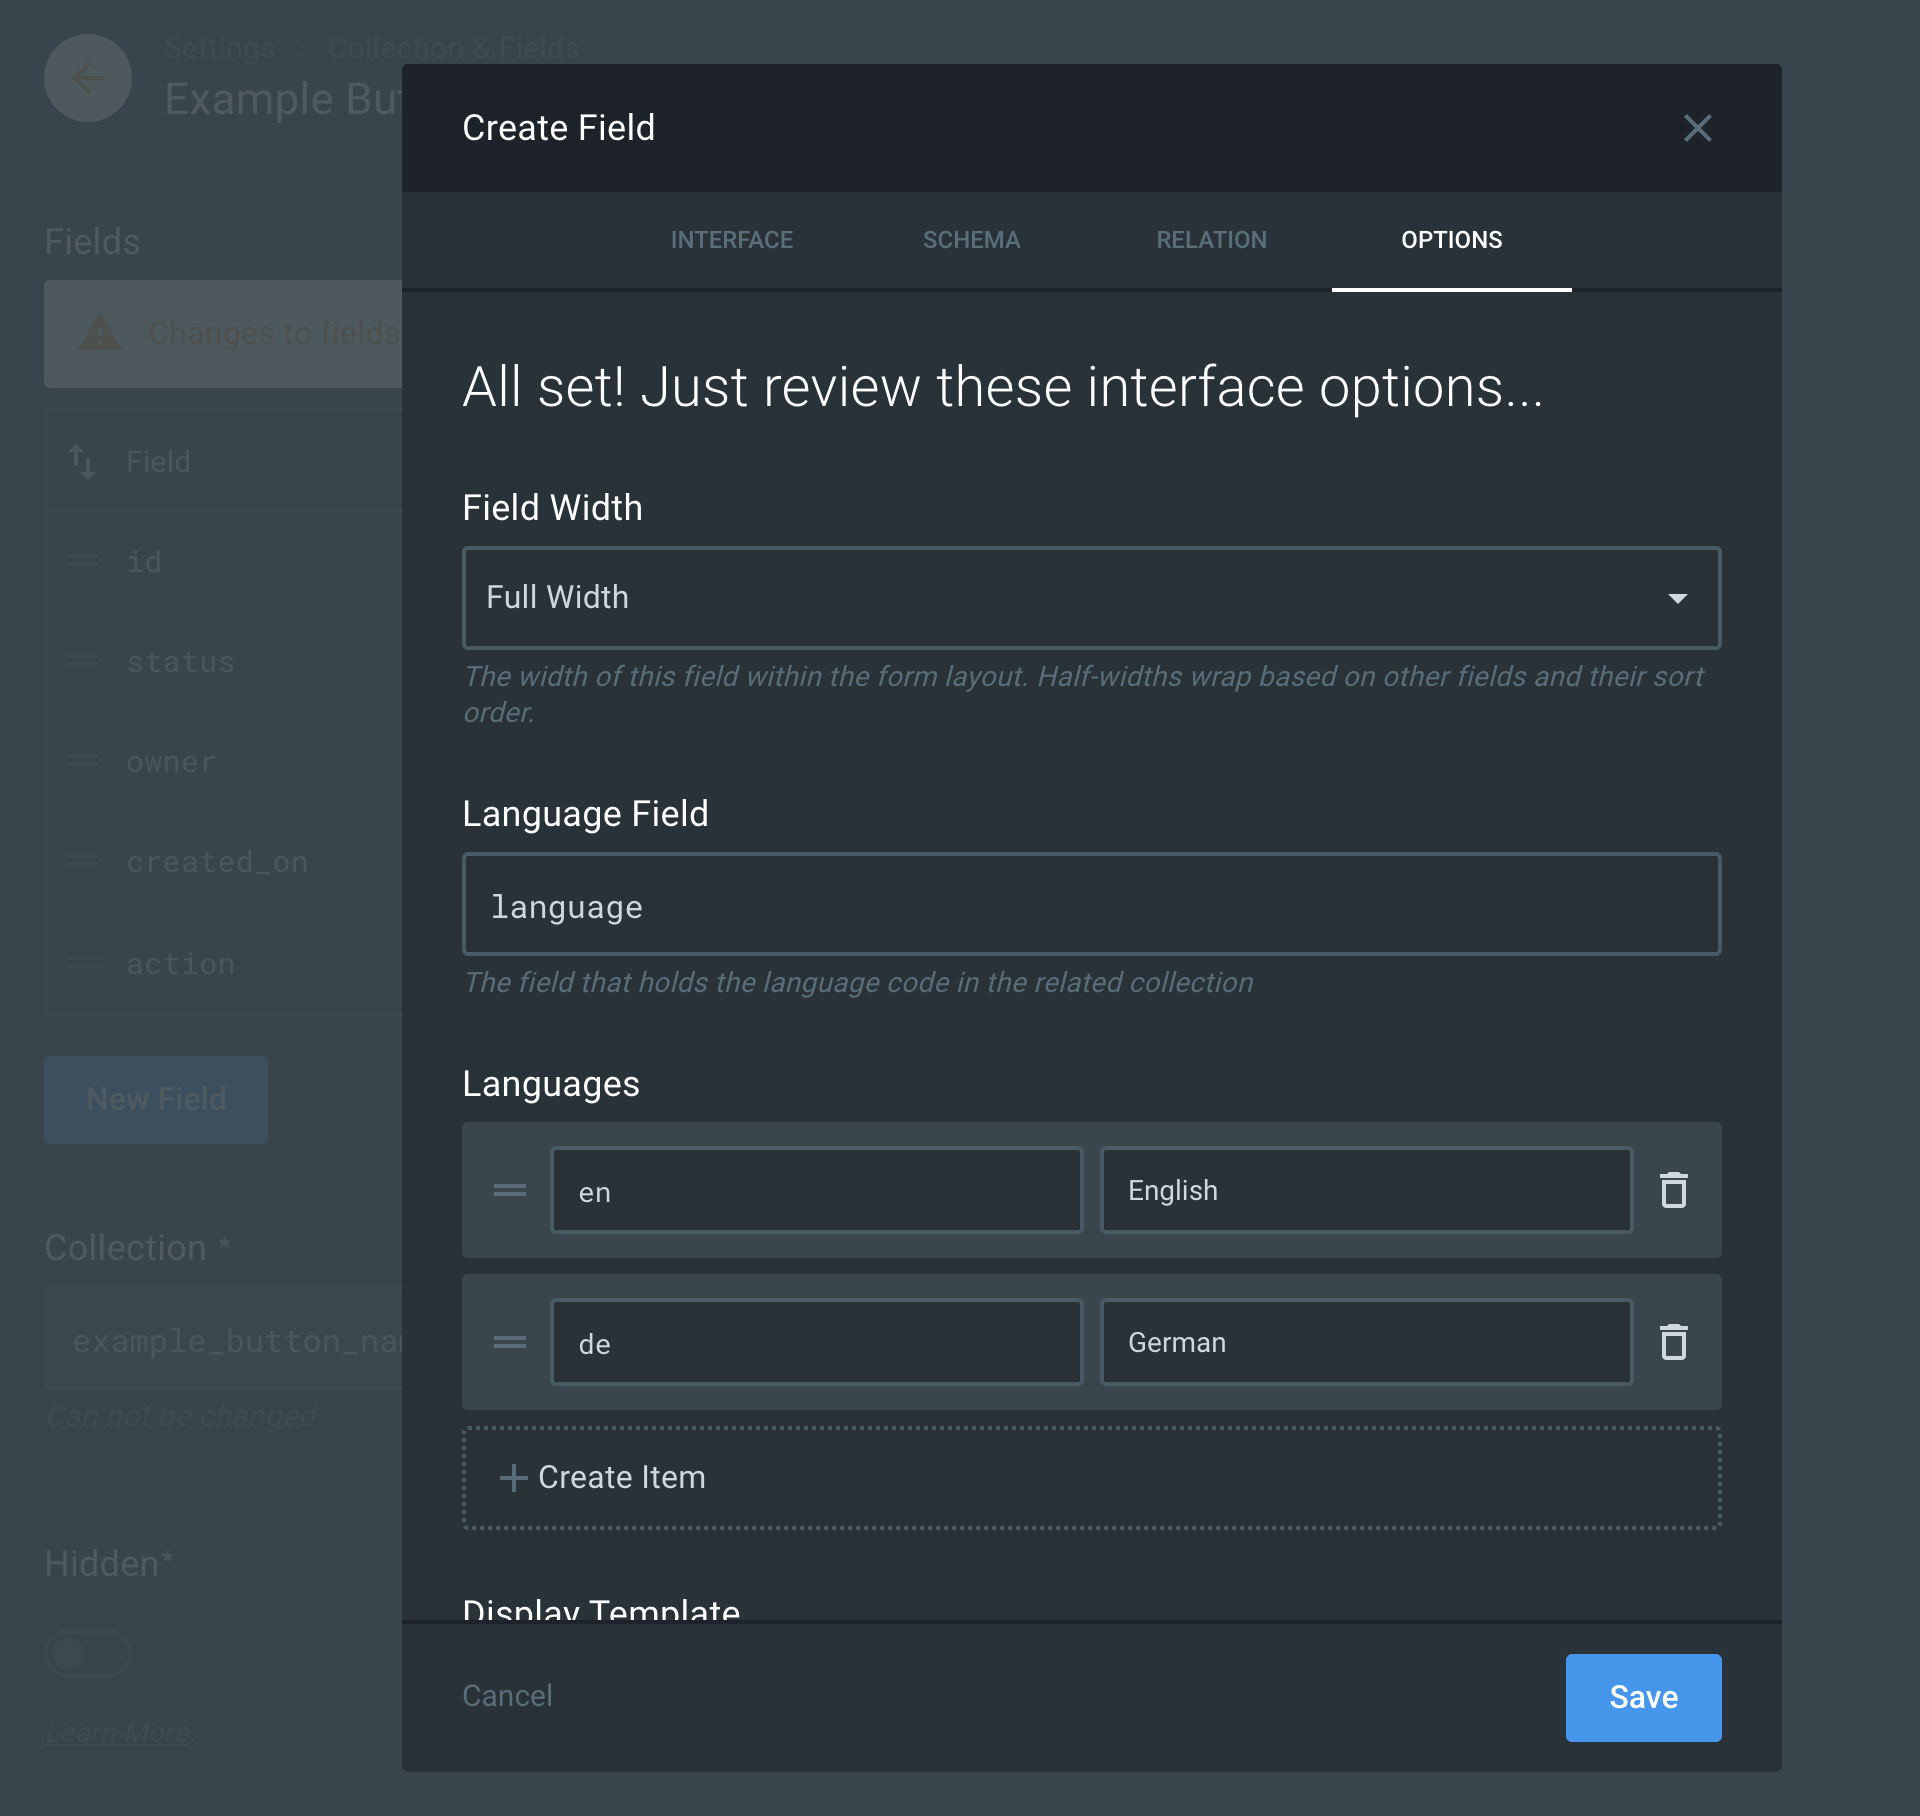
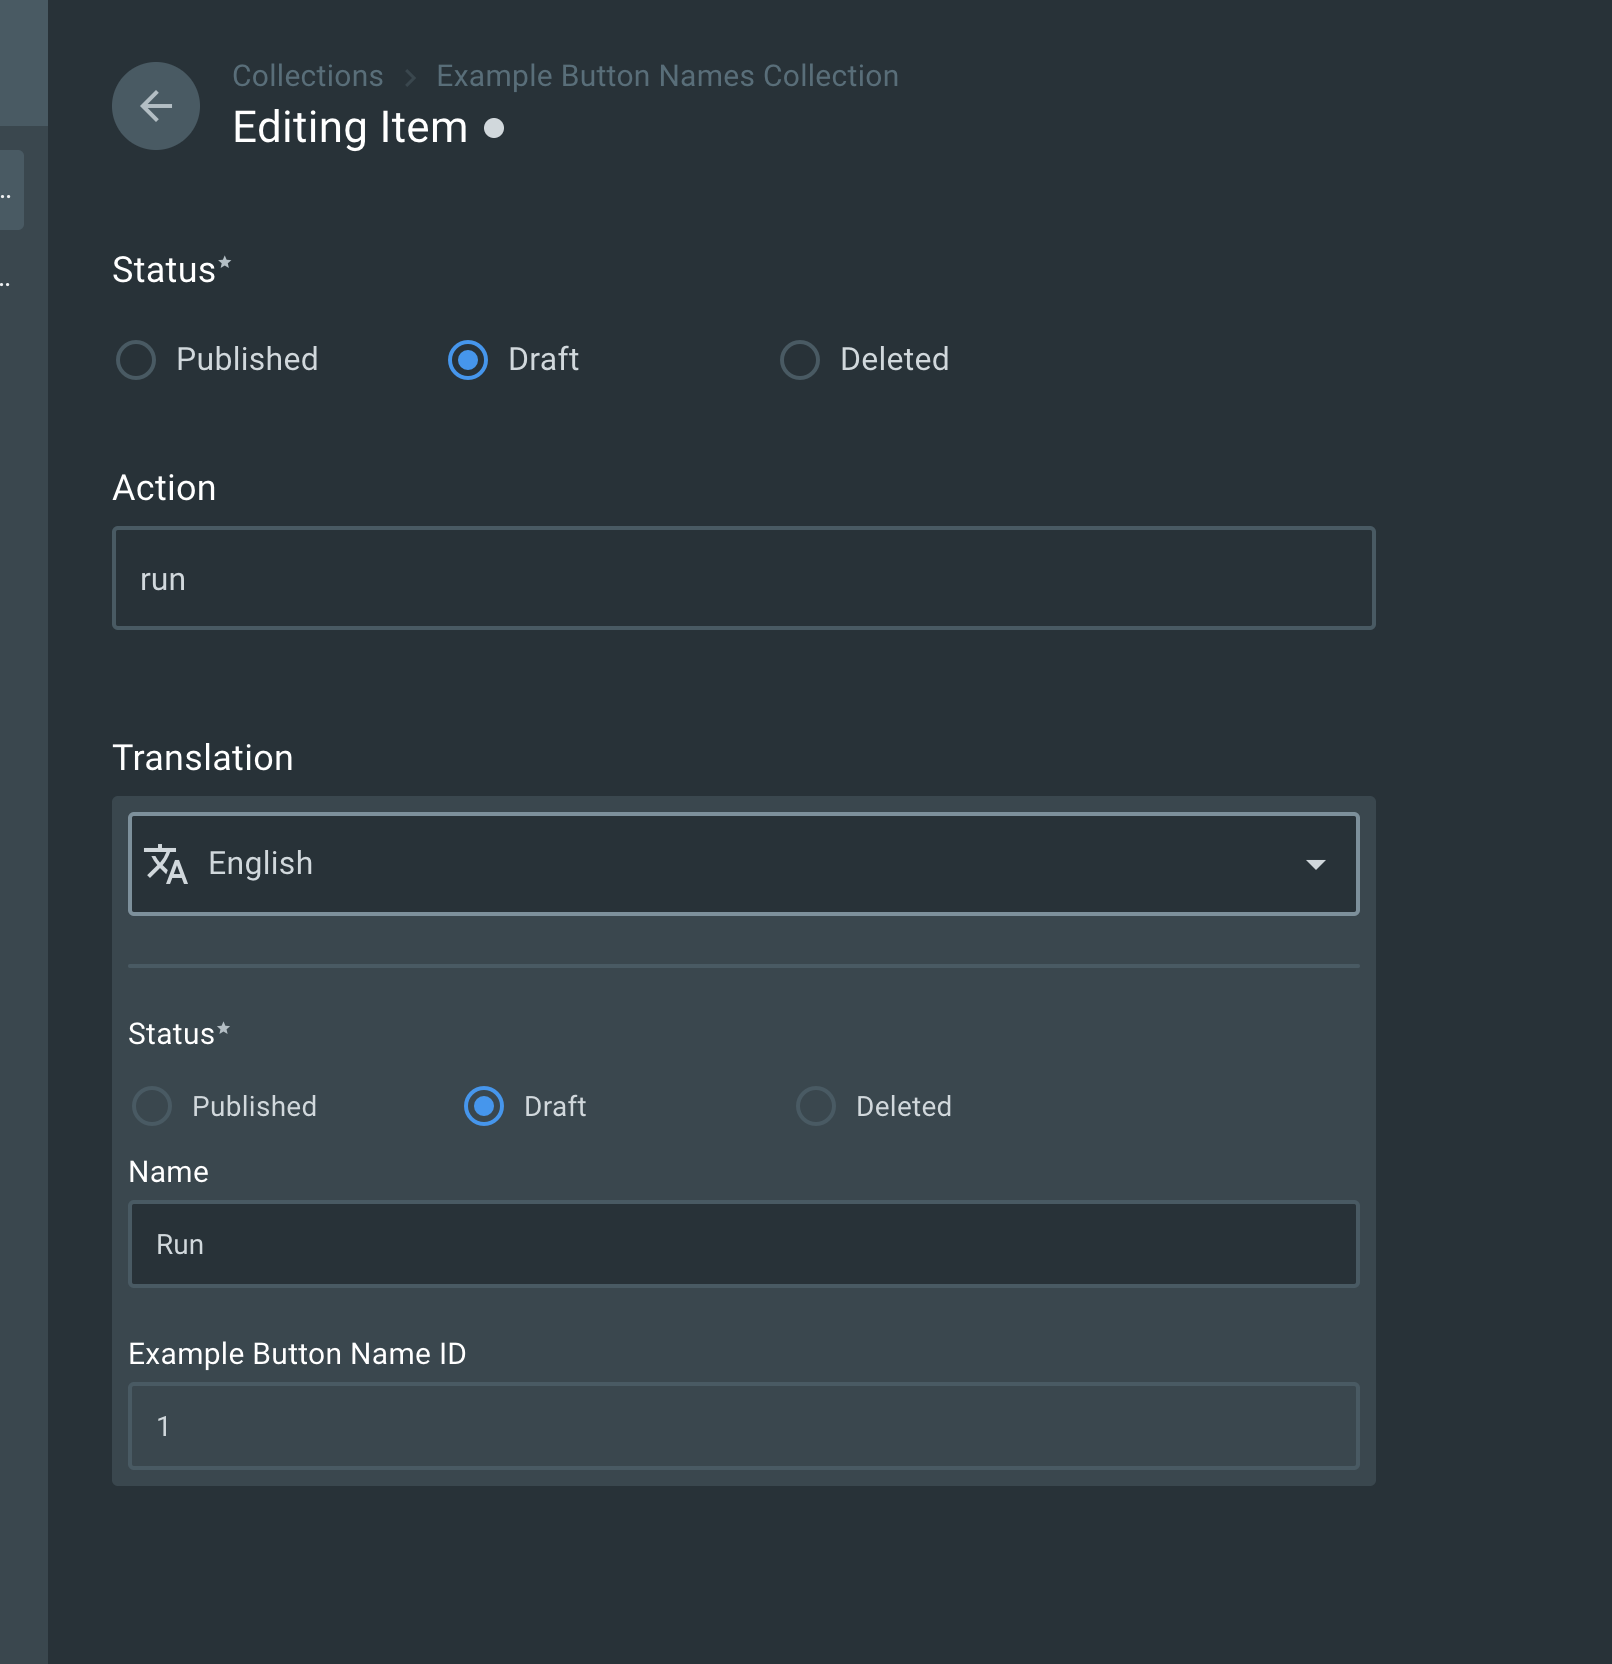
Make sure you also set the “language” field so that the Directus UI knows exactly where it should store the different languages. You end up with a fully functional UI and the ability to store all the languages you’ve decided to support.
Query data
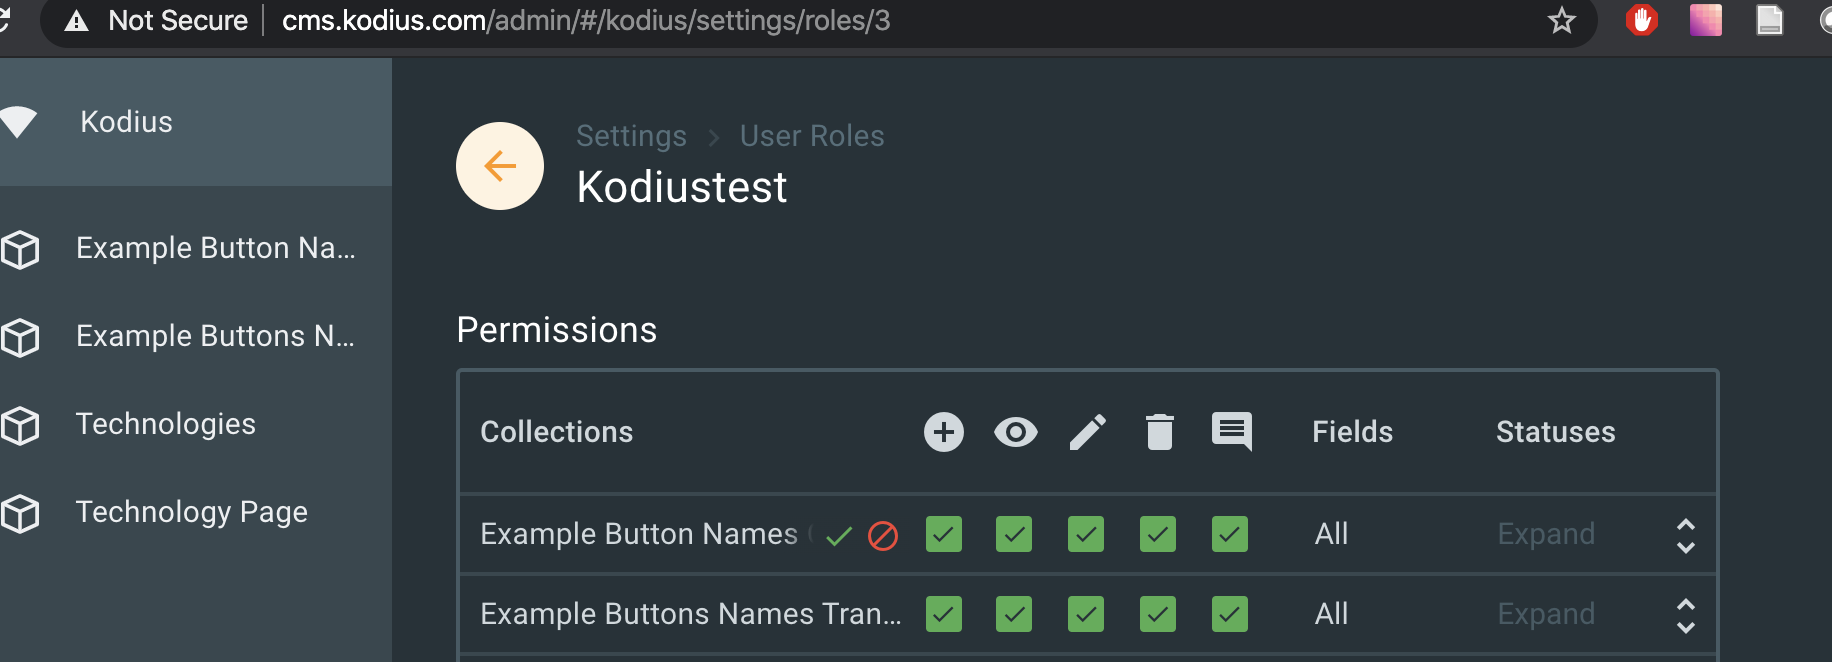
If you are not using the admin user to access data, make sure you give proper rights to your user.
Turn off gridsome and change config to fetch new data
 {
      use: "gridsome-source-directus",
      options: {
        apiUrl: "http://cms.kodius.com",
        project: "kodius",
        email: "apiuser@kodius.com",
        password: "Ruda,actv",
        collections: [
          {
            name: "example_button_names_collection",
            fields: "*"
          },
          {
            name: "example_buttons_names_translations",
            fields: "*"
          }
        ]
      }
Let’s fire up Gridsome and check it out:
gridsome developYou can now explore this:
http://localhost:8080/___explore
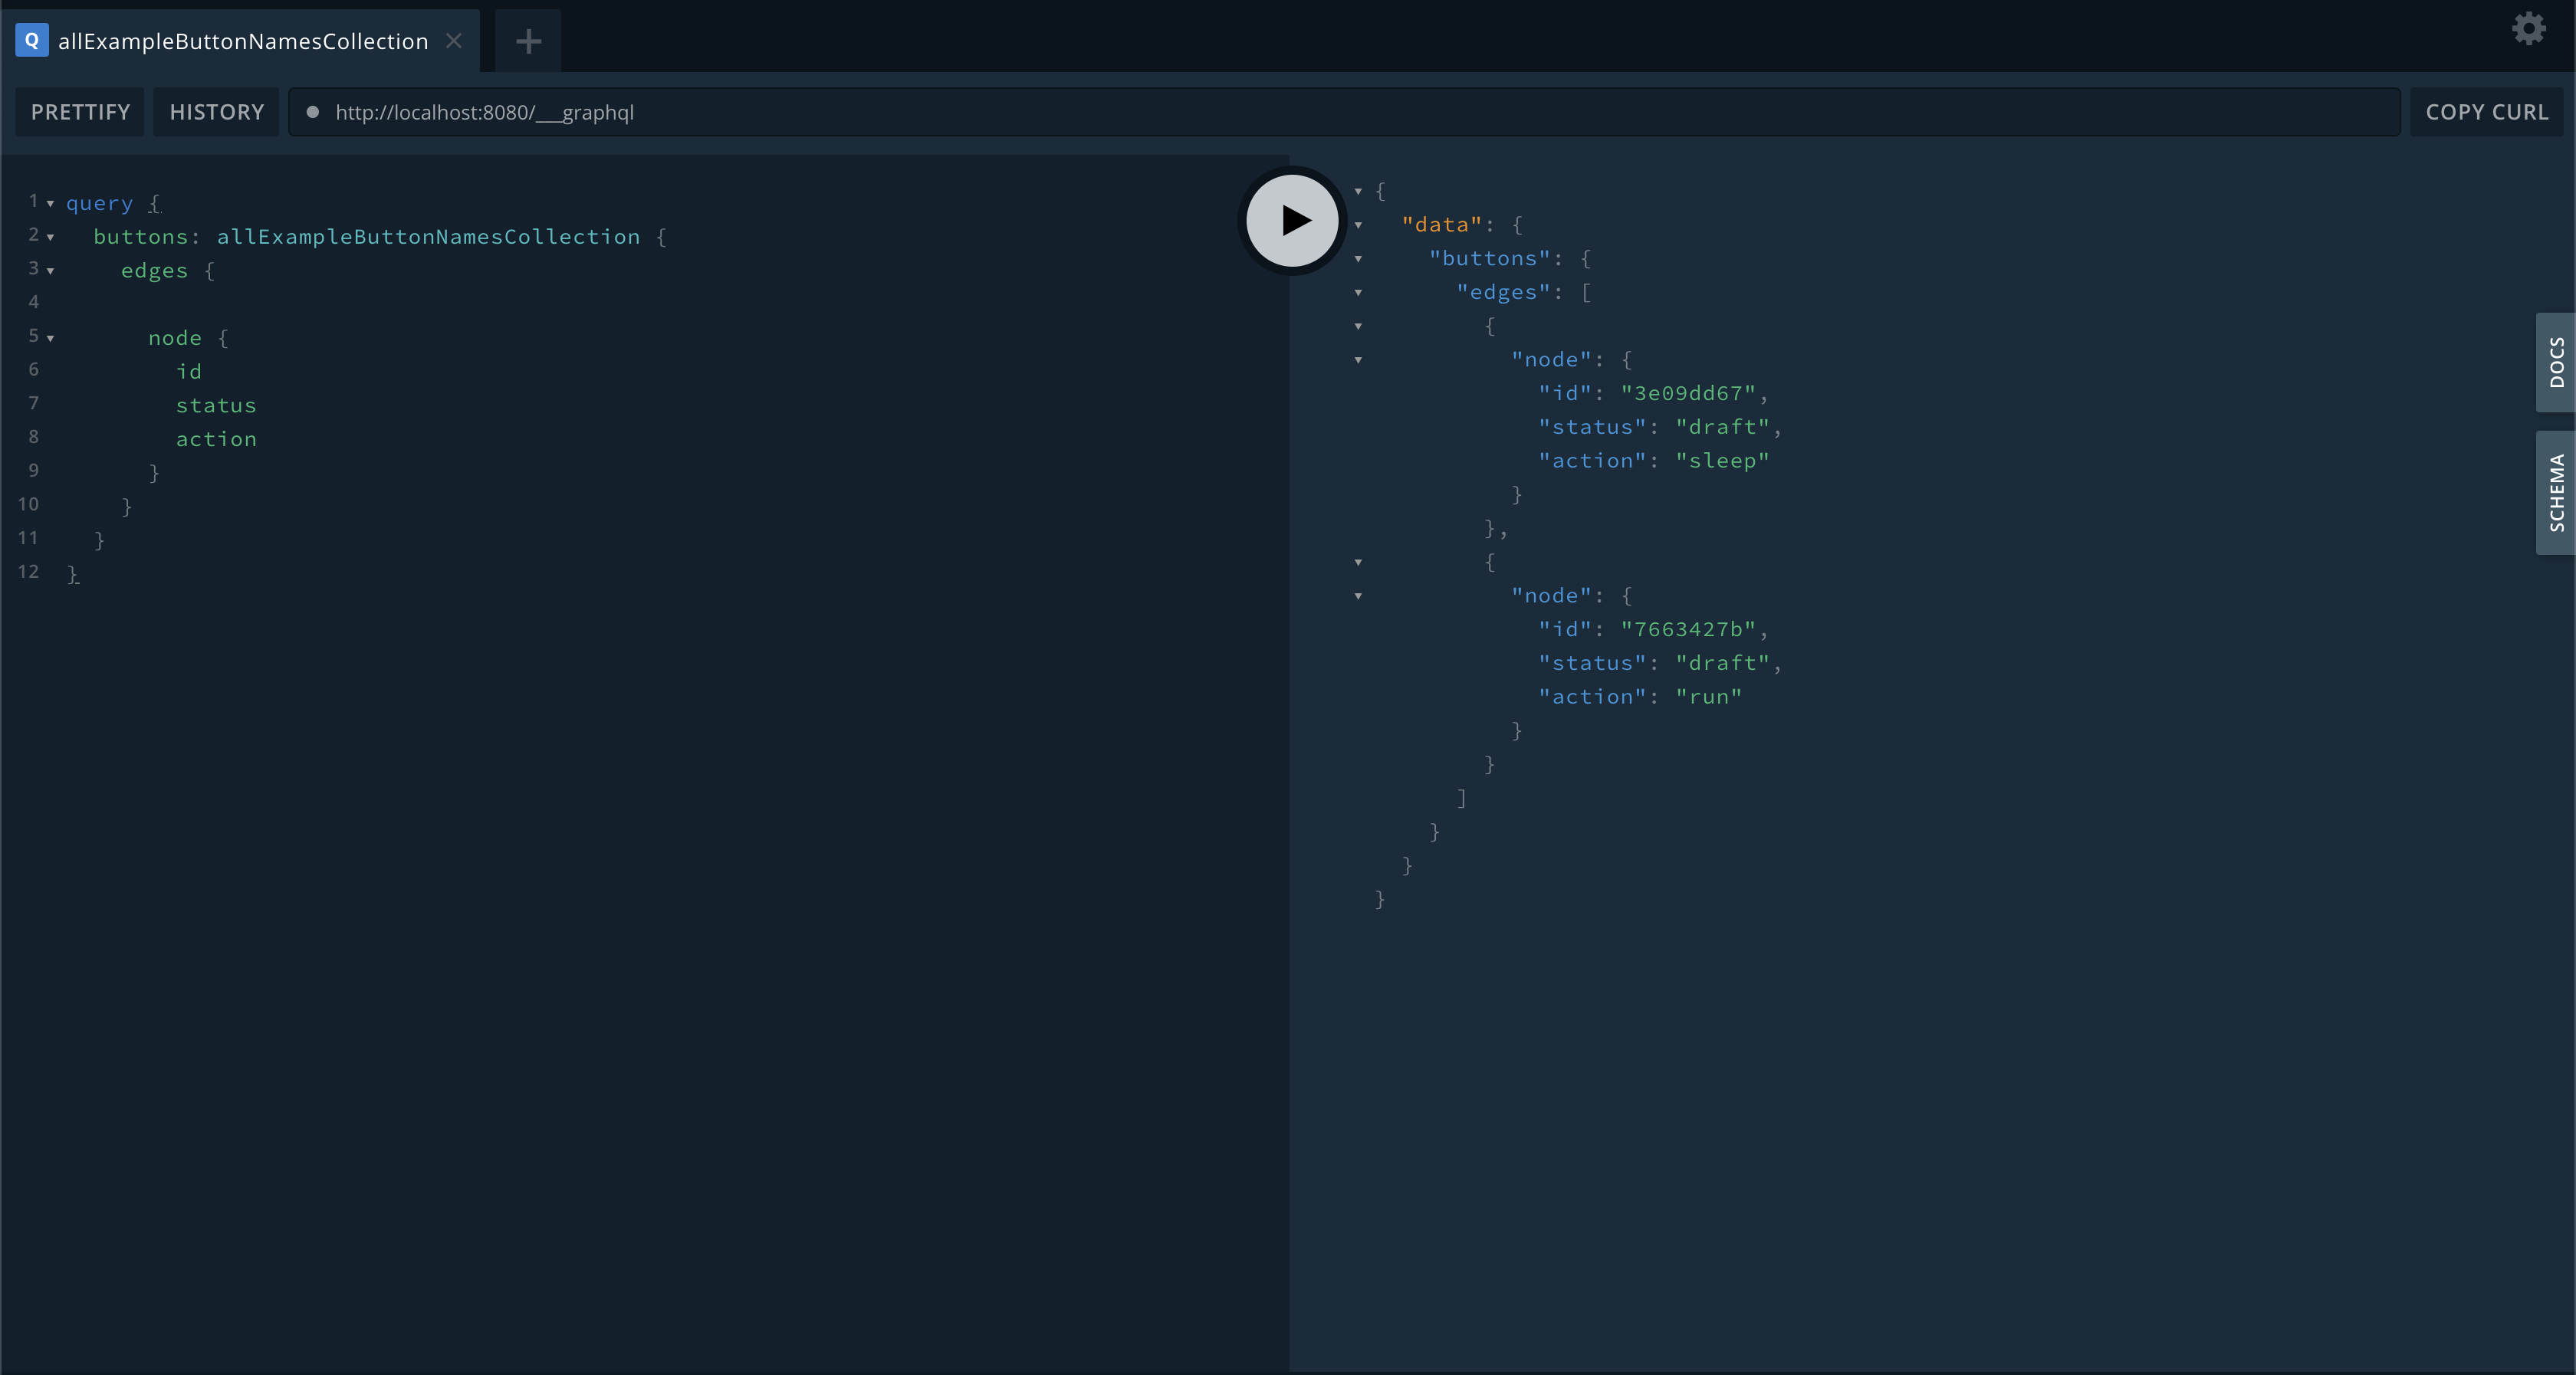
query {
	buttons: allExampleButtonNamesCollection {
		edges {
			node {
				id
				status
				action
			}
		}
	}
}
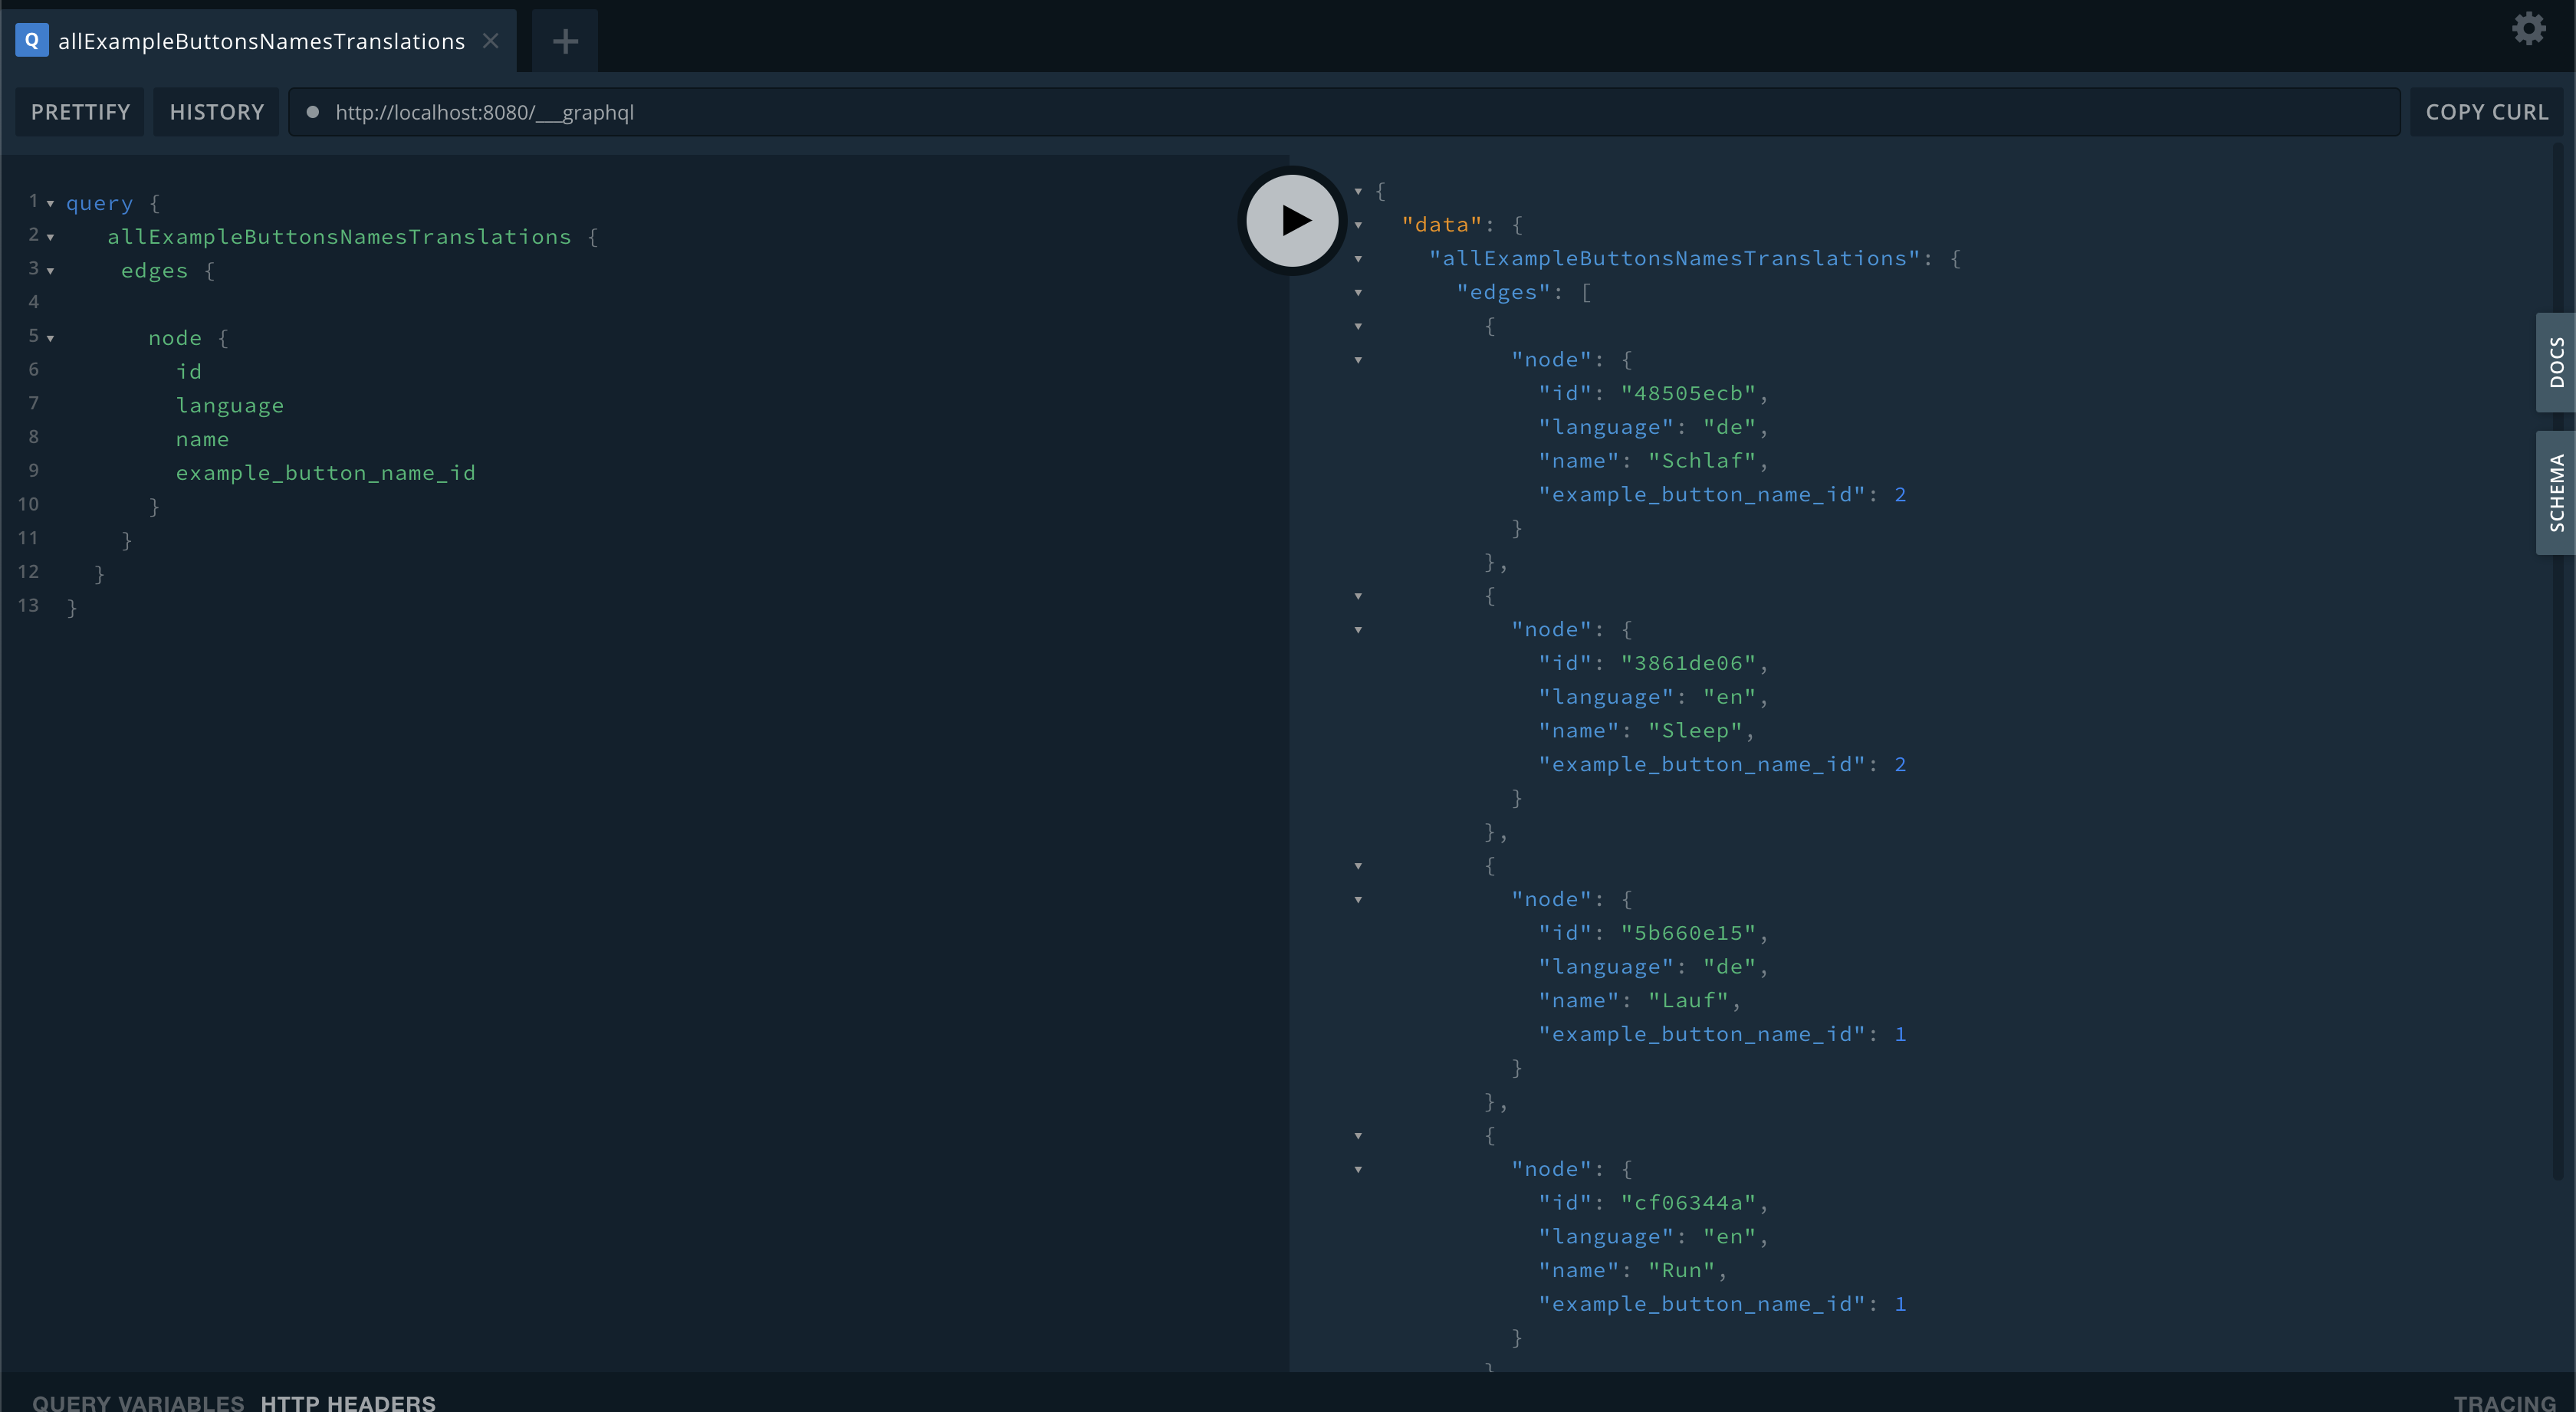
It is easy enough to query translated items:
query {
	allExampleButtonsNamesTranslations {
		edges {
			node {
				id
				language
				name
				example_button_name_id
			}
		}
	}
}
Content change
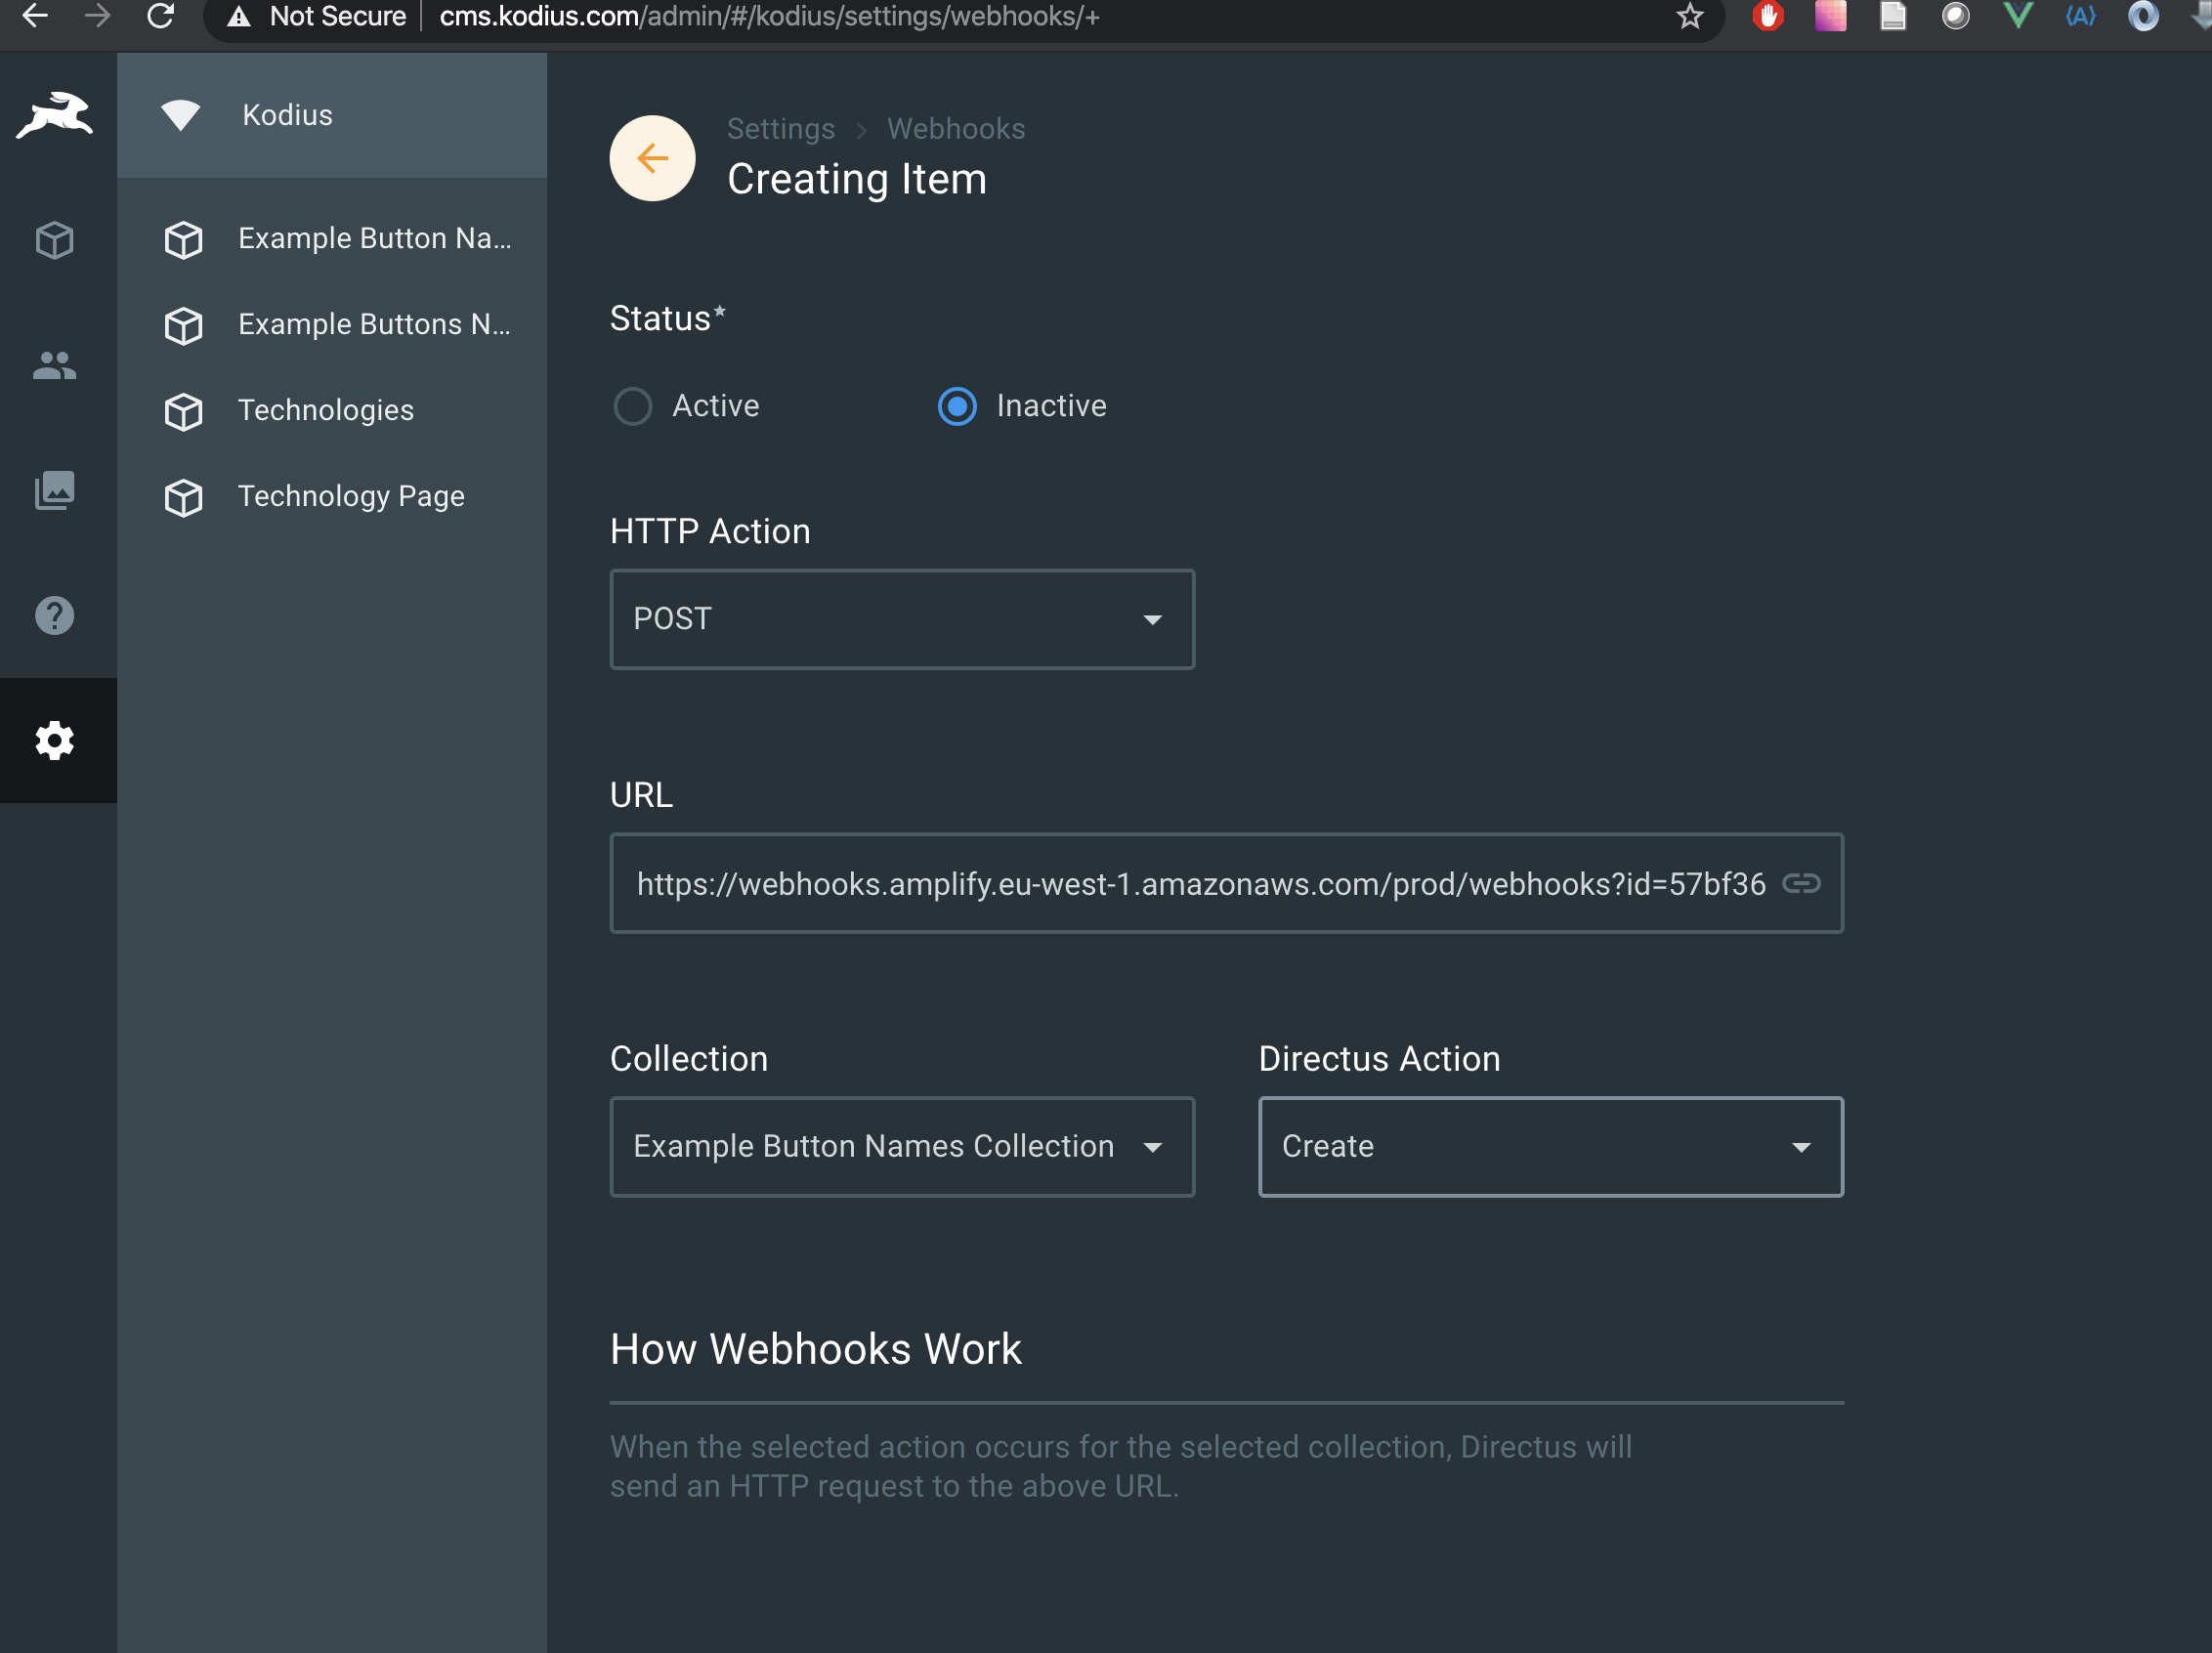
You get a web-hook address for your application on Amplify and then all you need to do is type in this web hook in Directus as the desired action. For example, I’ll redeploy amplify each time someone adds a new button action.
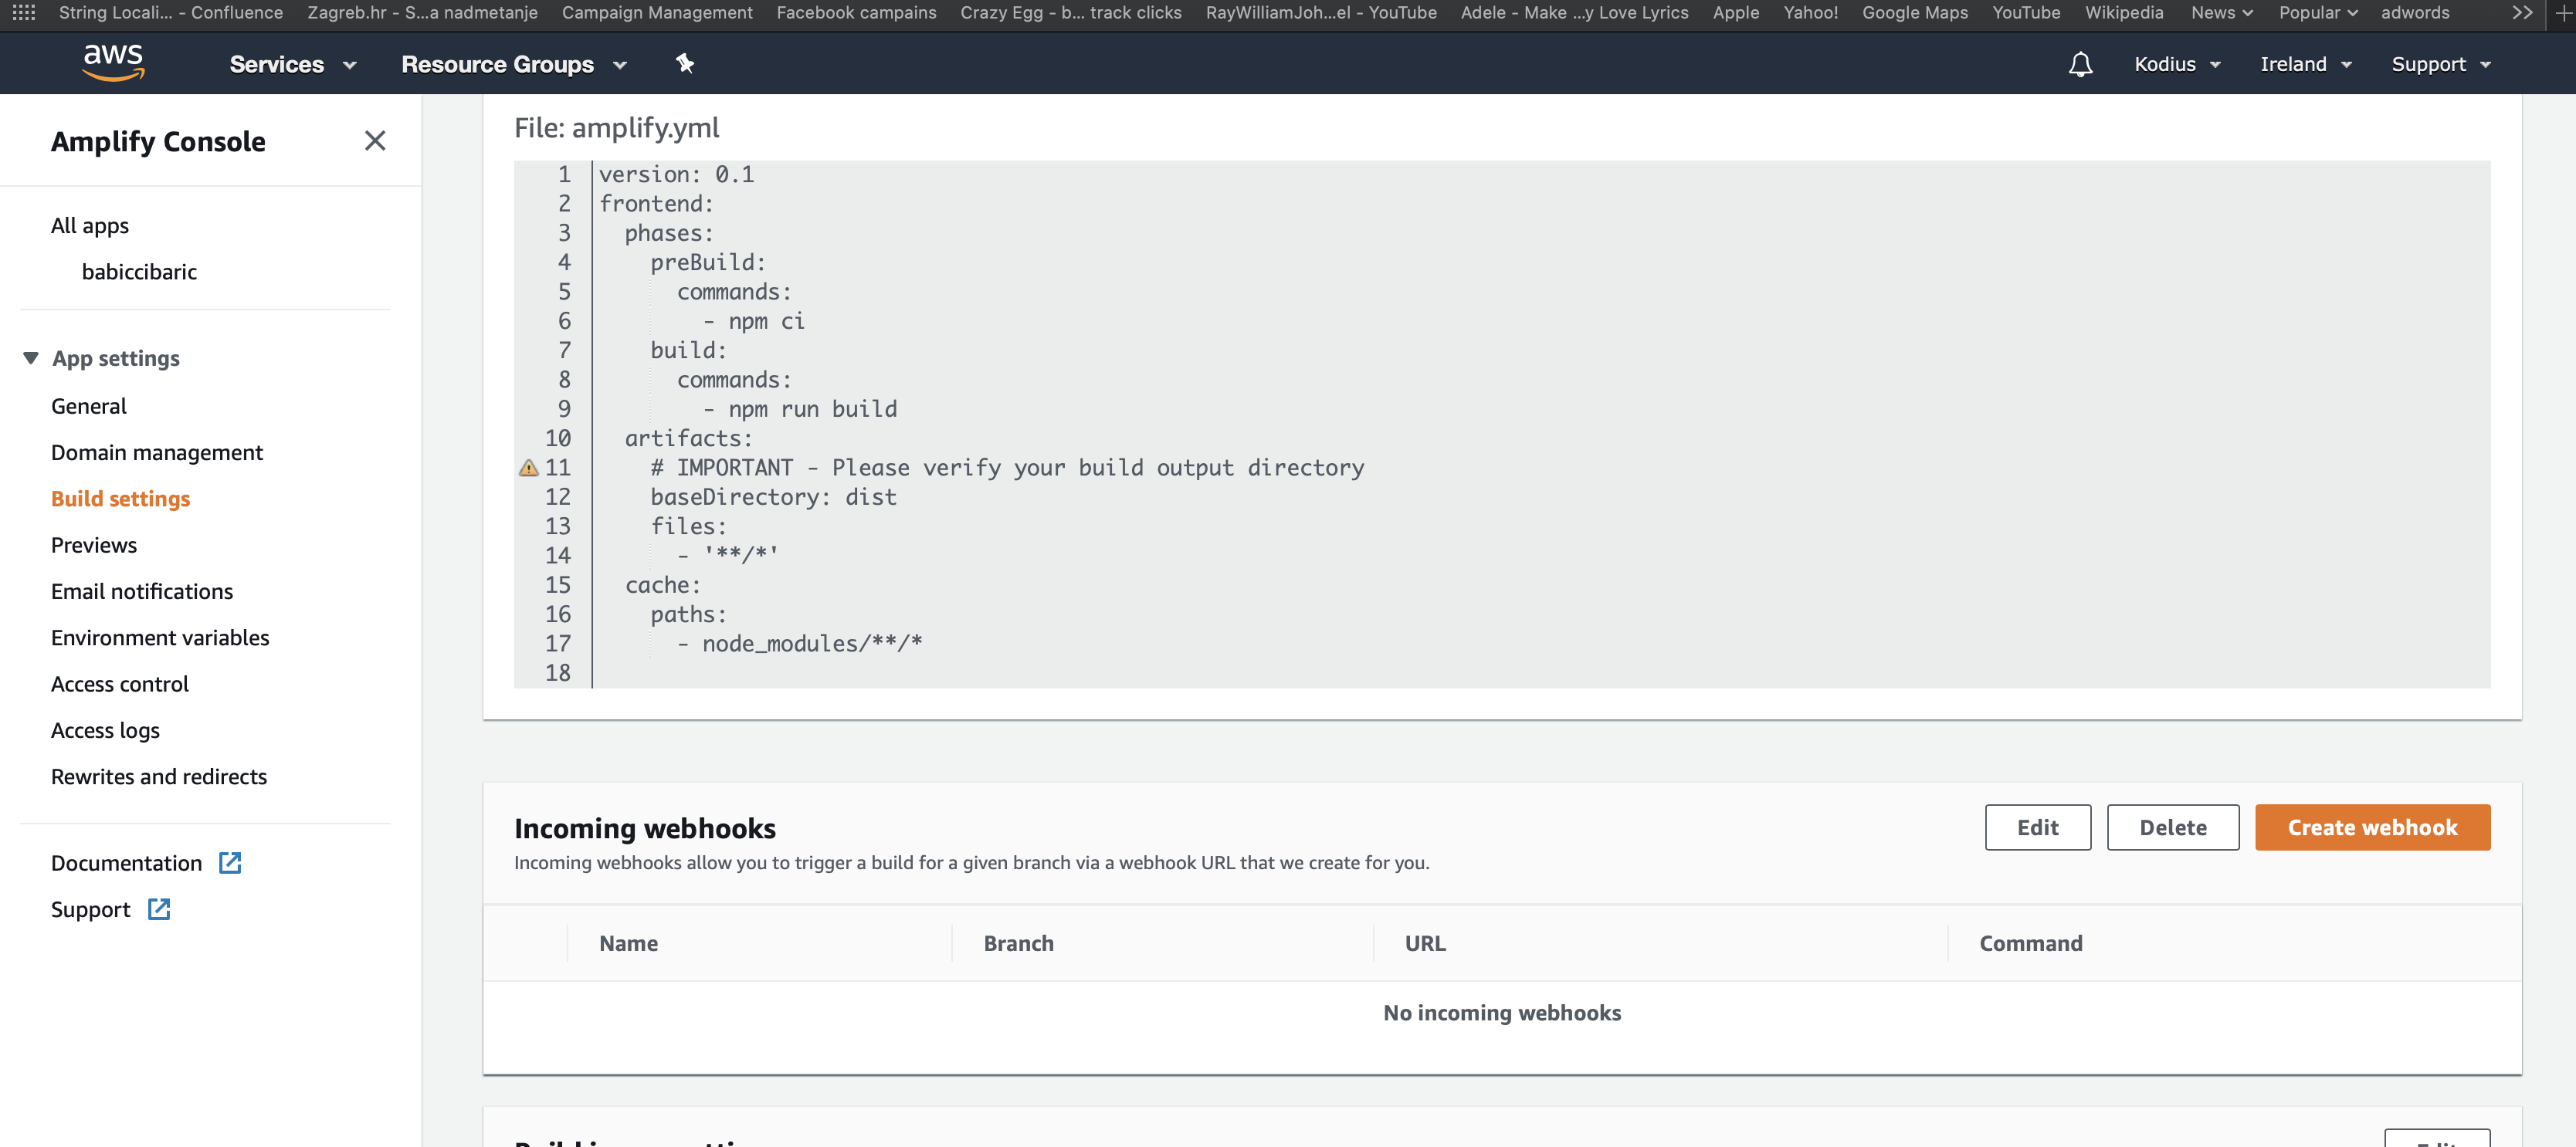
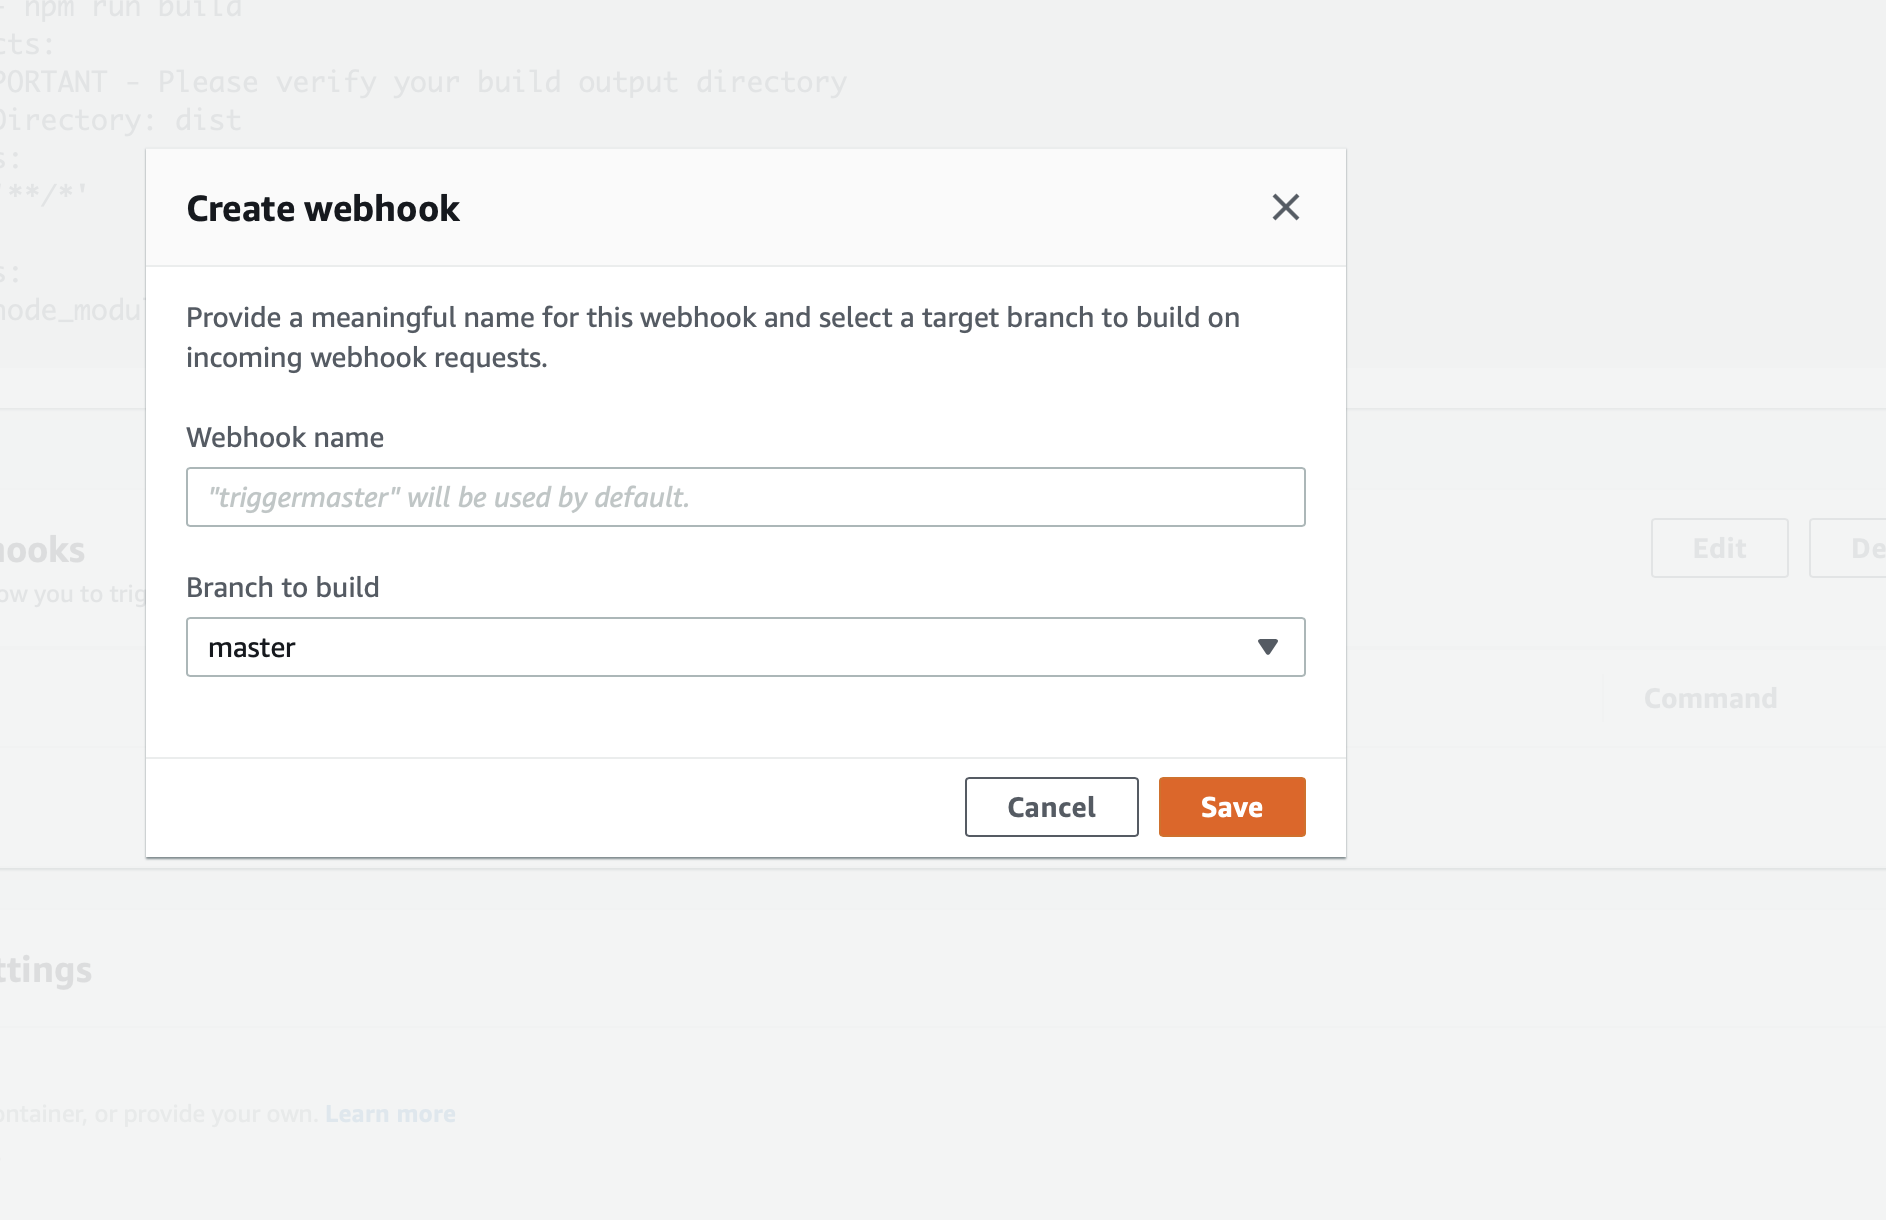

I then take the URL and copy/paste it to CMS Webhooks:
Conclusion
I’ve shown you how to combine Gridsome with Directus to build a highly-performant Jamstack site with localization support and hosted for cheap.
References:
- https://jamstack.org/
- https://gridsome.org/
- https://gridsome.org/plugins/gridsome-plugin-tailwindcss
- https://websiteforstudents.com/install-directus-cms-on-ubuntu-16-04-17-10-18-04-with-apache2-mariadb-and-php-7-2-support/
- https://tailwindcss.com/docs/installation
- https://aws.amazon.com/amplify/
- https://tailwindcss.com/
- https://docs.directus.io/getting-started/installation.html
- https://docs.aws.amazon.com/amplify/latest/userguide/getting-started.html
- https://www.npmjs.com/package/aws-amplify
- https://aws-amplify.github.io/

